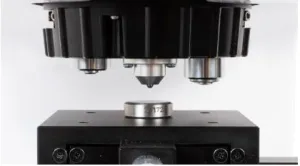
Why Vickers Hardness Testers Are Ideal for Micro and Thin Metal Samples

The measurement of the hardness of micro-scale or thin metal samples presents a unique set of challenges. Delicate materials, coatings, or thin layers can often be subjected to excessive force or imprecision when using conventional methods such as Rockwell or Brinell. This is where Vickers testing becomes essential, offering the precision and consistency required to evaluate small features without compromising the sample.
In this article, we explore why Vickers hardness testers are the preferred choice for testing thin metal sheets, surface treatments, and microstructural zones. Vickers systems offer industries that require high-resolution material analysis dependable data, thanks to their highly accurate indentation measurements and adaptable load range. We will analyze the operational characteristics, practical advantages, and specific applications in which the method is most effective.
Precision Testing for Small and Thin Samples
Vickers testing is specifically engineered to overcome the constraints of conventional hardness methods when they are implemented on small, thin, or intricate metal components. The microhardness mode of the test uses a diamond pyramid-shaped indenter and applies extremely low loads, typically between 10 g and 1 kgf. This makes it a perfect testing method for delicate materials that are unable to withstand high force without deformation.
This precision is even more advantageous when working with thin metal sheets, coatings, foils, micro-welds, or surface-hardened zones. In such instances, even minor surface inconsistencies or material layering can influence the results of more aggressive testing methods. On the other hand, Vickers hardness testers generate minimal indentation and enable highly localized measurements, commonly down to specific grains or layers within a structure.
The method is often used in quality control for aerospace, electronics, medical devices, and metallographic research, and it complies with recognized standards such as ASTM E384 and ISO 6507. The indenter’s small size and sharp geometry provide clear impressions, which are subsequently measured optically or digitally to obtain precise hardness values.
Advantages and Accuracy of Vickers Hardness Testers
Vickers hardness testers are set apart by their capacity to generate consistently precise results in an array of materials and thicknesses with a single indenter type. Vickers testing uses a uniform diamond pyramid-shaped indenter throughout all load settings, in contrast to Rockwell or Brinell testing, which necessitate distinct indenters and force levels based on the material. This simplifies test procedures while guaranteeing exceptional accuracy for both soft and hard metals.
The Vickers indenter’s geometric precision enables the measurement of extremely small features with highly repeatable results, with deviations typically falling within ±1–2%. This level of control matters in applications that involve thin films, microstructural transitions, and surface coatings, as it is necessary to analyze hardness gradients without introducing measurement error due to sample thickness or scale.
Vickers testing is more dependable when testing localized zones due to the fact that it is less influenced by adjacent features or boundaries within the material, as the indentation is small and sharply defined. This is especially beneficial in the fields of metallography, failure analysis, and process validation, where detailed hardness mapping is necessary.
Vickers hardness testers are also compatible with automated optical systems and software-based analysis, which is another noteworthy advantage. These systems significantly enhance throughput and diminish operator influence by facilitating rapid image capture, indentation measurement, and digital reporting. Vickers testing is one of the most precise and versatile methods available in modern metal testing equipment when combined with standardized procedures (ASTM E384, ISO 6507).
Practical Applications and Workflow with Vickers Equipment
In industries that necessitate detailed hardness profiles at a microscopic level, Vickers hardness testing is extremely valuable. Common applications include the evaluation of microstructures in alloy development, heat-affected zones in welds, thin metallic coatings, and surface-hardened layers. It is particularly beneficial in industries such as aerospace, automotive, medical manufacturing, and electronics, where material reliability at a fine scale is key.
The typical workflow commences with thorough sample preparation. The test surface must be flat, clean, and well-polished, as Vickers testing necessitates precise optical measurement of the indent. This can often be achieved through the use of metallographic polishing techniques in microhardness applications. The system applies a predetermined low load to the sample after it has been mounted and leveled. The resulting indentation is typically measured using a high-resolution microscope or an integrated optical system.
Automated stages, digital imaging, and analysis software are often found in Vickers hardness testers, which enable users to generate standardized reports, map hardness gradients, and perform multi-point testing. In addition to enhancing accuracy, these features also enhance the speed and consistency of testing in high-volume environments.
Due to the precision required for sample preparation and measurement, Vickers testing has a slower throughput than Brinell or Rockwell testing. However, it continues to be the optimal option for testing thin metals or small components that are not amenable to more aggressive methods, particularly when fine detail is necessary. For the purposes of research, product validation, and surface evaluation, Vickers testing provides a level of control and resolution that is unparalleled by other conventional hardness techniques.
Precision That Meets the Demands of Modern Materials
Vickers hardness testing stands out by its accuracy, flexibility, and industry relevance when it comes to assessing the hardness of thin metals, coatings, and microstructures. It is a key technique in laboratories and quality control settings where precision is non-negotiable due to its capacity to produce consistent results on small or delicate samples.
Vickers hardness testers are still a core part of today’s metal testing equipment due to their compliance with international standards, automation compatibility, and advanced optical measurement. The Vickers method guarantees that critical hardness data is captured with clarity, repeatability, and confidence, no matter whether it is used to evaluate case depth, validate heat treatment, or analyze thin surface layers.