Essential RV Plumbing Parts & How to Maintain Them
When you’re living the RV lifestyle—whether full-time or just on weekend getaways—there’s one system you don’t want failing unexpectedly: your plumbing. From clean drinking water to proper waste disposal, your RV’s plumbing system plays a vital role in comfort, hygiene, and functionality. Knowing the RV plumbing parts involved—and how to maintain them—can save you time, money, and headaches down the road.
In this guide, we’ll break down the essential components of an RV plumbing system and share best practices for keeping everything running smoothly.
Understanding RV Plumbing Systems
An RV plumbing system is designed to mimic a home’s setup, but it’s more compact, mobile, and operates on a combination of gravity, pressure, and electricity. It involves three water types:
- Fresh water: Clean, potable water for drinking, cooking, and bathing.
- Grey water: Used water from sinks and showers.
- Black water: Wastewater from the toilet.
Each of these requires specific components to manage effectively. Let’s explore the essential RV plumbing parts that support this system.
Essential RV Plumbing Parts (and What They Do)
- Fresh Water Tank
This is your onboard reservoir of clean water. It’s typically made from durable plastic and can hold anywhere from 20 to 100+ gallons depending on the RV.
Maintenance Tips:
- Sanitize the tank every 3–6 months using a bleach solution.
- Use a water filter on incoming water to reduce mineral buildup and contaminants.
- Water Pump
The water pump moves fresh water from the tank to your faucets and shower. It’s usually 12V and kicks on when a tap is opened.
Maintenance Tips:
- Run the pump dry for no longer than a few seconds to avoid damage.
- Check for leaks, unusual noise, or loss of pressure.
- Keep an extra fuse handy—these can blow unexpectedly.
- City Water Inlet
This is where you connect to a campground’s pressurized water supply. It bypasses the fresh water tank and pump.
Maintenance Tips:
- Use a pressure regulator to avoid over-pressurizing your RV plumbing system.
- Inspect the rubber gasket and screen filter regularly for wear or debris.
- Always flush the hose before attaching to prevent contamination.
- Hot Water Heater
RV water heaters typically use propane, electric, or both. Popular sizes range from 6 to 10 gallons.
Maintenance Tips:
- Drain and flush the heater every few months to remove sediment.
- Inspect the anode rod (for Suburban models) and replace it when 75% worn.
- Never turn on the heater when it’s empty—it can burn out the heating element.
- Plumbing Pipes & Fittings
Most RV plumbing uses PEX tubing or flexible plastic hose, connected via clamps or quick-connect fittings.
Maintenance Tips:
- Check for loose connections and leaks, especially after travel.
- Use food-grade pipe thread sealant (not Teflon tape) on threaded connections.
- Insulate exposed pipes in winter to prevent freezing.
- Grey & Black Water Tanks
These hold your wastewater and are emptied at designated dump stations.
Maintenance Tips:
- Always dump black before grey to help rinse your hose.
- Use enzyme-based tank treatments to break down solids and reduce odor.
- Keep the black tank valve closed between dumps to prevent solids from drying and clogging.
- Tank Sensors
These sensors monitor the levels of your fresh, grey, and black tanks and display them on a panel inside the RV.
Maintenance Tips:
- Clean sensors regularly using a tank cleaner or homemade mixture (ice + detergent + drive).
- Avoid overfilling tanks—this can damage sensors or flood the system.
- Toilet (RV-Specific)
RV toilets use less water and often feature a foot pedal for flushing. Some models offer composting or macerating functions.
Maintenance Tips:
- Use only RV-safe toilet paper to avoid clogs.
- Lubricate the rubber seal with a silicone-based spray to keep it sealing tightly.
- Regularly flush with plenty of water to avoid pyramid plugs.
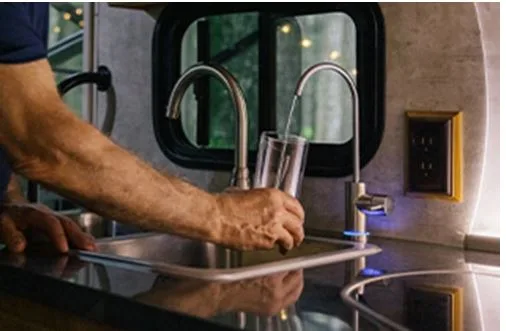
- Shower & Faucets
These are similar to home fixtures but optimized for water conservation and low flow.
Maintenance Tips:
- Clean aerators and showerheads to remove mineral buildup.
- Check for leaks under sinks after traveling.
- Use water-saving tips like turning off the water while soaping up (“Navy shower”).
- Drain Hoses & Fittings (Sewer Hoses)
Flexible sewer hoses connect your RV’s waste system to dump station inlets. They come in varying lengths and strengths.
Maintenance Tips:
- Store hoses in a dedicated compartment or bin.
- Rinse thoroughly after each dump and let them dry.
- Replace at signs of cracks, leaks, or brittleness.
Tips to Maintain Your RV Plumbing System
Now that you know the key RV plumbing parts, here are general maintenance tips to extend the life of your system and ensure everything works as expected:
- Seasonal Prep
- Winterize: Before freezing weather, drain all water, add RV antifreeze, and bypass the water heater.
- De-winterize: Flush antifreeze from the system and sanitize the fresh tank before use in spring.
- Prevent Clogs
- Install drain screens in sinks and shower.
- Avoid flushing anything other than human waste and RV-safe paper.
- Keep a plunger and tank treatments on hand.
- Pressure Management
- Use a pressure regulator (40–50 PSI range) to protect pipes.
- Avoid leaving the city water connected for long periods.
- Regular Inspections
- Check under sinks, behind access panels, and around tanks for leaks or corrosion.
- Look for signs of water damage—soft flooring, stains, or mold smell.
- Stock Essential Spares
Keep these in your RV toolkit:
- Extra hose washers
- Water pump fuse
- Pipe clamps
- Sealant tape or thread sealant
- Freshwater hose and backup sewer hose
Troubleshooting Common RV Plumbing Issues
💧 Low Water Pressure
- Check pump filter, faucet aerators, and water source pressure.
- Look for leaks or pinched lines.
🚱 Foul Odors
- Flush tanks thoroughly.
- Use proper venting caps and keep roof vents clear.
- Add deodorizing treatments regularly.
🚽 Toilet Won’t Hold Water
- The seal may be dried out—use a silicone lubricant.
- The blade may be misaligned or broken.
🚿 Water Heater Not Working
- Check propane supply and igniter for gas models.
- For electric, test heating elements and fuses.
Conclusion
Maintaining your RV plumbing system isn’t hard once you understand the purpose and care routine for each component. By staying proactive and learning how each of these RV plumbing parts works, you’ll reduce the chances of breakdowns and enjoy the comforts of home—wherever the road takes you.
Invest time now in inspections and simple maintenance, and your system will reward you with clean water, efficient drainage, and peace of mind.