How to Unlock a Disabled iPhone Without iTunes: A Comprehensive Guide
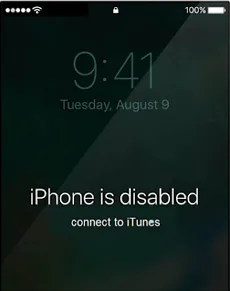
A disabled iPhone can be a frustrating and anxiety-inducing experience, often caused by multiple incorrect passcode attempts. When your iPhone displays the “iPhone is Disabled” or “Security Lockout” message, it can feel like you’ve hit a dead end, especially since the traditional solution often points to iTunes. However, many users prefer to avoid iTunes due to compatibility issues with newer macOS (where it’s replaced by Finder), a lack of computer access, or the complexity of the process.
In this guide, we’ll explore three effective methods to help you regain access to your device, focusing on solutions that can minimize or prevent data loss.
Part 1: Understanding a Disabled iPhone and Why You Might Want to Avoid iTunes
What Causes an iPhone to Become Disabled?
The most common reason for a disabled iPhone is a series of repeated, incorrect passcode entries. As a security measure to protect your data, Apple progressively locks you out. After a few wrong tries, you’ll be prompted to try again in one minute. This time increases with each failure until the device becomes “disabled.” The final stage, after 10 failed attempts, often results in a permanent lockdown, requiring you to connect to a computer to proceed.
Why You Might Skip the iTunes/Finder Method
While using a computer to restore your device is Apple’s official solution, it has its drawbacks.
- Outdated Software: For users on newer macOS versions, iTunes has been replaced by Finder, which can be confusing for those accustomed to the old method.
- Requires a Computer: Many users may not have immediate access to a computer, making this method impractical.
- Data Loss is Inevitable: The standard restore process through iTunes or Finder involves a complete factory reset, which erases all data on the device.
Fortunately, there are alternative methods that don’t rely on a computer-based restore, offering more flexibility and, in some cases, the possibility of data preservation.
Part 2: Unlock Disabled iPhone Using AnyUnlock
AnyUnlock by iMobie is a professional iPhone password remover designed to solve a variety of iOS password problems, and it’s a powerful alternative to iTunes for unlocking a disabled iPhone. It stands out by offering a high success rate and the potential to preserve your data if certain conditions are met.
Key Features of AnyUnlock
- Unlock a disabled iPhone/iPad by resetting the passcode.
- Remove all screen locks, including passcode, Face ID, Touch ID, and PIN.
- Simple 1-click operation with no technical skills required.
- Supports all iPhone/iPad models and iOS versions.
- Also unlocks Apple ID, bypasses MDM lock, removes iTunes backup password, bypasses iCloud Activation Lock, and fixes “iPhone Unavailable” issues.
Step-by-Step Guide
- Download the AnyUnlock software from the official iMobie website on your computer.
- Launch AnyUnlock and connect your disabled iPhone to your computer using a USB cable.
- On the AnyUnlock home screen, choose the “Unlock Screen Passcode” option.
- The software will automatically detect your iPhone. Click “Start Now” to begin the process. If your iPhone isn’t detected, AnyUnlock will guide you on how to put it into Recovery Mode.
- AnyUnlock will prompt you to download the appropriate iOS firmware package for your device model. Select a location to save the file on your computer and click “Download.”
- After the firmware downloads, click “Unlock Now” to start removing the passcode. The entire process typically takes 5 to 10 minutes.
- Your iPhone will restart as a new device without the passcode. If “Find My” was disabled, your data will be preserved.
Part 3: Unlock Disabled iPhone Using iCloud
If you don’t have access to a computer and “Find My” is enabled on your disabled iPhone, using iCloud is a powerful official alternative to iTunes. This method allows you to remotely erase and reset your device from any web browser.
Step-by-Step Guide
- Sign In to iCloud: On any web browser, visit icloud.com and sign in with the Apple ID associated with the disabled iPhone.
- Find iPhone: Click on the “Find iPhone” icon.
- Select Your Device: Click “All Devices” at the top, then select your disabled iPhone from the list.
- Erase iPhone: A menu will appear with options. Select “Erase iPhone.”
- Confirm Erase: Confirm the action and enter your Apple ID password one more time to proceed. The device will begin the erasing process the next time it connects to Wi-Fi or a cellular network.
- Set Up as New: Once the erasure is complete, the iPhone will be reset to factory settings, allowing you to set it up as new or restore it from a recent iCloud backup.
Part 4: Unlock Disabled iPhone Using the Find My App
For users with another Apple device (like an iPad or another iPhone) logged into the same Apple ID, the Find My app provides a quick and convenient way of how to unlock disabled iPhone without iTunes or a web browser.
Step-by-Step Guide
- On your other Apple device, open the Find My app.
- Select Devices: Tap the “Devices” tab at the bottom of the screen.
- Choose Your iPhone: Scroll through the list of devices and select your disabled iPhone.
- Erase This Device: Scroll down and tap “Erase This Device.”
- Confirm Erase: A confirmation prompt will appear. Confirm the action to begin the remote wipe.
- Set Up: The iPhone will reset itself once it connects to the internet, allowing you to set it up from scratch.
Conclusion
Getting locked out of a disabled iPhone is frustrating, but not permanent. AnyUnlock by iMobie offers a quick, versatile option that can even preserve data if “Find My” is off, while Apple’s iCloud and Find My app provide free remote solutions for those fine with erasing data. Your choice depends on factors like backups, “Find My” status, and access to a computer—making it easier to pick the right method to regain access.