What Makes a Great Industrial Overlay? Materials, Adhesives, and Application Tips
Industrial overlays are the unsung heroes of rugged equipment—from factory HMIs and medical devices to outdoor kiosks and aerospace controls. A well-engineered overlay protects electronics, communicates information clearly, and keeps operators productive in harsh environments. But what exactly separates an average overlay from a great one? In this guide, we’ll break down the essentials: choosing the right materials, pairing them with the right adhesives, and applying them correctly so they deliver reliable performance for years.
What an Industrial Overlay Does
An overlay must: keep graphics legible, survive abrasion and cleaning, resist chemicals like oils and solvents, bond securely with minimal edge lift, and align with LEDs, displays, and buttons without interference. Nail those basics and you’ve got the foundation for durable, professional industrial overlays.
Materials: The Backbone of Performance
The base film and topcoat define how the overlay looks, feels, and survives daily abuse. Common choices include:
Polycarbonate (PC)
A popular go-to for control panels, polycarbonate balances clarity, impact strength, and affordability. It embosses nicely for tactile keys and can be textured for scratch resistance. Use hard-coated grades where abrasion or frequent cleaning is expected.
Best for: indoor equipment, machine controls, backlit panels.
Watch-outs: standard PC can scratch; prolonged UV can yellow without protection.
Polyester (PET)
When you need exceptional chemical and fatigue resistance—especially for dome switches—polyester shines. PET maintains crisp snap when embossed and resists many cleaners and solvents better than PC.
Best for: high-cycle keypads, medical and lab devices, harsh cleaners.
Watch-outs: slightly less forgiving to form than PC; choose hard-coated versions for abrasion.
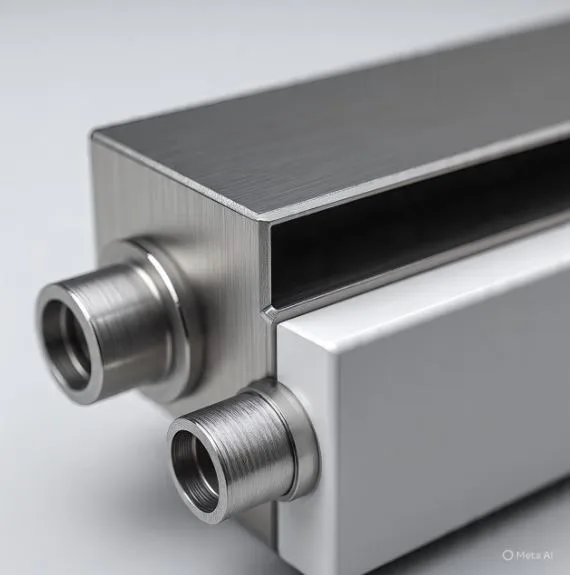
Metals (Aluminum, Stainless)
Metal overlays add rigidity, heat resistance, and a premium feel. Anodized aluminum accepts crisp graphics and stands up well in hot or oily environments.
Best for: high-heat zones, heavy machinery, equipment needing EMI shielding.
Watch-outs: higher cost and weight; ensure isolation to prevent galvanic corrosion.
Vinyl (PVC)
Flexible, economical, and easy to conform to curves, vinyl overlays are useful for short- to medium-term labeling and large-format graphics.
Best for: temporary or semi-permanent graphics, complex curves.
Watch-outs: lower chemical and abrasion resistance; can shrink over time in heat.
Topcoats & Finishes
The top surface matters as much as the base. Consider:
- Hard coats for abrasion and chemical resistance.
- Textures (matte, velvet, gloss) to control glare and fingerprints.
- Anti-microbial or anti-fog coatings for healthcare and cold-room use.
- UV-blocking films for outdoor durability.
Printing & Color
Screen printing delivers dense, durable color layers; digital printing offers rapid iterations and photo-quality images. For critical branding, specify color systems and acceptable deltas for consistency. Always shield inks between the base and adhesive (“subsurface printing”) so graphics are protected from wear.
Adhesives: Getting the Bond Right
Even the best materials fail if the overlay won’t stay put. Selecting the right adhesive stack is about matching the surface, environment, and assembly process.
Adhesive Chemistries
- Acrylic PSAs (pressure-sensitive adhesives): The workhorse for industrial overlays. Broad temperature range, good shear strength, and excellent aging on metals and many plastics.
- Rubber-based PSAs: Strong initial tack and fast grab, useful for low temperatures, but typically weaker in heat and solvents—best for indoor, short-term uses.
- Foam adhesives: Fill gaps and conform to irregularities, improving bond on textured housings and reducing “telegraphing” of surface defects.
- Heat-activated adhesives: Create robust bonds where pressure alone isn’t enough; useful for certain metals or high-temp applications.
Surface Energy & Texture
Bond strength depends heavily on substrate surface energy.
- High-surface-energy (HSE): Metals, glass, ABS, and polycarbonate bond easily.
- Low-surface-energy (LSE): Polypropylene (PP), polyethylene (PE), and some powder coats need specialty LSE adhesives or primers.
If the housing is textured, choose a thicker adhesive or foam to maintain contact across peaks and valleys. For overlays with windows or cutouts, use zone-adhesive constructions to keep clear areas pristine and avoid bubbles over displays.
Environmental & Operational Factors
Ask these questions up front:
- What temperatures will it see during operation and storage?
- Any exposure to fuels, oils, cleaning chemicals, or salt fog?
- Is UV exposure continuous (e.g., outdoor kiosks) or intermittent?
- Will the device see vibration, flex, or repeated impact?
These answers determine adhesive thickness, chemistry, and whether you need edge sealing or gasket layers.
Application Tips: How to Install for Success
Great design and materials can be undone by a rushed install. Here’s a straightforward process that production teams rely on.
1) Prep the Surface
- Clean with a lint-free wipe and an approved solvent (isopropyl alcohol + water is a common starting point).
- Remove oils, mold release agents, and dust.
- For LSE plastics or heavy textures, use a manufacturer-recommended primer to boost adhesion.
2) Control the Environment
- Aim for a stable application temperature—room temperature is typically ideal.
- Extremely cold surfaces reduce tack; very hot surfaces can cause premature softening.
- Keep humidity moderate; avoid condensation on the substrate.
3) Align Before You Commit
- Dry-fit the overlay and check alignment to displays, LEDs, and fasteners.
- Use registration marks, hinge tape, or removable alignment jigs to keep everything square.
4) Apply with Steady Pressure
- Peel the liner gradually and apply with firm, uniform pressure using a roller or squeegee to avoid trapped air.
- Work from the center outward. If your design includes windows, apply around them carefully to prevent bubbles along edges.
5) Let the Bond Mature
- Pressure-sensitive adhesives achieve most of their strength quickly, but full bond can take 24–72 hours.
- If the assembly will face stress (heat, chemical wash, or vibration), allow dwell time before service.
6) Inspect and Protect
- Check edges for lift, especially near cutouts and radii.
- If edges are at risk of abrasion or chemical wicking, consider an edge seal or gasket lip in the design.
Design Moves that Elevate Industrial Overlays
Beyond basics, small choices improve usability and longevity.
- Embossed keys and tactile domes: Improve user feedback, especially with gloves.
- Backlighting & dead-front graphics: Hide indicators until lit; use light-diffusing layers for even glow.
- Optically clear windows: Specify hard-coated, anti-glare, or anti-reflective films over displays and sensors.
- EMI/RFI considerations: Printed conductive inks or metal foils can shield sensitive electronics.
- Smart geometry: Generous radii at internal corners reduce crack initiation; keep spacing between cutouts to maintain strength.
Testing & Validation Checklist
A great overlay earns its spot with data. Include representative tests such as:
- Adhesion (peel/shear) on actual substrates and textures.
- Chemical resistance against your real cleaners, oils, and fuels.
- UV/weathering for outdoor gear.
- Abrasion & scratch using standard rub tests relevant to your industry.
- Thermal cycling & humidity to catch edge lift and fogging.
- Functional testing of keys, domes, and backlighting across the full temp range.
Document results and retain samples; they’re invaluable for troubleshooting.
Putting It All Together
Great industrial overlays don’t happen by accident. Start with the end environment in mind, choose materials that match the mechanical and chemical realities, pair them with adhesives tuned to your substrate’s surface energy, and install with a disciplined process. Build in thoughtful design features—tactile cues, protected graphics, clean windows—and then validate with testing that mirrors real life.
Do those things consistently, and you’ll get overlays that look sharp on day one and still perform after years of use—protecting your brand, your users, and your equipment.
