The Edible Geode: Unveiling the Sweet Science and Culinary Artistry of Crystal Candy
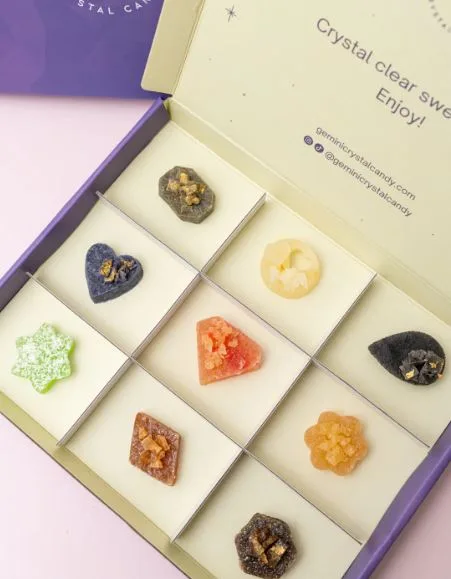
In the realm of confections, few treats capture the imagination quite like crystal candies. These dazzling, jewel-like sweets appear to be miniature geodes or sparkling mineral formations, but they are entirely edible and delightfully sweet. This unique form of confectionery is a testament to the beautiful intersection of food science and artistic expression, turning simple ingredients into a visually stunning masterpiece. The process of creating these sugary crystals is a patient art, one that rewards precision with a breathtaking and delicious result.
At its core, crystal candy is a form of rock candy, but it is elevated by its intricate, multi-faceted appearance, which mimics natural crystals. The secret to its creation lies in the careful manipulation of sugar saturation and temperature. A super-saturated sugar syrup is the foundation, and as it cools, the sugar molecules link together in a crystalline lattice, forming the hard, transparent structures we see. The longer the cooling process, the larger and more complex the crystals become, making each piece a unique work of art.
The History and Origins of Crystal Confections
While crystal candy has recently surged in popularity on social media platforms for its aesthetic appeal, the concept of crystallizing sugar is far from new. The origins of rock candy can be traced back to the 9th century in Persia, where sugar was first refined from sugarcane. Early confectioners discovered that by hanging strings or sticks into a sugar solution, they could coax the sugar to crystallize into large, sweet formations. This method spread across the globe, with various cultures adapting the technique to create their own versions of this unique treat.
Historically, rock candy was not just a sweet treat. It was also valued for its medicinal properties, often used to soothe sore throats or as a simple digestive aid. The process was a slow, deliberate one, often taking weeks to yield a single batch. This slow crystallization process is what differentiates it from other candies and is the very essence of its creation. The modern resurgence of crystal candy is a beautiful homage to this ancient practice, blending traditional methods with contemporary creativity and a wider array of vibrant colors and flavors.
The Science of Sugar Crystallization
Understanding how crystal candy forms is a fascinating dive into basic chemistry. The process relies on a super-saturated solution, which means the sugar solution contains more dissolved sugar than it normally could at a given temperature. This is achieved by heating the water, which allows it to hold a greater amount of dissolved sugar.
Here is a simplified breakdown of the scientific process:
- Creating the Super-Saturated Solution: A precise ratio of sugar and water is heated until the sugar completely dissolves. This step is crucial; any undissolved sugar can act as a seed crystal, causing premature or chaotic crystallization.
- The Nucleation Phase: As the solution cools, it becomes unstable. Any small irregularity or “seed” crystal, such as a grain of undissolved sugar, a string, or even a dust particle, provides a surface for the dissolved sugar molecules to attach to.
- The Growth Phase: Once a seed is established, the sugar molecules in the solution begin to “grow” onto it, arranging themselves in an orderly, repeating pattern. This is the crystallization process. The slower the cooling, the more time the molecules have to arrange themselves perfectly, resulting in larger, more well-defined crystals.
- Color and Flavor: Food-safe dyes and flavor extracts are added to the super-saturated solution before the cooling process begins. The color and flavor molecules become trapped within the growing sugar crystals, creating the beautiful, translucent hues and delicious tastes that define crystal candy.
This methodical process is the reason why each piece of crystal candy is truly unique. Factors such as room temperature, humidity, and the type of sugar used can all influence the final crystalline structure, making every batch a new and exciting experiment.
Crafting Your Own Edible Gems: A Step-by-Step Guide
Making crystal candy at home is a rewarding project that allows for endless creative possibilities. While patience is key, the process is straightforward enough for anyone to try.
Here’s a simplified guide to get you started:
- Prepare the Container: Choose a clean glass jar or a heatproof container.
- Make the Sugar Solution: Combine 2 cups of water with 4-5 cups of granulated sugar in a saucepan. Heat over medium-high heat, stirring constantly until the sugar is completely dissolved. Do not boil vigorously.
- Add Flavor and Color: Once the sugar is dissolved, remove from heat. Stir in a few drops of food coloring and a teaspoon of your favorite flavoring extract.
- Suspend the Stick or String: Attach a wooden skewer or a clean, cotton string to a pencil and suspend it in the center of the jar. Ensure it doesn’t touch the bottom or sides.
- Patience is Key: Cover the jar loosely and place it in a cool, undisturbed area. Do not move it. The crystals will begin to form within 24 hours, but for the best results, let them grow for 7-14 days.
- Harvesting: Once the crystals have reached the desired size, carefully remove the stick or string from the jar. Pat the candy dry with a paper towel and let it air-dry completely before storing.
This process provides a canvas for creativity, allowing you to experiment with different colors, flavors, and even shapes by using various suspension methods.
The Versatility of Crystal Candy in Culinary Arts
Beyond being a beautiful stand-alone treat, crystal candy is a surprisingly versatile ingredient for culinary and baking projects. Its unique texture—a satisfying crunch that dissolves into pure sweetness—makes it a fantastic garnish and a creative element in various desserts.
Here are some creative ways to use crystal candy:
- Cake and Cupcake Toppers: The sparkling, geode-like appearance of crystal candy makes it the perfect decorative element for cakes, transforming them into stunning geological masterpieces.
- Cocktail Garnish: Use a large piece of crystal candy as a stir stick or simply drop it into a cocktail to add a touch of sparkle and a hint of sweetness.
- Edible Centerpieces: A large geode-style crystal candy can be the centerpiece of a dessert platter, surrounded by other confections.
- Charcuterie Boards: Add small pieces of crystal candy to a dessert charcuterie board for a beautiful textural and visual contrast to fruits, cheeses, and chocolates.
- Infused Teas and Coffees: Drop a piece of crystal candy into hot tea or coffee to sweeten and flavor the beverage with a slow, sparkling release.
Its hard, non-melting structure also makes it an excellent addition to dessert boxes or as part of a homemade gift, as it holds up well in transit and maintains its beautiful appearance.
The Art of Presentation and Preservation
The final stage of the crystal candy journey is its presentation and storage. Due to its delicate, crystalline structure, proper handling and preservation are essential to maintain its beauty.
Follow these tips for best results:
- Store in an Airtight Container: This prevents moisture from the air from causing the crystals to dissolve or become sticky.
- Keep Away from Heat: High temperatures can melt the delicate sugar structures. Store in a cool, dry place, but not the refrigerator, as the condensation can cause stickiness.
- Handle with Care: The sharp edges and points of the crystals can be brittle. Handle each piece gently to avoid breakage.
- Consider Display: When used as a centerpiece or garnish, place the candy on a dry surface to ensure it doesn’t absorb moisture from other foods.
Conclusion
The visual appeal of crystal candy is undeniable, making it a perfect subject for food photography and a delightful gift for any occasion. Its elegance and simplicity make it a true masterpiece of confectionery art, proving that even the simplest ingredients can create something extraordinary. The combination of culinary expertise and a foundational understanding of chemistry transforms sugar and water into a breathtaking, edible gem that captivates both the eye and the palate. For those intrigued by the blend of science and sweets, the creation of these sparkling treats offers a truly unique and rewarding experience. For more on the unique chemistry of sugar, the science of baking is a fascinating field to explore.
Frequently Asked Questions
Q1: How long does it take for crystal candy to form?
A: The crystallization process can begin within 24 hours, but to get large, well-defined crystals, it is recommended to let the solution sit for 7 to 14 days. The longer it sits, the larger the crystals will grow.
Q2: Why didn’t my sugar solution crystallize?
A: There are a few common reasons. The solution may not have been super-saturated enough (not enough sugar), it might have been disturbed too often, or there wasn’t a proper “seed” or surface for the crystals to grow on. Make sure your suspension string is slightly rough to give the crystals something to grab onto.
Q3: Is crystal candy the same as rock candy?
A: Crystal candy is a form of rock candy, but it is typically crafted to have a more complex, geode-like structure and appearance. Rock candy often grows in more uniform, blocky formations, while crystal candy is more artistically shaped and visually intricate.
Q4: Can I use different types of sugar?
A: Granulated white sugar is the best choice because it provides the cleanest, clearest crystals. Using brown sugar or other types of sugar can result in a cloudier or stickier product due to the presence of molasses and other impurities.
Q5: How do I store crystal candy?
A: Store your crystal candy in a cool, dry place in an airtight container. This will prevent it from getting sticky or dissolving due to humidity. Avoid storing it in the refrigerator.