Proven Tips for Maintaining Your Portable Burr Coffee Grinder
For coffee enthusiasts who value freshly ground beans on the go, portable burr coffee grinders have become indispensable companions. These compact devices deliver consistent grind quality whether you’re camping in the wilderness, traveling for business, or simply enjoying coffee at the office. However, like any precision tool, these grinders require proper care to maintain their performance and longevity. Without regular maintenance, even the best portable burr grinder can suffer from reduced grinding efficiency, inconsistent particle size, and premature wear.
Understanding how to properly maintain your portable burr grinder isn’t complicated, but it does require attention to detail and consistency. From daily cleaning routines to periodic deep maintenance, each step plays a vital role in preserving your grinder’s functionality. This guide will walk you through proven maintenance strategies that keep your grinder operating at peak performance, ensuring every cup of coffee tastes as exceptional as intended. Whether you’re a seasoned coffee aficionado or new to manual grinding, these practical tips will help you protect your investment and enjoy superior coffee wherever your adventures take you.
Introduction to Portable Burr Coffee Grinders
Portable burr coffee grinders represent a significant advancement in mobile coffee brewing technology, combining precision grinding mechanisms with compact, travel-friendly designs. Unlike blade grinders that chop beans inconsistently, burr grinders use two revolving abrasive surfaces to crush beans uniformly, producing particles of equal size that extract evenly during brewing. This consistency directly impacts flavor quality, allowing you to taste the subtle notes and characteristics that make specialty coffee exceptional.
The portability factor adds remarkable versatility to your coffee routine. Manual burr grinders require no electricity, making them ideal for outdoor adventures, international travel, or simply reducing your carbon footprint. Most models feature adjustable grind settings that accommodate various brewing methods, from fine espresso to coarse French press. Their durable construction, typically incorporating ceramic or stainless steel burrs, ensures reliable performance across diverse environments and conditions.
Beyond convenience, these grinders offer economic advantages by eliminating the need for pre-ground coffee, which loses freshness within days of grinding. By grinding beans immediately before brewing, you preserve essential oils and aromatic compounds that define coffee’s flavor profile. This combination of portability, precision, and freshness makes burr grinders essential tools for anyone serious about coffee quality, whether at home or exploring remote destinations where exceptional coffee shouldn’t be compromised.
Understanding Your Grinder
Familiarizing yourself with your specific grinder model forms the foundation of effective maintenance. Start by locating the manufacturer’s documentation, which typically details your grinder’s burr type—ceramic burrs offer durability and heat resistance, while stainless steel provides sharpness and longevity. Understanding your adjustment mechanism is equally important, as some models use stepped settings with defined click positions, while others feature stepless adjustment for infinite grind size control.
Examine how your grinder disassembles, paying attention to the catch container, grind chamber, and burr assembly. Most portable models feature hand-removable components that separate without tools, though some require specific techniques to avoid damaging threads or locking mechanisms. Identify the grind capacity marked inside the hopper, as overloading strains the mechanism and produces inconsistent results. Note any manufacturer-specific features like anti-static components or sealed bearings that influence cleaning approaches and maintenance frequency, ensuring your care routine aligns with your grinder’s unique design characteristics.
The Importance of Regular Maintenance
Regular maintenance directly determines your grinder’s grinding consistency, longevity, and the quality of coffee it produces. Coffee oils and fine particles accumulate inside the burr chamber with each use, creating a residue layer that interferes with burr alignment and grinding precision. This buildup causes uneven particle distribution, where some grounds extract too quickly while others remain under-extracted, resulting in bitter or sour flavors that mask your coffee’s intended taste profile. Neglected grinders also require significantly more effort to operate as residue increases friction between moving parts, making hand-cranking laborious and potentially damaging internal components. Consistent maintenance prevents these issues while extending your grinder’s operational lifespan by years, protecting the financial investment you’ve made in quality coffee equipment and ensuring reliable performance during travels when replacement options may be unavailable.
Common Grinder Issues and Solutions
Inconsistent grind size ranks among the most frequent complaints, typically caused by loose burr alignment or worn adjustment mechanisms. Tighten the burr assembly by rotating it clockwise until snug, then test with a small batch of beans to verify uniform particle size. Excessive grinding resistance often indicates coffee oil buildup between burrs—disassemble the grinder and brush away accumulated residue from all contact surfaces. If your grinder produces squeaking or grinding noises during operation, the burrs may be misaligned or debris may be trapped in the mechanism; remove the burrs, inspect for foreign objects, and reassemble carefully following alignment marks. Beans jamming in the hopper usually result from overloading or using oily dark roasts that clump together; reduce batch size and tap the grinder gently to encourage bean flow. Handle wobbling or loose cranks by checking the drive shaft connection and tightening any accessible fasteners, as continued use with loose components accelerates wear and damages threading.
Key Maintenance Tips
Establishing a post-grind cleaning routine prevents the majority of performance issues. After each use, disassemble the catch container and grind chamber, then use a dedicated brush with stiff bristles to sweep away residual grounds from all surfaces. Pay particular attention to the burr teeth and adjustment collar, where fine particles lodge themselves into grooves and threads. Tap the grinder body gently against your palm to dislodge trapped particles, then wipe interior surfaces with a dry microfiber cloth to remove oils without introducing moisture that can cause grounds to cake.
Protecting against blockages requires attention to bean selection and loading practices. Avoid extremely oily beans from dark roasts, as their surface oils accumulate rapidly and create sticky residue that clogs burr gaps. When loading beans, never exceed the manufacturer’s recommended capacity—overfilling forces beans against each other, creating pressure that jams the mechanism and strains the drive shaft. For optimal flow, load beans in small batches and grind completely before adding more, allowing the mechanism to process each batch without resistance.
Burr calibration maintains grinding precision over time. Monthly, test your finest setting by grinding a small amount and examining particle consistency under good lighting. If you notice irregular sizes or the adjustment feels loose, recalibrate by completely disassembling the burr assembly, cleaning all adjustment threads thoroughly, and reassembling while ensuring proper seating. Some models feature calibration screws or alignment marks—consult your manual to adjust these according to manufacturer specifications, then test grind quality across multiple settings to verify consistent performance.
Lubrication requirements vary by model, but most portable grinders benefit from minimal maintenance of moving parts. Apply food-grade mineral oil sparingly to the drive shaft connection point every three months, using just enough to coat the surface without excess that attracts coffee dust. Never lubricate burrs themselves, as any oil contamination transfers directly to your coffee and alters flavor. For models with sealed bearings, external lubrication isn’t necessary, but check periodically for any signs of resistance or unusual noise that might indicate internal wear requiring professional service.
Storage practices significantly impact grinder condition between uses. Always store your grinder completely empty and dry, as residual beans absorb moisture and release oils that harden into stubborn deposits. Keep the device in a breathable case or pouch rather than sealed plastic, allowing air circulation that prevents moisture accumulation. Store in moderate temperatures away from direct sunlight, which can warp plastic components and degrade rubber gaskets. Before extended storage periods, perform a thorough cleaning and consider loosening the adjustment mechanism to its coarsest setting, reducing spring tension that can weaken over time when compressed.
Grinder Cleaning Techniques
Begin your cleaning process by completely disassembling the grinder in a well-lit workspace. Remove the crank handle first, followed by the hopper, adjustment collar, and catch container. Carefully extract the burr assembly by rotating counterclockwise, noting the alignment position for proper reassembly. Lay all components on a clean towel in the order they were removed, creating a visual reference that simplifies reconstruction.
Use a dedicated grinder brush with firm bristles to sweep away grounds from each component systematically. Start with the burrs themselves, brushing between each tooth and around the outer edges where particles accumulate densely. Clean the adjustment threads thoroughly, as coffee dust in these grooves affects grind consistency. For the hopper and catch container, brush all interior corners and seams where static causes grounds to cling stubbornly.
Address stubborn oil residue with a dry microfiber cloth, wiping all surfaces without introducing water or cleaning solutions that leave residues affecting coffee flavor. For particularly oily buildup on burrs, use uncooked white rice as a natural absorbent—grind a small handful through the assembled grinder, then discard the rice powder and brush away loosened oils. This method safely removes accumulated oils without chemical contamination.
Complete the cleaning by inspecting each component for wear or damage before reassembly. Check burr teeth for chips or excessive dulling, examine threads for stripping, and verify gaskets remain pliable. Reassemble in reverse order, ensuring the burr alignment matches its original position and all connections seat firmly without forcing. Test the mechanism by hand-cranking without beans, confirming smooth rotation before your next grinding session.
Over Time Shutdown and its Benefits
Properly shutting down your grinder during extended periods of non-use preserves component integrity and prevents degradation that occurs when assembled mechanisms sit idle. Begin by performing a thorough cleaning to remove all coffee residue, as oils left inside harden over weeks and become increasingly difficult to remove. Once cleaned, adjust the grind setting to its coarsest position, which releases tension from the adjustment spring and prevents metal fatigue that weakens precision over months of compression. Disassemble the burr assembly partially if you won’t use the grinder for several weeks, storing the burrs separately in a dry container to prevent moisture exposure that causes corrosion on metal components.
Store the grinder in a climate-controlled environment away from temperature extremes and humidity fluctuations that warp plastic housings and degrade rubber seals. Place it in a breathable fabric case rather than airtight plastic, allowing residual moisture to evaporate naturally. Before returning the grinder to service after extended storage, inspect all components for any signs of oxidation, stiffness, or unusual odors, then reassemble and run a small batch of sacrificial beans through to season the burrs and verify smooth operation before grinding your premium coffee.
Upgrading and Replacing Parts
Recognizing when components need replacement ensures your grinder maintains optimal performance throughout its lifespan. Burrs typically require replacement after grinding 500-800 pounds of coffee, depending on material and usage intensity—ceramic burrs last longer but dull gradually, while steel burrs maintain sharpness longer before requiring sudden replacement. Signs indicating burr replacement include noticeably longer grinding times, increased effort required to crank, and persistent inconsistency in particle size despite thorough cleaning and calibration. Inspect burrs visually every six months for rounded teeth, visible chips, or smooth surfaces where sharp edges once existed.
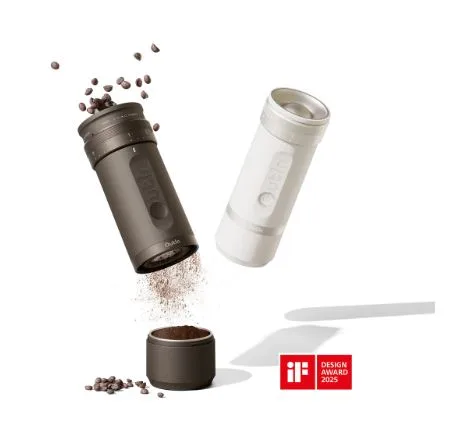
When sourcing replacement parts, always use manufacturer-specified components to ensure proper fit and performance. Generic burrs may seem cost-effective but often feature incorrect dimensions that compromise grind quality and potentially damage your grinder’s housing. Brands like OutIn offer readily available replacement burrs and components designed specifically for their grinder models, ensuring compatibility and maintaining the precision that made the grinder reliable in the first place. Replace worn gaskets and seals simultaneously with burrs, as these rubber components degrade at similar rates and fresh seals prevent grounds from escaping into unwanted areas. Upgrade opportunities include aftermarket adjustment collars offering finer calibration control and premium crank handles with ergonomic grips that reduce hand fatigue during extended grinding sessions, enhancing both precision and user comfort without compromising your grinder’s core functionality.
Customer Support and Warranty Information
Accessing manufacturer support ensures you receive expert guidance when maintenance challenges exceed routine care. Most reputable grinder brands provide customer service through multiple channels including email support, phone hotlines, and detailed FAQ sections on their websites. Before contacting support, gather your grinder’s model number, purchase date, and specific issue details to expedite assistance. Many manufacturers offer instructional videos and downloadable maintenance guides that address common concerns without requiring direct contact.
Warranty coverage typically ranges from one to three years, protecting against manufacturing defects and premature component failure under normal use conditions. Review your warranty terms carefully, as coverage usually excludes damage from improper cleaning, unauthorized modifications, or wear from commercial use. Register your grinder immediately after purchase to activate warranty protection and maintain proof of purchase documentation. Some manufacturers offer extended warranty programs or discounted replacement parts for registered users, providing long-term value beyond the standard coverage period.
Protecting Your Investment Through Proper Care
Maintaining your portable burr coffee grinder requires consistent attention but rewards you with years of reliable performance and exceptional coffee quality. By implementing daily cleaning routines, performing monthly calibrations, and addressing issues promptly, you protect your investment while ensuring every grind produces uniform particles that extract optimally. The maintenance practices outlined in this guide—from proper disassembly techniques to strategic storage methods—form a comprehensive care system that prevents common problems before they compromise your grinding experience. Remember that your grinder is a precision instrument deserving the same care you give to selecting quality beans and perfecting your brewing technique. With proper maintenance, your portable burr grinder will continue delivering the consistent, fresh grounds that make exceptional coffee possible, whether you’re at home or exploring new destinations where great coffee enhances every adventure.