Your Simple Guide to Dirt Bike Graphics and Decal Kits
Your dirt bike says a lot about you before you even throw a leg over it. The graphics on your bike are the first thing people notice at the track or on the trail. So it makes sense to get them right. Whether you ride a KTM, Honda, Yamaha, Kawasaki, or any other brand, there is a graphics kit out there for your bike. This guide will walk you through everything you need to know — from choosing the right kit to getting it installed properly
Why Dirt Bike Graphics Actually Matter
A lot of riders think graphics are just about looks. But there is more to it than that.
Good quality graphics also protect your plastics. They act as a thin layer between your panels and the branches, rocks, and mud that your bike runs through. Without graphics, your plastics take scratches and scuffs much faster. With a solid set of decals, the panels stay looking newer for longer.
On top of that, graphics help with visibility. If you ride in groups or race, having a distinct look helps others spot you quickly. It also gives your bike a more finished, professional appearance — which matters if you ever plan to sell it.
And honestly, there is something motivating about riding a bike that looks sharp. It is a small thing, but it makes a difference.
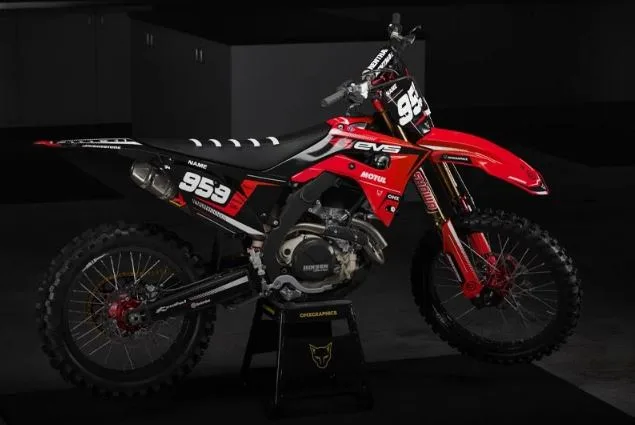
What Are MX Graphics Kits?
MX stands for motocross. An MX graphics kit is a full set of printed vinyl decals made to cover the main plastic panels on your dirt bike. A standard kit usually covers:
- Front fender
- Rear fender
- Side panels
- Radiator shrouds
- Swing arm
Some kits also include number plates and fork guards. The vinyl used in quality kits is thick, durable, and built to handle rough conditions. It does not peel easily, and it holds colour well even after long hours in the sun or mud.
The best dirt bike graphics kits are made specifically for your bike model and year. This means the shapes are cut to fit precisely. There are no gaps, no overhangs, and no awkward wrapping around edges. Everything lines up clean.
Choosing Between Standard and Custom Kits
This is where most riders stop and think for a while. There are two main options — standard kits and custom kits. Both have their place.
Standard kits come in pre-designed styles. The colours and layouts are already set. You pick a design you like, choose your bike model, and order. These are great if you just want something that looks good without spending a lot of time on design decisions. They tend to be more affordable too.
Custom kits give you full control. You can pick your own colours, add your name or race number, choose your own fonts, and sometimes even upload your own artwork. A fully custom mx graphics kit is ideal for racers, riders who want a unique look, or anyone who wants their bike to feel truly personal.
Many companies that offer custom kits now let you preview your design before it goes to print. This is a huge help because you can see exactly what you are getting. You can swap colours, adjust layouts, and make changes without committing. Once you are happy, you approve it and they print.
Brand Fit: Does It Work for Your Bike?
One of the most common questions is whether a graphics kit will actually fit your specific bike. The answer depends entirely on where you buy from.
Generic kits sold cheaply online are often made in rough sizes that sort of fit a range of bikes. These rarely look great and can be a frustration to install. They may not line up with your panels, and the cutouts for bolts or vents may be in the wrong place.
Quality suppliers build their kits for specific models and years. For example:
- KTM riders can find kits built for the SX, SX-F, XC, EXC, and EXC-F models going back to 1998
- Honda riders can get kits that fit the CR, CRF, XR, and NX models
- Husqvarna riders have options for the FC, TC, FX, TX, TE, and FE series
This level of detail matters. When a kit is made for your exact model, installation is much easier. The panels align, the edges sit flat, and the final result looks factory-fitted rather than stuck on.
The same goes for brands like Yamaha, Kawasaki, GasGas, Beta, Suzuki, Triumph, and others. A good supplier will have a wide range of bike models covered, often going back decades.
How to Install Dirt Bike Graphics the Right Way
Installation is something a lot of riders rush, and then regret it later. Taking your time here makes a real difference in how long your graphics last and how good they look.
Here are a few tips that help:
- Clean everything first. Remove any dirt, oil, or old adhesive from your plastics. Use isopropyl alcohol for the best result. Any leftover residue will stop the new graphics from sticking properly.
- Work in a warm space. Cold vinyl is stiffer and harder to work with. A warm garage or room makes the material more flexible and easier to lay down smoothly.
- Start from the centre. Peel back a small section, align the graphic, and work your way outward. This helps avoid bubbles and wrinkles.
- Use a soft squeegee or a credit card. As you lay the graphic down, press firmly from the centre out. This pushes air bubbles toward the edges so they can escape.
- Take your time on curves. Around the shrouds and fenders, the vinyl needs to wrap slightly. Use gentle heat from a heat gun or hair dryer to make it more pliable around curved sections.
After installation, press all the edges firmly. Pay special attention to the corners and any cutouts. These are the spots that lift first if they are not pressed down well.
How Long Do Graphics Last?
This depends on how much you ride and the conditions you ride in. In general, quality vinyl graphics on a well-maintained bike can last one to three seasons with regular use. Riders who race frequently may notice wear sooner, especially on the shrouds and side panels where boots and legs rub constantly.
To extend the life of your graphics, rinse your bike gently after muddy rides rather than blasting it with a high-pressure hose directly on the decals. High pressure at close range can lift edges over time. Also, storing your bike out of direct sunlight when not in use helps the colours stay vivid for longer.
Final Thoughts
Updating your dirt bike graphics is one of the easiest ways to give your bike a fresh look and a bit of extra protection. Whether you go with a standard kit that looks sharp right out of the box or a fully custom design built just for you, the key is choosing quality materials made to fit your specific bike. Take your time with the install, prep your plastics well, and the result will speak for itself. Your bike will look great — and so will you pulling up to the gate.