How to Safely Convert HEIC to JPEG Without Uploading Images to Any Website
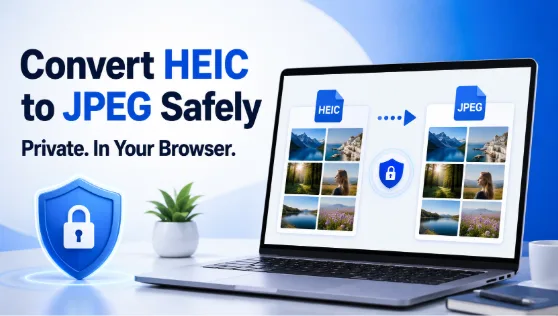
HEIC has become a common image format, especially for photos taken on modern Apple devices. It stores high-quality images in smaller file sizes, which helps save space on a phone or computer. Problems begin when a website, editing program, printing service, or older device does not support HEIC files. In that situation, converting the image to JPEG is usually the easiest solution.
Many online converters ask users to upload personal photos to a remote server. That may seem harmless, but images can contain private faces, home interiors, identity documents, location details, work materials, and hidden metadata. A safer approach is to convert files directly inside the browser, so the images never need to leave the device.
Why Image Privacy Matters During Conversion
Photos often reveal more than people realize. A simple family picture may show children, addresses, vehicle registration numbers, computer screens, travel plans, or valuable belongings. Business images may contain client information, unreleased products, invoices, property details, or internal documents.
When a converter uploads a file to a server, the user must trust the provider’s storage, security, deletion policy, staff access controls, and third-party infrastructure. Even when a website promises automatic deletion, the image still travels across the internet and is processed outside the user’s device.
Client-side conversion reduces this exposure. The processing happens locally in the browser using the device’s own computing power. Instead of sending the photo to a remote machine, the browser reads the HEIC file, converts it, and prepares a JPEG for download.
What Client-Side Conversion Means
A client-side image converter runs its main conversion process in the browser. The selected file remains on the computer, phone, or tablet while the browser handles the work.
The process usually follows these steps:
- The user selects one or more HEIC files.
- The browser reads the files locally.
- The tool converts the image data into JPEG format.
- The user chooses a quality level.
- The converted files are prepared for download.
With a privacy-focused heic to jpeg tool, this approach avoids the traditional upload, wait, process, and server-download workflow. It can also make conversion faster because there is no need to transfer large files over an internet connection.
Users should still review the tool’s privacy explanation. A clear statement that conversion occurs in the browser is more useful than vague claims such as “secure processing.” Transparent tools explain what happens to selected files and whether any image data is transmitted.
How to Check Whether a Converter Uploads Photos
Not every tool clearly explains its processing method. Before converting private images, look for direct language such as “client-side,” “local processing,” “in-browser conversion,” or “files never leave your device.”
A trustworthy page should make the privacy model easy to understand. It should not hide important details inside confusing legal text. Users can also watch for practical signs. A local converter may begin processing immediately because it is not waiting for a remote server, and large files may convert without an upload progress bar.
These signs are helpful, but the written privacy policy and technical explanation remain important. Avoid tools that make broad security promises without explaining where the image is processed.
Choosing the Right JPEG Quality
JPEG quality settings control the balance between visual detail and file size. A higher setting usually keeps more detail but creates a larger file. A lower setting reduces the size but may introduce visible compression, especially around text, hair, edges, shadows, and fine patterns.
Multiple quality options are useful because not every image has the same purpose. A photo prepared for professional editing may need a high-quality export. An image attached to an email may work well at a medium setting. A small preview for a website or chat may not require maximum detail.
A practical approach is:
- Choose high quality for printing, archiving, editing, or client delivery.
- Choose medium quality for everyday sharing, presentations, and email.
- Choose a lower setting when file size matters more than fine detail.
Always inspect the converted JPEG before deleting the original HEIC file. Zoom in on detailed areas and confirm that faces, text, colors, and edges still look acceptable.
Why EXIF Metadata Can Be Important
EXIF metadata is information stored inside many image files. Depending on the device and settings, it may include the date and time, camera model, exposure details, orientation, lens information, and sometimes location coordinates.
Preserving metadata can be valuable for photographers, content teams, archivists, property professionals, and anyone who organizes images by capture date. It can also help editing software display the correct orientation or maintain useful camera information.
Some converters remove metadata automatically. That may be desirable when sharing images publicly, but it can be a problem when users need a faithful converted copy. A converter that preserves EXIF data provides more continuity between the original HEIC file and the resulting JPEG.
Privacy still requires judgment. Preserved location metadata can reveal where a photo was taken. Before posting an image publicly, users should decide whether to keep or remove sensitive details. Metadata preservation protects information during conversion, but public sharing may require a separate review.
A Safe Step-by-Step Conversion Routine
A careful workflow helps protect both image quality and personal information.
First, organize the HEIC files in a local folder. Keep the originals untouched until the converted JPEG files have been reviewed. This prevents accidental data loss and makes comparison easier.
Next, open a browser-based converter that clearly states that files are processed locally. Select the images and choose the quality level that matches their intended use.
After conversion, download the JPEG files to a separate folder. Open several images at full size and check sharpness, colors, orientation, and visible compression. For important photos, compare the JPEG with the original HEIC version.
Then review the metadata if it matters to your workflow. Confirm that the expected date, camera details, orientation, or other EXIF fields remain available.
Finally, create a backup before deleting anything. Storage is inexpensive compared with the cost of losing original family photos, client images, or professional work.
Common Mistakes to Avoid
The most common mistake is choosing the first converter that appears in search results without checking how it handles files. A polished design does not automatically mean private processing.
Another mistake is selecting the lowest quality setting simply to reduce file size. Strong compression may be acceptable for temporary previews, but it can permanently reduce detail in the converted copy.
Users also delete HEIC originals immediately after conversion. This is risky because JPEG is a different format and may not retain every advantage of the source file. Keep originals until the new files have been inspected and backed up.
It is also unwise to assume that metadata is always preserved or always removed. Different tools behave differently. Check the converter’s features and verify the output when EXIF information matters.
Finally, avoid converting highly sensitive images on shared or public computers. Even local processing cannot protect files from browser history, downloaded-file lists, temporary storage, other users, or device-level monitoring.
Keep Control of Every Photo You Convert
Converting HEIC files to JPEG should not require giving a third party access to personal images. A client-side tool keeps the main task on the user’s device, avoids unnecessary uploads, and provides a privacy-conscious way to create widely compatible JPEG files.
The safest routine is simple. Use a transparent in-browser converter, choose an appropriate quality level, confirm whether EXIF metadata is preserved, inspect the output, and keep original files until backups are complete.
Convenience matters, but control matters more. When photos include private people, locations, documents, or professional information, local conversion solves a compatibility problem without creating a new privacy risk for ordinary users.