How to Measure Shot Grouping: MOA, Group Size, and Accuracy Explained
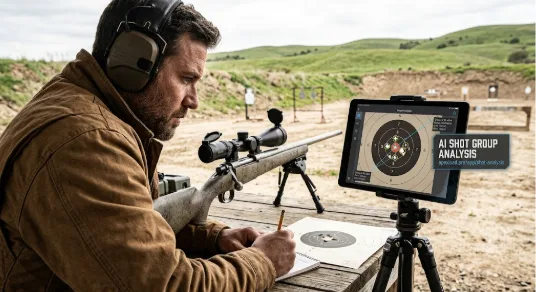
Most shooters look at their target after a range session and aren’t sure what they’re actually seeing. Is a 2-inch cluster at 100 yards good, bad, or average? This confusion is common, and it usually comes down to one thing: not knowing how to read shot grouping the right way. Here is the short answer.
One MOA (Minute of Angle) equals roughly 1.047 inches at 100 yards, according to the National Shooting Sports Foundation, and that single number is the key to comparing shot grouping across any distance. You can even skip the manual math entirely by uploading a target photo to AI shot group analysis, which reads group size and point of impact automatically. Once you understand it, judging accuracy stops being a guessing game.
Blog’s Objective
To explain how bullet dispersion works in plain terms, show how MOA connects to group size, and walk through practical ways to measure and improve your accuracy.
Key Takeaways
- Your shot pattern shows how consistently a rifle and load perform together.
- 1 MOA equals about 1.047 inches at 100 yards, and that gap grows with distance.
- Group size is fixed in inches; MOA scales with distance, making it better for comparisons.
- Measure center to center, use at least 5 shots, and record your conditions.
- Software tools remove manual math and reduce measurement error.
Table of Contents
- What Is Shot Grouping?
- Group Size vs. MOA: What’s the Difference?
- How to Measure Your Shot Groups
- Using a Shot Group Calculator the Right Way
- Common Mistakes That Skew Your Results
- Putting It All Into Practice
- Frequently Asked Questions
What Is Shot Grouping?
Shot grouping means the pattern your bullets make on paper when fired from the same position, at the same target, without moving your rifle’s zero. Using a reliable shot group calculator allows you to see these patterns clearly. A tight cluster means good consistency. A scattered pattern usually points to something off, whether it’s the ammo, the rifle, or the shooter. This is why the pattern of your shots is the most honest way to judge how well a rifle and load actually perform together.
Here’s a fact worth remembering. That 1.047-inch figure isn’t rounded for convenience. It’s the actual math behind one angular minute, and serious long-range shooters track it closely because the gap between 1 inch and 1.047 inches grows with distance. At 1,000 yards, that difference is nearly half an inch. So while “1 MOA equals 1 inch at 100 yards” works fine for casual range days, precision shooters use the exact figure.
Group Size vs. MOA: What’s the Difference?
Group size and MOA measure the same thing but in different ways.
- Group size is a fixed number, usually in inches or centimeters. A 1-inch group is 1 inch no matter the distance it was shot.
- MOA is an angular measurement. It scales with distance, so 1 MOA is about 1 inch at 100 yards, 2 inches at 200 yards, and so on.
That scaling is exactly why MOA is more useful for comparing accuracy across different ranges. A rifle that shoots a 3-inch group at 100 yards and a 6-inch group at 200 yards is performing consistently at roughly 3 MOA the whole time, even though the raw group size doubled. Modern target analysis software makes these comparisons much easier for every shooter.
Quick Math
To find MOA from a group size, use this formula:
MOA = (group size in inches ÷ distance in yards) × 100
Think of it as dividing your group size by your distance in hundreds of yards.
So a 2-inch group at 300 yards works out to about 0.67 MOA, which is genuinely tight shooting.
How to Measure Your Shot Groups
Getting an accurate measurement isn’t hard, but it does take a bit of care. Follow these steps:
- Fire a consistent group, usually 5 shots, from a stable rest.
- Measure the two widest holes, center to center, not edge to edge.
- Note your exact distance to the target.
- Convert to MOA using the formula above, or let software do it.
- Record the load, weather, and rifle setup alongside the number, since conditions affect results.
A common error is measuring outer edge to outer edge instead of center to center, which inflates the group size and makes accuracy look worse than it is.
Using a Shot Group Calculator the Right Way
Doing this math by hand for every session gets old fast, especially if you’re testing several loads back to back. A shot group calculator handles the conversion instantly, removing rounding mistakes and letting you compare sessions side by side without redoing the arithmetic each time.
Beyond simple calculators, some platforms now offer full target analysis software that reads a photo of your target and pulls out group size, mean radius, and point of impact automatically. This matters because manual measurement, even careful measurement, introduces small errors that add up when you’re fine-tuning a load. Pairing quick math with proper analysis software gives you a repeatable, consistent way to track progress over time instead of relying on a tape measure and guesswork.
Common Mistakes That Skew Your Results
- Shooting groups too small, like 2 or 3 rounds, which isn’t enough data to be statistically meaningful.
- Ignoring wind and temperature changes between range sessions.
- Comparing groups shot at different distances without converting to MOA first.
- Using a rest that isn’t fully stable, which adds shooter error into what should be rifle and ammo data.
- Forgetting to log the load recipe means good results can’t be repeated later.
Putting It All Into Practice
Understanding your numbers is only half the job. The other half is using them to actually improve your loads and your shooting. Once you know how to read group size and convert it to MOA, every shot grouping range trip becomes more useful, because you’re comparing apples to apples instead of guessing.
If you want to skip the manual work, print a proper target, take a photo after your session, and let a calculator or analysis tool do the measuring.
At ApexLoad, they’ve built exactly this kind of tool into their platform, letting shooters upload a target photo and get group size, mean radius, and point of impact without any manual math. It’s a straightforward way to spend more time refining loads and less time squinting at a ruler.
Ready to see your own numbers? Print a target, take your shots, and run the analysis to find out exactly where your accuracy stands.
Frequently Asked Questions
1. What counts as a good shot grouping for a hunting rifle?
Under 1.5 MOA works well for most hunting distances. Consistency matters more than chasing perfection.
2. How many shots should go into a group before trusting a shot group calculator’s result?
Five is the practical minimum. Three shots can look great by luck, hiding real dispersion.
3. Does target analysis software work with any printed target, or only specific designs?
Most tools need visible reference markers for scale. Random paper works for shooting, not always for measurement.
4. Can AI shot group analysis fully replace manual measuring?
It handles the math and cuts errors, though checking distance and lighting still falls on you.
5. Why do two groups with identical MOA sometimes shoot differently in the field?
Mean radius explains it. It tracks average distance from the center, catching flyers that group size alone misses.