5 Ways to Edit Photos with AI
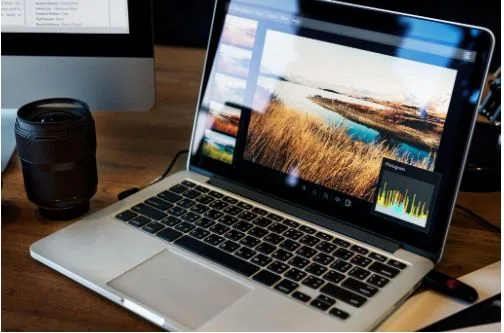
Artificial intelligence has moved everyday photo editing beyond filters and automatic brightness controls. Current tools can identify subjects, reconstruct detail, remove selected objects, and create new visual elements from written instructions. These capabilities save time, but they work best when users assign AI a specific task and review the result rather than accepting the first version automatically.
Here are five practical ways individuals and small teams can use AI to improve photographs without giving up control of the final image.
- Correct Light, Colour, and Noise
Indoor phone photos and evening images often suffer from several related issues: dark shadows, colour casts from artificial lighting, and visible noise. AI enhancement can analyse these problems together and produce a balanced starting point.
For a natural result, correct exposure and white balance before adding strong sharpness. Inspect skin, walls, and smooth skies for blotchy texture. If faces begin to look polished like plastic, reduce the effect. Noise reduction should make the subject easier to see, not erase all evidence of the lighting conditions.
This approach is useful for event photos, family archives, property images, and product shots created without a full studio setup.
- Remove Distractions or Replace a Background
Object removal tools allow a user to select a cable, sign, passer-by, or other distraction and ask AI to rebuild the area behind it. Background tools can isolate the main subject and place it on a transparent, plain, or newly generated setting.
Simple surfaces are generally easier to reconstruct than repeated bricks, railings, reflections, or patterned fabric. After any removal, zoom in around the repaired boundary and look for duplicated texture or broken lines.
Background replacement is particularly useful for ecommerce and profile images, although the new scene must match the original direction of light. A subject lit from the left will not sit convincingly in a generated room lit strongly from the right unless the editor also corrects the lighting.
- Restore and Enlarge Older or Smaller Images
AI upscaling estimates additional pixels so a small file can be displayed or printed at a larger size. Restoration models may also reduce scanning noise, improve contrast, and clarify a slightly blurred face.
These tools do not recover hidden ground truth. When a source contains very little detail, the model creates a plausible interpretation. This is why restored family and historical photographs should be kept alongside the original. The enhanced copy can be easier to enjoy, while the source remains the accurate record of what the camera or scanner captured.
Apply restoration in stages. Repair exposure and damage first, then upscale the selected final crop. Strong face reconstruction should be checked carefully against other photographs of the same person.
- Make Targeted Changes With a Prompt
Generative editing lets users describe an alteration in ordinary language. It can extend a backdrop, change the colour of an object, add space for headline text, or create a seasonal version of an existing composition.
Precise prompts produce easier-to-review results. State what should change and what must remain fixed. For example:
Extend the neutral wall to the right for a horizontal banner. Keep the person, clothing, pose, facial features, and existing light unchanged.
Generate more than one option and compare anatomy, text, reflections, logos, and repeated patterns. For advertising or product work, verify that the AI has not changed a defining feature. Generative editing is an efficient concept and production tool, but it still requires approval by someone who understands the subject.
- Create Channel-Specific Versions
One finished image may need to become a square shop thumbnail, a vertical story, a wide blog header, and a high-resolution print. AI can help extend backgrounds or preserve a subject while adapting the composition. Conventional resizing and cropping should still be used whenever they solve the problem without generating new content.
Start from a full-resolution master and create a separate export for each channel. Keep important faces, text, and products inside the safe area. Review the smallest version on an actual phone; fine details that look good on a monitor may disappear in a feed.
Naming exports by platform and dimensions prevents teams from repeatedly compressing the same derivative.
How to Select a Tool
Choosing the best AI photo editor depends on the work being done. A creator may value an all-in-one browser workspace, a design team may need integration with professional software, and a business may prefer to hand a critical retouch to a human specialist. Independent comparisons are useful when they explain those trade-offs instead of declaring one product the winner for every task.
Before subscribing, test candidates with the same small set of files: a low-light portrait, a product with text, an image with a complicated background, and a scene needing only one minor change. Compare source fidelity, export quality, processing limits, privacy terms, and the cost of producing a finished image rather than one attempt.
Keep a Human Review at the End
AI reduces the mechanical work involved in editing, but it cannot determine whether a change is accurate, ethical, or suitable for publication. That responsibility remains with the person or organisation using the image.
Keep originals, document major generative changes, and obtain permission before altering licensed or client-owned work. In editorial and documentary contexts, disclose edits that materially change what happened.
Used with those safeguards, AI can make photo workflows faster and more accessible. The strongest results come from a simple division of labour: software proposes and executes the edit; a person defines the purpose and decides whether the image is ready to be seen.