Grow a Garden Tier List: Best Items, Pets, Plants, Mutations and Their Uses
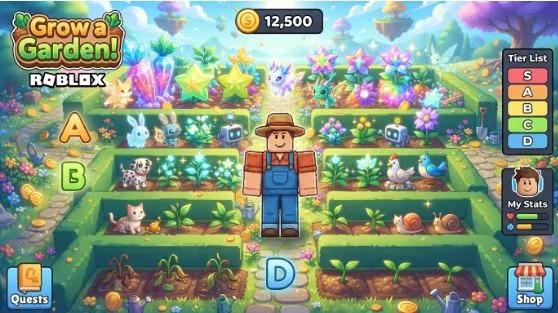
If you are playing Grow a Garden on Roblox, knowing which plants, pets, mutations, and other items are worth using can make your progress much easier. Some items are extremely valuable and can help you earn more Sheckles, while others are mainly useful during the early stages of the game.
This Grow a Garden tier list organizes different types of items into tiers based on their overall usefulness, value, efficiency, and importance to your garden.
The tier list is especially useful for players who are not sure what to keep, what to grow, what to buy, and which items should receive priority.
What Is the Grow a Garden Tier List?
The Grow a Garden tier list is a simple ranking system that places plants, pets, mutations, and other useful elements into different categories.
The usual ranking starts with S-Tier, which contains the strongest choices, and goes down to D-Tier, which contains options that are generally less useful.
A higher tier does not always mean an item is completely better in every situation. An item that is excellent for making money may not be the best option for completing another objective.
For this reason, you should use the tier list as a guide rather than following it blindly.
How the Grow a Garden Tier List Works
The tiers generally work like this:
| Tier | Meaning | Main Use |
| S-Tier | Excellent | Best overall choices |
| A-Tier | Very Good | Strong alternatives |
| B-Tier | Good | Useful in many situations |
| C-Tier | Average | Situational or early-game use |
| D-Tier | Weak | Usually lower priority |
Several things can affect where an item belongs on a tier list.
These include:
- How much money it can generate
- How difficult it is to obtain
- How quickly it produces results
- Its usefulness during different stages of the game
- Its rarity
- Its ability to work with other items
- Its usefulness for beginners
- Its usefulness for advanced players
Because the game changes through updates, an item’s position can also change over time.
Grow a Garden Tier List Explained
S-Tier – Best and Most Valuable
S-Tier represents the strongest choices available for their particular purpose.
These are the items players usually want to prioritize because they provide excellent value or offer an important advantage.
S-Tier choices can be especially useful when you are trying to build a powerful garden, increase your income, or make the most of limited resources.
However, obtaining an S-Tier item may require more time, luck, or resources.
What Are S-Tier Items Used For?
S-Tier items can be used for:
- Maximizing garden income
- Improving farming efficiency
- Getting valuable crops
- Supporting high-value strategies
- Improving long-term progression
- Creating stronger combinations
If you have limited resources, S-Tier options are usually worth considering first.
A-Tier – Excellent Choices
A-Tier items are also very strong but may have a small disadvantage compared with S-Tier choices.
This does not mean they are bad. In many situations, an A-Tier item can perform almost as well as an S-Tier option.
A-Tier choices are often easier to obtain and can therefore be excellent alternatives.
What Are A-Tier Items Used For?
A-Tier items are useful for:
- Building a strong garden
- Making consistent money
- Supporting different farming strategies
- Replacing harder-to-obtain S-Tier items
- Progressing through the game efficiently
For many players, having several A-Tier items is much better than waiting too long for one perfect S-Tier item.
B-Tier – Good and Useful Options
B-Tier items are generally reliable choices.
They may not have the same power or value as higher-tier options, but they can still be very useful.
B-Tier items are particularly helpful when you are still developing your garden.
What Are B-Tier Items Used For?
They can help with:
- Early and mid-game progression
- Generating regular income
- Filling gaps in your garden
- Experimenting with different strategies
- Supporting better items
You should not automatically sell or ignore B-Tier items simply because they are not at the top of the list.
C-Tier – Average Choices
C-Tier represents average options.
These items may have some useful qualities but usually have better alternatives available.
They can still have value for newer players who do not yet have access to stronger items.
What Are C-Tier Items Used For?
C-Tier options can be useful for:
- Beginners
- Temporary garden setups
- Completing certain tasks
- Testing different strategies
- Filling empty spaces
As your garden improves, you will usually want to replace weaker C-Tier options with stronger choices.
D-Tier – Weak or Less Useful Options
D-Tier items are generally the lowest priority.
This does not necessarily mean that every D-Tier item is useless. Some may still have specific purposes, especially during the early game.
However, they normally provide less value compared with higher-tier alternatives.
What Are D-Tier Items Used For?
D-Tier options can be useful when:
- You have limited resources
- You are just starting
- You need something temporarily
- You are completing a specific objective
- Better options are not available
Once you obtain stronger items, you can usually move away from D-Tier choices.
Grow a Garden Pets Tier List
Pets are an important part of Grow a Garden because they can provide useful abilities and bonuses.
The best pet for you depends on what you are trying to accomplish. Some pets may be more valuable for earning money, while others can provide useful effects that support a particular farming strategy.
Best S-Tier Pets
S-Tier pets are generally the pets you want to prioritize when building an efficient setup.
Their abilities can provide significant benefits and may become even more useful when combined with the right plants or other effects.
High-tier pets are particularly valuable for players who are focused on maximizing their garden.
Best A-Tier Pets
A-Tier pets are excellent alternatives to the very best pets.
They can provide strong abilities without necessarily being the absolute top choice.
If an S-Tier pet is difficult to obtain, an A-Tier pet can often be a practical replacement.
Best B-Tier Pets
B-Tier pets are useful and can contribute to a strong garden.
They are especially helpful for players who are progressing through the game and have not yet collected the rarest pets.
Lower-Tier Pets
Lower-tier pets may have limited usefulness compared with stronger alternatives.
However, beginners should still use whatever helpful pets they have available.
Your goal should be to improve your collection gradually rather than waiting until you obtain a perfect pet.
Grow a Garden Plants Tier List
Plants are at the center of Grow a Garden.
Choosing the right plants can have a major effect on how quickly you earn money and develop your garden.
Different plants can be valuable for different reasons. Some are useful because they produce valuable crops, while others may be better for specific farming strategies.
Best Plants for Making Money
If your primary goal is to make Sheckles, focus on plants that provide strong value relative to the resources and time required to grow them.
High-value plants can become particularly important as your garden develops.
Instead of simply looking at the selling price, consider the complete process.
Ask yourself:
- How long does the plant take to produce?
- How often can it produce?
- How much space does it require?
- Can mutations increase its value?
- Does it work well with your other plants?
A plant with a high selling price is not automatically the most profitable plant.
Best Plants for Growing Quickly
Fast-growing plants can be useful when you want regular income.
They allow you to harvest more frequently and can help newer players build their resources.
Quick crops are particularly useful when you do not have access to expensive or rare plants.
Best Plants for Rare Crops
Rare crops can have significant value and can become an important part of an advanced garden.
However, rarity alone should not determine whether you use a plant.
A rare plant is most useful when its rewards justify the resources required to obtain and maintain it.
Best Plants for Beginners
Beginners should generally focus on plants that are easy to obtain and simple to manage.
There is no need to build an expensive end-game garden immediately.
Start with reliable crops, earn money, and gradually replace weaker plants with better options.
Grow a Garden Mutations Tier List
Mutations can significantly affect the value of crops.
They are one of the reasons why an ordinary crop can become much more valuable.
Because mutations can change the value and usefulness of a crop, players should pay attention to opportunities that can improve their harvests.
Best Mutations for Profit
The best mutations for profit are generally those that substantially increase the value of a crop.
When you are trying to earn as much as possible, mutations can be more important than simply growing a large number of ordinary crops.
Best Mutations for Crop Value
Crop value is another important factor when comparing mutations.
A valuable mutation can turn a normal harvest into something much more profitable.
For this reason, advanced players often build their gardens around maximizing crop value rather than simply producing the highest number of crops.
Best Mutations for Farming
Some mutations may fit particular farming strategies better than others.
The best choice depends on your garden, available pets, plants, and overall strategy.
This is why there is not always one mutation that is best for every player.
What Is the Use of Each Tier in Grow a Garden?
Understanding the purpose of the tiers is more important than memorizing them.
What Are S-Tier Items Used For?
S-Tier items are generally used for maximizing your results.
They are suitable for players who want the strongest possible setup and are willing to spend time or resources obtaining better items.
Use S-Tier choices when you want:
- Maximum efficiency
- Higher potential income
- Stronger combinations
- Long-term progression
What Are A-Tier Items Used For?
A-Tier items provide strong performance while giving you more flexibility.
They are often a good choice when S-Tier items are unavailable or too expensive to obtain.
What Are B-Tier Items Used For?
B-Tier items are useful workhorses.
They can help you progress without requiring the rarest resources.
They are especially valuable during the middle stages of the game.
What Are C-Tier Items Used For?
C-Tier items are usually temporary or situational choices.
They can help you get started, complete objectives, or fill spaces until you find better options.
What Are D-Tier Items Used For?
D-Tier items have the lowest overall priority.
You can still use them if you have no better alternatives, but you should generally replace them as your collection improves.
Best Grow a Garden Items for Beginners
New players should not worry about obtaining every rare item immediately.
A good beginner strategy is to focus on progression.
Start by:
- Growing easy-to-manage crops.
- Selling harvests to build your money.
- Expanding your collection gradually.
- Learning how different plants work.
- Collecting useful pets.
- Experimenting with mutations.
- Replacing weaker items over time.
Your first goal should be creating a stable income rather than building a perfect end-game garden.
Best Items for Making Money Fast
If your goal is to make money quickly, concentrate on overall profitability rather than the highest individual selling price.
A strong money-making setup usually considers:
- Crop value
- Growth time
- Harvest frequency
- Garden space
- Mutations
- Pet bonuses
- Your available resources
For example, a crop that sells for a lot but takes a very long time to produce may not always outperform a crop that produces smaller rewards much more frequently.
Best Items for Advanced Players
Advanced players can focus more heavily on optimization.
At this stage, you should look beyond individual items and think about how everything works together.
A strong advanced setup can involve:
- High-value plants
- Powerful pets
- Valuable mutations
- Efficient use of garden space
- Strategic crop selection
- Long-term resource management
The best setup is usually the one where the different parts of your garden support each other.
How to Use the Grow a Garden Tier List
Using a tier list is simple.
First, decide what you are trying to accomplish.
Are you trying to:
- Make money?
- Progress quickly?
- Build a collection?
- Get rare crops?
- Improve your garden?
- Experiment with mutations?
Once you know your goal, look at the items that perform well for that specific purpose.
Do not assume that an S-Tier item is automatically the best choice for every situation.
For example, a plant that is excellent for experienced players may be difficult for a beginner to obtain. In that case, an easier A-Tier or B-Tier option could be the better practical choice.
How to Choose the Best Items for Your Garden
There is no single perfect garden for every player.
Your available resources, progression level, pets, plants, and goals all matter.
When choosing an item, consider its:
Value
How much can it help you earn or progress?
Availability
Can you realistically obtain it?
Efficiency
Does it provide good results for the time and resources you invest?
Compatibility
Does it work well with your existing setup?
Long-Term Use
Will you still use it after progressing further?
These factors can help you make better decisions than simply choosing an item because it appears high on a tier list.
Grow a Garden Tier List: Final Verdict
The Grow a Garden tier list is a useful tool for deciding which plants, pets, mutations, and other items deserve your attention.
S-Tier options are generally the strongest, while A-Tier and B-Tier choices can still provide excellent results. C-Tier and D-Tier options are more useful for beginners, temporary setups, or specific situations.
The most important thing to remember is that a tier list is a guide, not a strict rule.
Your ideal setup depends on your goals and what you currently have. As you progress, continue replacing weaker items, experiment with different combinations, and focus on the choices that provide the best results for your particular garden.