How to Make an Established Garden Easier to Water
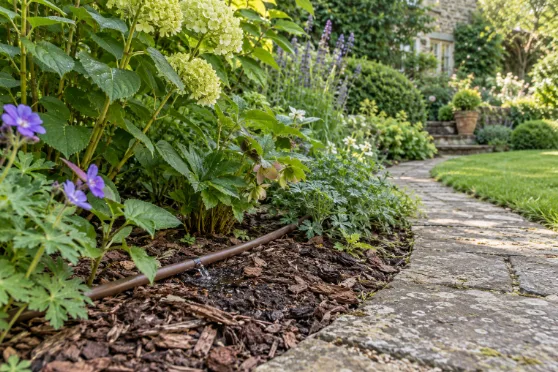
A garden can take years to settle into its best shape, yet the watering routine often remains surprisingly awkward. There are pots beyond the reach of the hose, a newly planted shrub tucked into a mature border, and a vegetable bed that needs attention just as you are heading out. Making that routine easier does not necessarily require a garden redesign.
For anyone considering adding irrigation to an established garden, the first task is to identify where reliable watering would make a worthwhile difference. Existing planting and paths can often be worked around, but the scope should follow the garden’s needs. Sometimes a solution for one border or a collection of containers is enough.
Find out which plants need your time
An established garden is rarely made up entirely of established plants. Last autumn’s hedge, this spring’s perennials and summer bedding have different needs from shrubs that have occupied the same border for a decade. Containers also need regular checks because their roots are restricted to the compost in the pot.
The RHS guidance on watering distinguishes between new planting, which needs support during establishment, and mature trees, shrubs and perennials, which generally need additional water only in severe drought. Check below the surface before watering, and remember that plants beneath eaves or tree canopies may miss rainfall.
Keep a simple watering diary through a dry week. Note what you watered, whether the soil or compost was actually dry, and which jobs were inconvenient. This gives you a much clearer brief than deciding that every bed needs an automatic supply.
Help the soil retain moisture
Before increasing the amount of water you apply, look at how quickly the soil loses it. Bare patches between shrubs are an obvious place to start. An organic mulch, such as garden compost or chipped bark, helps reduce evaporation and suppress weeds.
For effective coverage, you need a layer at least 5cm thick, ideally around 7.5cm. Remove weeds first and apply it when the soil is moist. Keep mulch away from woody stems and avoid burying low-growing plants. Different planting needs different treatment: moisture around the stems can be a problem for some Mediterranean plants, including thyme.
Match the watering method to the job
A watering can remains a sensible choice for a few accessible pots. It lets you see how much water each receives and makes stored rainwater easy to use. Where carrying cans becomes difficult, or a larger area needs regular attention, another method may be more practical.
Drip lines deliver water through individual outlets, while seep hoses release it along their length. Both can direct water into planted areas, but positioning matters: a wet strip beside the path does little for roots further into a border.
Ask for the proposed layout to be explained in terms of the plants it will serve. Which roots will receive water? Will the chosen equipment suit the slope? How will coverage be checked once everything is in place?
Protect what is already growing
In a mature garden, the pipe route deserves as much thought as the watering equipment. A short route on paper may cross valuable roots, established clumps or paving that would be difficult to reinstate.
Forest Research’s guidance on tree roots and trenching explains that many roots occupy soil near the surface. Excavation and compaction can damage them, affecting both the tree’s health and its stability. Where work approaches mature trees, get suitable arboricultural advice on the route and installation method before digging.
For any installation, ask to see the proposed routes and access points. Agree which surfaces will be disturbed, how they will be reinstated and where accessible controls will sit. Photograph the layout before pipes are concealed so there is a useful record for future planting or repairs.
Keep different watering needs separate
A collection of patio containers and an established shrub border should not automatically share the same watering programme. Separate zones allow each area to run independently. Water pressure and flow also need checking before deciding how much equipment can operate at once.
Think about how you will use those controls. Can you pause one zone after rain, adjust a container area without changing the rest, and turn everything off easily? Ask for zone names that describe recognisable places, such as “patio pots” or “vegetable beds”, and keep a short written guide beside the controller.
Check the results before relying on a timer
A timer confirms that watering was scheduled; it does not show whether every plant received what it needed. During the first few runs, walk around while the system is operating. Look for misplaced outlets, leaking connections and water landing outside the intended area.
Check soil or compost afterwards and compare the results across each area. Adjust the programme with the installer where necessary. Before a holiday, run the arrangement through its normal routine while you are still home, leaving time to spot and correct problems.
The best outcome is a routine you can manage comfortably: fewer awkward trips with a watering can, less guesswork and reliable support for the plants that need it. Begin with the most troublesome part of the garden, see what improves, and expand only if there is a clear reason to do so.