Clip Strip Hacks: Creative Ways to Display More in Less Space
If you’re wrestling with crowded shelves and tiny endcaps, there’s one unsung hero that can multiply your merchandising real estate almost overnight: the clip strip. These slim, vertical wonder-tools help you “float” inventory in overlooked spaces—without touching your planogram. Whether you manage a grocery aisle, a convenience store, a hardware bay, or a boutique, the right clip strip strategy can boost impulse buys, tell stronger product stories, and keep your fixtures looking fresh with minimal effort.
Below are practical, field-tested hacks to get more out of every square inch—plus setup tips, measurement ideas, and maintenance routines to make your displays stick.
First, what exactly is a clip strip?
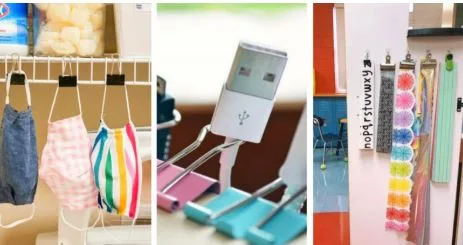
A clip strip is a narrow, typically plastic or metal strip with integrated clips or hooks that hold small packaged goods—think trial sizes, add-ons, and accessories. You hang the strip from shelves, pegboard, gondolas, cooler doors, or even endcap sides to add vertical facings where there wasn’t room before. Because clip strips stay flush to surfaces, they’re perfect for high-traffic, high-constraint areas where a full shelf just won’t fit.
Pick the right strip before you hang anything
Not every clip strip performs the same. Match the strip to your environment and product:
- Material & mounting: Plastic strips are lightweight and affordable; metal offers durability. Choose S-hooks for pegboard/gondolas, adhesive tabs for smooth panels, and magnetic clip strips for coolers and steel uprights so you can reposition in seconds.
- Length & capacity: Taller strips create vertical drama, but make sure the lowest facing sits above shin height and the top facing doesn’t block sightlines.
- Clip type: Flat clips suit carded items; hook styles handle bagged goods or hang tags.
- Weight rating: Add up the product weight and stay safely below the strip’s limit; heavier items go near the top anchor to reduce swing.
12 Clip Strip Hacks to Display More in Less Space
1) Cross-merch at decision points
Park a clip strip where shoppers decide on a main item, and offer a complementary add-on. Pasta → mini grater; paint → tack cloths; pet food → treat sample packs. Keep it obvious and relevant so the add-on feels like part of the solution, not a detour.
2) Build micro-collections that tell a story
Use a single strip to create a “mini kit.” For example: “Weekend Car Care” (air fresheners, microfiber, tire wipes) or “Back-to-School Desk Fix” (cable clips, sticky tabs, screen wipes). Add a small header card that names the collection so the purpose is instantly clear.
3) Turn dead zones into profit zones
The outside endcap panel, the narrow side of a gondola, the unused space between pegs, the inside of cooler doors—these spots are prime real estate. A magnetic or adhesive clip strip slips in without reworking shelves and gives you 6–12 extra facings where there used to be none.
4) Color-block for speed shopping
Group items on the strip by color (or use colored clip sleeves) so the assortment reads at a glance. This reduces “visual search” time and makes the strip feel tidy, even when fully loaded. Color-blocking also photographs well for social posts and signage.
5) Use “laddering” to show good-better-best
Stack three related SKUs vertically: entry level at eye level, mid-tier just above, premium at the top. Customers scan from center out; the ladder layout makes trading up effortless while still offering a budget option.
6) Add QR codes for recipes, how-tos, or UGC
Attach a small header with a QR code linking to a 30-second recipe, a 3-step tutorial, or a customer photo gallery. This turns your clip strip into a micro-experience that justifies the impulse purchase and helps shoppers visualize the product in use.
7) Seasonal snap-ins you can swap in 30 seconds
Pre-build seasonal assortments in back room totes (Summer Sips, Tailgate Essentials, Holiday Stocking Stuffers). Because clip strips are portable, staff can swap a full strip for a fresh one without touching the shelf set. Keep a calendar so resets happen on time.
8) Dual-strip “halo” around a hero product
Frame a hero SKU with two clip strips on either side of the shelf section. Stock one strip with must-have accessories and the other with fun extras. The symmetrical layout draws attention to the centerpiece while tripling the attachment opportunities.
9) Micro-trial strategy for new items
Launching a new flavor or tool? Seed single-serve or trial sizes on a clip strip in the aisle where the parent category lives. Shoppers can sample without committing to a full-size unit, and you’ll get cleaner read-outs on which variants earn a permanent facing.
10) Planogram pressure valve
When you can’t add a shelf peg without chaos, the clip strip becomes your relief valve. Use it to hold overflow SKUs in the same family (extra scents, limited editions) without squeezing the core set. If a variant sells through quickly on the strip, consider promoting it into the main set.
11) Back-of-house efficiency: kitting, picking, and returns
Clip strips aren’t just for the sales floor. Use them in the stockroom to stage parts for BOPIS orders, organize tiny components, or triage returns by condition. Label the strip with day/date to speed audits and reduce misplacement.
12) A/B test positions and sequences
Run simple tests: left side vs. right side of the bay; top-heavy vs. bottom-heavy sequencing; signage vs. no signage. Track units sold and attachment rate for two weeks, then keep the winner in place. Your clip strip becomes a low-cost lab.
Simple signage that sells
Even the best clip strip needs a tiny nudge. Add a header card (3″ × 5″ is plenty) that finishes the sentence, “While you’re here…” Examples:
- “Don’t forget these!”
- “Complete the set”
- “Last-minute add-ons”
- “Pair with tonight’s dinner”
Use plain language and one clear benefit. Price callouts can help if the items are under a common threshold (e.g., “All under $5”).
Placement & compliance basics (so you never have to move it twice)
- Height & safety: Keep the lowest product above shin level and maintain aisle width. Avoid placements that create protrusions at head or shoulder height near tight corners.
- ADA & local rules: Maintain required clearances for aisles, doors, and POS lanes. If you’re near a cooler, ensure the clip strip doesn’t block handle use or door swing.
- Weight & sway: Heavier items high on the strip stabilize the hang. Use a secondary anchor if customers will frequently tug on the products.
- Housekeeping: Avoid clipping fragile packs or items that leak. If the product has a hang hole, prefer hooks over crushing clips.
How to choose what goes on the strip
Think in terms of attachment logic and packaging fit:
- Attachment logic: The item should solve a near-term need created by the main purchase. Batteries near electronics, travel bottles near skincare, seasoning packets near meat, cable ties near small appliances.
- Packaging fit: Carded, hang-tagged, or light poly-bags work best. Keep individual unit weight small; if the product is heavy, show fewer facings and reinforce the top anchor.
Inventory & replenishment that won’t slow your team down
- Facing counts: 6–12 units on a clip strip is typical. More than that looks messy unless your packaging is extremely slim.
- Backstock: Mirror what’s on the strip—if you carry 4 variants on the strip, keep at least one inner pack of each in the back room.
- Labels & min/max: Add a small label at the bottom clip that says “Reorder at 2 units.” Staff can restock while walking the floor without a handheld checklist.
Measure what matters (and keep what wins)
You don’t need fancy software to know whether a clip strip is working. Track:
- Units sold per week for the items on the strip
- Attachment rate (strip item sold with the nearest “parent” category item)
- Basket impact (average ring when the strip item appears on the receipt)
- Dwell cues (are people pausing and scanning the strip, or walking past it?)
Start with a two-week baseline, adjust one variable (position, assortment, or signage), then measure again for two weeks. Keep the winner, retire the loser, and document your learning in a quick playbook so the team can replicate the gains across stores.
Troubleshooting: why your clip strip might be underperforming
- Assortment mismatch: The add-ons don’t actually help with the main purchase. Swap to tighter complements.
- Visual clutter: Too many SKUs or inconsistent packaging sizes. Reduce variants and color-block.
- Wrong placement: If it’s hidden behind a swing door or at ankle height, it won’t convert. Move it higher and forward.
- No nudge: Add a header card or a price cue (“2 for $3”) so the value is unmistakable.
A repeatable workflow your team can run
- Identify the parent product and the most logical add-ons.
- Choose the right clip strip (material, mounting, capacity).
- Mock the layout on a table; ladder good-better-best or color-block.
- Print a small header with a simple callout or QR code.
- Hang, photograph, and date it for your records.
- Track for two weeks, then test one change and track again.
- Roll out the winners across similar locations.
The bottom line
Space will always be tight, but creativity is infinite. With a smart clip strip plan—right product, right place, right message—you can multiply your display capacity, elevate the shopping experience, and capture incremental sales that traditional fixtures leave on the table. Start with one bay and one goal (increase attachments, launch a new item, clean up overflow), then scale your best plays across the floor.
When every inch matters, a clip strip is more than a hanger—it’s a profit column. Hang one today, measure honestly, and make it your smallest big win of the quarter.