How to Create 3D Models for Printing: A Complete Beginner’s Guide
Creating 3D models for printing is a skill that any individual can acquire through learning. This process requires designing or generating a model using computer-aided design (CAD) software, validating its printability, exporting the design in an appropriate file format, and preparing it for 3D printing. The guide below provides a comprehensive overview and a breakdown of all the key steps involved in designing 3D printing models including a short overview of a new way of generating 3D models – using AI. After completing the guide, one will be able to create their own 3D printing models.
Choosing a 3D Modeling Software
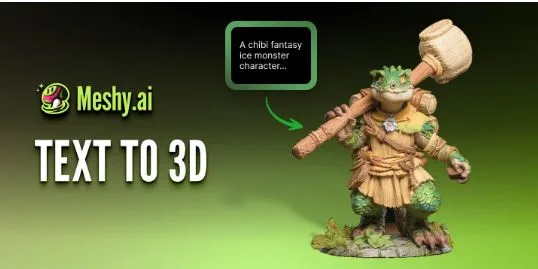
The first step is choosing the right design method. Tinkercad and Fusion 360 are CAD tools for dimension-driven design, while Blender is a polygonal modeling application. AI-based design offers another route: Meshy provides a free, browser-based workflow that supports both text-to-3D and image-to-3D without requiring an installation.
CAD software is well suited to designs that require exact dimensions. Tinkercad is a beginner-friendly browser CAD tool, while Fusion 360 supports more complex, dimension-driven work. For a faster creative workflow, users can generate a printable starting point with the Meshy AI from a written prompt, directly in the browser.
The complete guide to creating 3D printing models using CAD software
Regardless of which method one chooses to design a 3D printing model, the following steps are always undertaken:
Step 1: Come up with a concept and its intended use
The first step in designing a 3D printing model is to think of a concept and its intended use.
Step 2: Determine the approach to take when designing the model
Once a concept has been chosen, one has to decide which of the two approaches to take when designing the model. If one intends to use CAD software, they have to understand how to use the software. Alternatively, one can choose to use an AI-based design approach or a combination of the two.
Step 3: Generate a model using the chosen approach(es)
The next step is to use the chosen approach(es) to generate a model. In the case of CAD software, users have to use basic building blocks to generate a model. In the case of AI-based approaches, one has to provide the necessary prompts or input images to generate a 3D printing model.
Step 4: Check a 3D printing model for printability
Whether a model is created with CAD or AI, it should be checked for printability before slicing. AI-generated models may need a few quick adjustments, such as confirming scale and checking the mesh for holes or non-manifold geometry.
- Non-manifold geometry – This occurs when edges and vertices in a model are not properly connected; and
- Gaps – These are similar to non-manifold geometry but occur when edges and vertices are not connected.
Step 5: Export the model as an STL file
After a model has been checked for printability and the necessary repairs made, the model is then exported as an STL file.
Step 6: Prepare the model for printing
The last step is to prepare the model for printing. This step requires the following:
- Importing the model into a slicer software;
- Orienting the model appropriately;
- Setting the layer height, infill percentage and pattern; and
- Using a preview mode to make sure that everything is set correctly.
How to use an AI to generate a 3D printing model
AI-based approaches are increasingly being used to generate 3D printing models. AI-based approaches such as text to 3D and image to 3D enable one to generate a 3D printing model by simply providing a text prompt or by inputting an image into an AI image to 3D generator.
Although these approaches are quick and easy to use, it is important to remember the following:
- Confirm the model scale and dimensions before slicing;
- Run a quick mesh check for holes or non-manifold geometry; and
- Preview the sliced result and make any small printability adjustments.
As such, one should always remember to repair, decimate, hollow out, and scale a 3D model generated using an AI before printing.
How to repair and prepare an AI-generated 3D printing model for 3D printing
The following steps should be taken when repairing and preparing an AI-generated 3D printing model for 3D printing:
- Repairing a 3D model – The 3D model should be repaired using a 3D design software. Some AI software such as Meshy provide this option;
- Reducing the number of polygons – This step is important because it reduces the file size;
- Hollowing out a 3D model – This step is important to reduce the amount of material used during the 3D printing process;
- Scaling a 3D model – This step is important to ensure that the 3D printed model is the correct size; and
- Checking printability – This step ensures that a model is suitable for printing.
With the exception of the first step, the remaining steps are mostly automated.
How to make a 3D printing model using a web-based AI software without downloading anything
Use the Meshy text-to-3D tool to turn a written prompt into a 3D model in the browser. After generation, inspect the geometry, make any needed adjustments, and export the model as STL for slicer preparation.
How Meshy can be used to generate 3D printing models
Meshy is a great AI-powered 3D model generator that can be used with or without CAD software. It provides text-to-3D and image-to-3D features that can be used to generate 3D printing models. Meshy also has a range of export options that can be used to export 3D printing models as STL files for 3D printing. Meshy provides an ideal option for making the first 3D printing model. It can be used to make a 3D printing model of a decorative item or other object that does not require a high level of precision.
How to make a 3D printing model of a functional item (such as a bracket, gear, etc.)
High-precision mechanical parts such as brackets and gears are still best designed in CAD, where dimensions and tolerances can be controlled explicitly. AI tools such as Meshy are strongest for rapidly creating creative, decorative, and concept-driven forms that can then be checked and prepared for printing.
Design rules for 3D printing (such as minimum wall thickness)
A number of design rules should be followed when designing a 3D printing model. Some of the most important design rules include the following:
- Choose wall thickness for the material and process; for typical FDM projects, 0.8–1.2 mm is a practical starting range, while 0.5 mm may suit some SLA prints;
- Making sure that there is enough clearance. In most cases, there should be a clearance of between 0.2 mm and 0.5 mm;
- Avoiding overhangs and ensuring that if they are used, then supports are added; and
- Ensuring that a model is watertight.
Exporting a 3D model as an STL, OBJ, or 3MF file
A 3D model should be exported as an STL, OBJ, or 3MF file. STL files tend to be the easiest option but one should consider using 3MF files for more advanced applications. One should always make sure that the resolution is high enough to capture all of the intricate details in a 3D printing model.
Preparing a 3D model for 3D printing (using a slicer software)
A 3D model is prepared for 3D printing using a slicer software. The following steps should be taken when preparing a 3D model for 3D printing:
- Loading or importing a 3D model into a slicer software;
- Orienting the model correctly;
- Setting the layer height, infill percentage and pattern;
- Using a preview mode to make sure that everything is set correctly; and
- Printing the model.
Common mistakes that lead to failed prints (and how to avoid them)
The common mistakes that lead to failed prints include the following:
- Having non-manifold geometry – This flaw causes most 3D printing software to crash;
- Having thin walls in a 3D printing model;
- Forgetting to scale a model correctly;
- Having overhangs in a 3D printing model without supports; and
- Failing to do a test print before printing the final product.
Summary
From the guide above, it is evident that there are several steps that need to be taken when designing 3D printing models. Individuals who intend to design 3D printing models need to choose the most appropriate design approach. Those who intend to design very precise items should adopt the CAD design approach. Others can adopt AI-based approaches to 3D printing model design. Individuals should also make sure that they follow the various design rules and prepare a 3D printing model for printing using a slicer software.