How to Organize a Video Editing Project on Windows without Losing Media Files
You open a project you finished last month, and half the timeline shows a warning instead of your footage. Nothing is broken, and nothing has been deleted by the video editor. A folder was tidied up, a clip was renamed, or an external drive is no longer plugged in.
This happens because a project file does not contain your videos. It only knows where they were sitting when you imported them. That link is easy to break by accident and just as easy to protect. This guide explains how to set a project up so it stops happening, using Filmora Desktop Editor as the example.
Part 1. Understand the Difference Between a Project File and Source Media
A Filmora video editor project is saved as a .wfp file, and it is surprisingly small. That is because it stores your decisions rather than your footage. The two columns below show where the split falls:
| What the Project File Saves | What It Only Points To |
| Your cuts, trims, and the order of the clips | The original video files on your drive |
| Effects, transitions, and color settings | The images and graphics you placed |
| Titles and the words inside them | The music and voiceover recordings |
| Track layout and audio levels | Every imported file, by its name and location |
Filmora looks for each file by name and path, so moving it, renaming it, or unplugging the drive it lives on breaks the link. The edit itself is untouched, and the software simply cannot find what to play. Look into the official Filmora download page to give this tool a try.
Part 2. Create a Clear Project Folder Structure
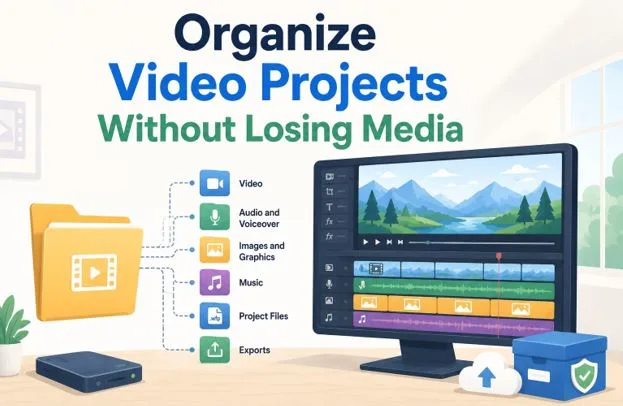
Since the link depends on file locations, the safest habit is to decide those locations once and leave them alone. Make one folder per project on your PC, then put these 6 folders inside it:
- Video: Your raw camera footage and screen recordings, copied off the memory card before you start.
- Audio and Voiceover: Recorded narration and any sound captured separately from the camera.
- Images and Graphics: Photos, logos, screenshots, and anything else that sits on screen as a still.
- Music: Background tracks, kept apart from voice so the two never get confused.
- Project Files: The .wfp files themselves, including every saved version.
- Exports: Finished videos, which keeps them out of the way of your source material.
Copy everything into these folders before importing, not afterward. Anything still sitting in a “Downloads” folder or on a memory card will break the moment it is cleared out.
Part 3. Name Files Before You Begin Editing
Camera files arrive with names such as “C0034.MP4,” which tell you nothing once 20 of them are sitting in the media panel. Renaming them to something descriptive, like “interview-wide-take2,” makes the whole edit faster to work through.
Renaming a file after it has been imported breaks the link exactly as moving it would, because Filmora for Windows is still looking for the old name. 5 minutes spent renaming before you start saves an hour of reconnecting files later.
Part 4. Save Filmora Project Versions Clearly
Saving over the same file every time leaves you no way back when a change turns out to be wrong. Use “Save As” at each significant stage and give the file a name that means something:
| File Name | What It Tells You |
| ProjectName_V01 | The first full assembly, kept even after you move past it |
| ProjectName_V02 | The next round of changes, saved so that V01 still exists |
| ProjectName_ClientNotes | A version built from someone else’s feedback |
| ProjectName_FinalReview | The cut you are ready to approve and export |
These files are tiny compared with your footage, so keeping several costs almost no disk space. It also means a corrupted project only sets you back to the previous version rather than to nothing.
Part 5. Archive the Filmora Project Before Moving It
Copying a .wfp file to another computer on its own will not work, because the media stays behind. The Filmora video editor has a feature that packages both together, and it takes 5 steps. To learn how editing is done across this platform, go through the Filmora editing guide for explicit details:
Step 1. Open the Project You Want to Move
Launch Filmora and open the project as normal. Everything needs to be present and playing correctly before you archive it.
Step 2. Choose File and Archive Project
Open the “File” menu and select “Archive Project.” The keyboard shortcut “Shift + Ctrl + A” does the same thing if you prefer.
Step 3. Pick Where the Archive Is Saved
Choose a location with enough free space, since the archive holds copies of your media as well as the project.
Step 4. Let Filmora Package Everything
Filmora gathers the project file and its source files into a single archived .wfp file. Larger projects take longer, so give it time to finish.
Step 5. Move It and Open It on the Other PC
Copy the archive across, then open it in Filmora on the second computer. Check that the timeline plays through with no warnings before you carry on editing.
Note: Archiving is also worth doing when a project is finished. It gives you one file holding the edit and everything it depends on.
Part 6. Relocate Missing Media When Files Have Already Moved
None of this helps with a project that is already broken, and those can usually be repaired in a couple of minutes.
What Filmora Shows You
Opening the project brings up a window listing the files it cannot find, with the locations it last saw them in. Choosing to ignore the warning takes you straight to the editor, where a red exclamation mark appears over the affected clips.
How to Reconnect the Files
Select a file from that list and use the locate option, which opens a browser window. Point it at where the file now lives and repeat for each remaining item. Press “OK” afterward to reopen the project with everything linked again.
Note: If a file has been permanently deleted, you can point Filmora at a replacement instead. It keeps the position and length in the timeline, so only the footage changes.
Conclusion
Backing up a project means backing up the media as well, not just the file you were editing. A tidy folder structure, sensible file names, and clear version numbers prevent most problems before they start. Archiving covers the rest, whether you are moving a project between machines or storing a finished one. Any reliable video editor for PC depends on the files underneath it staying where you left them.