How to Prepare Fonts for the Web Using a WebFont Generator
Typography is one of the most powerful design decisions you can make for a website. The right font shapes how visitors perceive your brand, how long they stay on a page, and whether they trust what they are reading. But there is a gap between choosing a font and actually deploying it correctly on the web. Many designers and developers download a font, drop it into their project, and wonder why it looks broken in certain browsers, loads slowly, or causes layout shifts on mobile.
The answer almost always comes down to format. Web fonts are not the same as desktop fonts, and serving them correctly requires a few specific steps. If you want to skip the manual work, the WebFont Generator handles the entire conversion process in the browser with no software installation required. This guide covers everything else you need to know about preparing fonts for the web the right way.
Why Web Fonts Are Not the Same as Desktop Fonts
When you install a font on your computer, it typically arrives as a .ttf (TrueType) or .otf (OpenType) file. These formats are designed for operating systems and applications like Photoshop, Word, or Figma. They work well in those environments because the software and OS handle rendering directly.
Browsers are a different story. They need fonts delivered in formats optimized for network transfer and fast rendering across a wide range of devices and connection speeds. Serving a raw .ttf or .otf file directly to a browser is technically possible, but it is rarely the best approach. The files are larger than they need to be, and compatibility across older browsers can be inconsistent.
Web-specific font formats were developed to solve this problem. The main ones you will encounter are:
WOFF2 (Web Open Font Format 2) is the current gold standard for web fonts. It uses Brotli compression, which makes files significantly smaller than .ttf equivalents, sometimes by 30 to 50 percent. All modern browsers support it, and it should always be your primary format.
WOFF (Web Open Font Format 1) is the predecessor to WOFF2. It uses zlib compression and is slightly larger, but it provides excellent fallback support for older browsers that do not yet support WOFF2. Including it in your font stack is good practice.
TTF can be used as a web font, but its lack of compression makes it heavier. It is sometimes included as a last-resort fallback for very old browsers or certain Android versions, but for most modern projects, you can skip it.
SVG fonts are largely obsolete. They were primarily used for early versions of iOS Safari and are not worth including in new projects.
EOT (Embedded OpenType) was Microsoft’s proprietary format for Internet Explorer. Unless you have a specific reason to support IE, you can ignore this format entirely.
For the vast majority of projects today, serving WOFF2 with a WOFF fallback is all you need.
Understanding the @font-face Rule
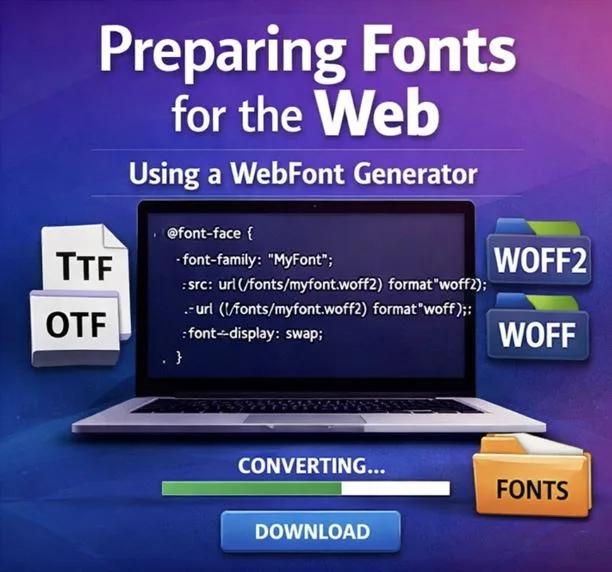
Before getting into conversion tools, it helps to understand how browsers actually load web fonts. The @font-face CSS rule is what tells the browser where to find your font files and how to use them. A typical declaration looks like this:
css
@font-face {
font-family: ‘YourFont’;
src: url(‘/fonts/yourfont.woff2’) format(‘woff2’),
url(‘/fonts/yourfont.woff’) format(‘woff’);
font-weight: normal;
font-style: normal;
font-display: swap;
}
A few things worth noting here. The src list is ordered by preference. The browser will try the first format it supports and skip the rest, which is why WOFF2 comes first. The font-display: swap property is important for performance. Without it, the browser may hold back rendering text until the font is fully loaded, which causes what is known as a Flash of Invisible Text (FOIT). Setting it to swap tells the browser to display a fallback font immediately and swap in your custom font once it is ready.
Writing this CSS from scratch every time is tedious, especially if you are dealing with multiple weights or styles. This is one of the key reasons a webfont generator is worth using.
Step-by-Step: Preparing Your Font for the Web
Here is the full process from start to finish.
Step 1: Start with a high-quality source file
Always begin with the original .ttf or .otf file from the font designer or foundry. Avoid converting a web font back into a source file, because each round-trip conversion can degrade quality. If you licensed a font, the download package from the foundry should include the desktop formats.
Step 2: Check your licensing
This step is easy to overlook but matters. Not all font licenses allow web embedding. Some fonts are licensed only for desktop use. Before deploying a font on a website, check that your license explicitly covers web use. Fonts downloaded from reputable free font platforms like Google Fonts are typically licensed under the Open Font License (OFL), which permits web use without restrictions.
Step 3: Consider subsetting
Font files often contain hundreds or thousands of characters covering multiple languages and special symbols. If your website only uses English, you do not need all of that. Subsetting is the process of stripping out characters you do not need, which can dramatically reduce file size. Many webfont generators include a subsetting option. Be careful not to subset too aggressively if your site serves multiple languages or uses special characters in headings or UI elements.
Step 4: Convert and download your web font files
Upload your source file and process it through a webfont generator. Download the output package, which should include your WOFF2 and WOFF files along with the generated CSS.
Step 5: Upload font files to your server
Create a /fonts directory in your project and place your converted font files there. Keep your file names consistent and lowercase, avoiding spaces. For example: inter-regular.woff2, inter-bold.woff2.
Step 6: Add the @font-face CSS to your stylesheet
Paste the generated CSS into your main stylesheet or a dedicated fonts stylesheet that is loaded early in your page. Make sure the file paths in the src attribute match where you actually placed the font files on your server.
Step 7: Apply the font in your styles
css
body {
font-family: ‘YourFont’, Arial, sans-serif;
}
Always specify system font fallbacks. If, for any reason, your web font fails to load, the browser needs a reasonable alternative to fall back on rather than defaulting to Times New Roman.
Performance Considerations
Font loading has a direct impact on page performance, and page performance affects both user experience and search rankings. A few practices worth following:
Limit the number of font weights you load. Each weight is a separate file and a separate HTTP request. Most sites can get by with two weights, a regular and a bold. Loading four or five weights adds unnecessary overhead.
Preload your primary font. Adding a preload hint in your HTML <head> tells the browser to fetch the font early, before it would normally discover it while parsing your CSS.
html
<link rel=”preload” href=”/fonts/yourfont.woff2″ as=”font” type=”font/woff2″ crossorigin>
Use font-display: swap consistently. Apply it to every @font-face declaration, not just your primary body font.
Serve fonts from a CDN if possible. A content delivery network reduces latency by serving files from a location close to the user. Many hosting providers include CDN functionality by default.
Self-Hosting vs. Google Fonts
Google Fonts is popular because it is free and easy to use. But self-hosting your fonts has real advantages that are worth considering.
From a privacy standpoint, Google Fonts loads files from Google’s servers, which means a third-party request is made every time a visitor loads your page. Under GDPR and similar regulations, this can be a compliance issue depending on your audience and jurisdiction. Self-hosting eliminates this.
From a performance standpoint, self-hosted fonts can actually be faster when served from a well-configured server or CDN, because you have full control over caching headers and compression. Google Fonts has improved significantly in recent years, but self-hosting removes the dependency on a third-party service entirely.
The main barrier to self-hosting has traditionally been the conversion and setup process. Once you have a reliable workflow in place, it takes only a few minutes per font family.
Common Mistakes and How to Avoid Them
Uploading a web font as your source file. If you grabbed a WOFF2 from a website and are trying to convert it into other formats, you are working backwards. Always start from the original desktop font file.
Forgetting font-display. This is one of the most common performance oversights. Add it to every @font-face rule.
Using too many font families. Mixing three or four different typefaces on a single site creates visual noise and increases load time. Stick to one or two font families and use weights and styles to create hierarchy.
Not testing across browsers. Even with WOFF2 and WOFF in place, always test your font rendering in Chrome, Firefox, Safari, and on mobile devices. Rendering can vary, especially on Windows vs. macOS, due to differences in font smoothing.
Ignoring file size. A single WOFF2 file for a display font can still be several hundred kilobytes if it contains full character sets. Check your file sizes and subset where appropriate.
Not Complicated but Logical
Getting web fonts right is not complicated once you understand the underlying logic. Choose the right formats, write clean @font-face CSS, optimize for performance, and always check your licensing. The steps are straightforward, but doing them manually every time is unnecessary work.
If you are launching a new site, migrating away from Google Fonts, or cleaning up a font setup that has gotten messy over time, https://font-converters.com/ has the tools to make the process faster and less error-prone. Typography deserves to be done properly, and with the right process in place, it does not have to be difficult.