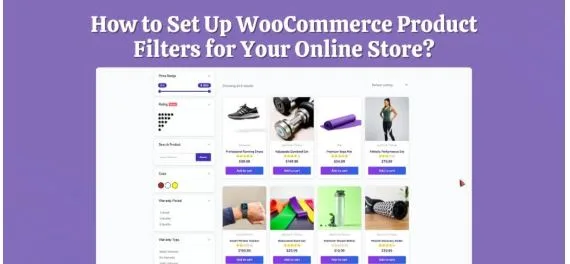
How to Set Up WooCommerce Product Filters for Your Online Store?
Finding the right product in an online store should feel simple. Yet many customers leave when they can’t quickly sort through dozens of items. Without proper filtering, browsing turns into frustration, and sales opportunities slip away. So, how can you set up WooCommerce product filters that help shoppers find exactly what they need?
You can easily do it by installing a WooCommerce product filter plugin and enabling options like category, price range, color, and rating filters. Once activated, these filters appear on your shop or category pages, allowing customers to refine results instantly without endless scrolling or confusion.
In this guide, you’ll learn step-by-step how to set up WooCommerce product filters for your online store, from installation to customization. Keep reading to find out how better filtering can make your store easier to navigate and more profitable.
How to Set Up WooCommerce Product Filters for Your Online Store?
Setting up product filters in WooCommerce doesn’t require coding knowledge or complex customization. With the right tools, you can let shoppers quickly refine their searches by category, color, price, or rating, all without reloading the page. Here’s a simple step-by-step process to set up your product filters properly:
Step 1: Prepare Your Store for Filtering
Before adding filters, make sure your products are well-organized. Assign categories, tags, and attributes such as color, size, or brand. These elements form the base for your filters. The more structured your product data, the better your filters will perform.
Step 2: Install a Product Filter Plugin
Go to your WordPress dashboard and go to Plugins → Add New. Search for a plugin that supports AJAX product filters for WooCommerce. For the hassle-free installation and setup purpose, we’ve picked the Dymainc Ajax Product Filters plugin.
Click Install Now, then Activate once the installation completes. After activation, you’ll see a new settings section under your WooCommerce menu.
If you’ve purchased the Pro version of WooCommerce, download the ZIP file from your account dashboard. Then go to Plugins → Add New → Upload Plugin, upload the ZIP file, and click Install Now followed by Activate.
Enter your license key to unlock advanced features and automatic updates.
Step 2: Access the Filter Widget
To add filters, go to Dashboard → Appearance → Widgets or edit your store page directly, depending on your theme. Click Add Block and look for the Dynamic AJAX Filter widget.
If you’re using a page builder like Elementor or WPBakery, you can access the same widget from their element lists.
For greater flexibility, you can insert filters anywhere on your site using a shortcode. Just paste the following code into any page, post, or template section: [[plugincy_filters]].
Step 4: Select the Filter Types
Next, choose what kind of filters you want to display. Go to Dashboard → Products, then select the filter options you want, like Category, Price, Size, Color, Tag, or Brand
Make sure your products include these attributes. For instance, if you want a size filter, confirm that each product already has size data under its attributes tab.
Step 5: Manage and Enable Filters
Go to Dashboard → Product Filters → Form Manager. Here, you’ll find all available filter types. Toggle on the filters you want to display on your store, such as category, attributes, or tags.
Click Save Changes once done. Your filters will now appear on your storefront.
Step 6: Customize the Filter Widget Design
For visual styling, head to Dashboard → Product Filters → Form Style. From the Select Attribute dropdown, choose a filter to style. Then select how it should appear: a checkbox, color swatch, dropdown, or image-based filter.
Adjust spacing, layout, and colors to match your theme, then click Save to apply your design.
Step 7: Configure SEO and Permalink Settings
To make your filters SEO-friendly, go to Dashboard → Product Filters → SEO & Permalink Setup. Enable the “Use Attribute Type in Permalinks” option.
If you’re using permalink-based filtering, also turn on the “Make Filter Links Indexable” option, which allows search engines to crawl your filtered URLs for better visibility.
Step 8: Backup or Export Your Filter Settings
Once everything looks good, save your configuration as a backup. Go to Dashboard → Product Filters → Advanced Settings →Import & Export Settings. Download your setup as a JSON file for future use.
If you ever need to restore your filters or transfer them to another site, use the “Import Settings” option to upload the same file.
Once everything is configured, visit your shop page and test the filters. If products update instantly without page reloads, your WooCommerce Product Filters are working perfectly, creating a smoother, faster shopping experience for customers.
Types of Product Filters You Can Add
WooCommerce allows you to combine different kinds of product filters to create a smoother shopping experience. Each filter serves a specific purpose, helping users find what they want faster while improving navigation and conversions. Below are the most useful types you can set up in your store.
Category Filters
Category filters let shoppers browse products based on defined categories such as clothing, electronics, accessories, or home essentials. This type of filter helps simplify the browsing process, especially in stores with multiple product ranges. It creates a clear, structured path that guides customers directly to their area of interest.
Price Range Filters
A price filter gives customers control over their budget. Whether through sliders or preset ranges, it allows users to instantly limit results to items within their spending range. It’s an essential feature for any eCommerce store because it makes decision-making faster and avoids overwhelming customers with products beyond their price comfort zone.
Attribute Filters
Attribute filters use specific product characteristics like color, size, material, or brand. They’re particularly helpful for stores selling clothing, shoes, or furniture where shoppers prefer to refine options quickly. These filters allow for precise sorting and ensure customers only see the variants that match what they’re looking for.
Rating Filters
Customers often rely on social proof before making a purchase. Rating filters allow shoppers to sort products by customer reviews or star ratings, highlighting the most trusted and popular items first. This filter not only builds credibility but also improves user engagement by showcasing the top-rated products more prominently.
Stock or Availability Filters
Stock filters show customers which products are currently available and hide those that are out of stock. This small yet effective feature prevents disappointment and helps maintain a positive experience. For stores with frequently changing inventory, it’s a great way to display only what can actually be purchased right now.
Discount or Offer Filters
If your store runs promotions or clearance events, discount filters are essential. They allow shoppers to view only sale or discounted items with a single click. This helps increase visibility for special offers while keeping bargain-hunters engaged, especially during holidays or limited-time sales.
Custom Tag or Brand Filters
Custom tag or brand filters help shoppers explore items based on specific tags or preferred brands. They’re ideal for stores with diverse collections or returning customers who trust certain brands. This feature makes navigation more personal and encourages brand loyalty while keeping browsing effortless.
Fixing Common Installation and Setup Issues
Even with a straightforward setup process, some issues can appear when installing or configuring product filters. These are usually easy to fix once you know where to look. Below are some of the most common installation and setup problems you might face and how to solve them quickly.
Filters Not Appearing on the Shop Page
If your filters don’t show up after installation, double-check that the widget or block is placed correctly. Go to Dashboard → Appearance → Widgets or your page builder editor to confirm the filter block is added to the sidebar or shop page section. Also, ensure your product attributes are set and linked properly.
Filters Not Updating Products in Real-Time
When filters don’t refresh instantly, AJAX functionality might be disabled. Go to Dashboard → Product Filters → Settings, and make sure Enable AJAX Filtering is turned on. Clear your site cache after saving changes. This ensures your AJAX product filters for WooCommerce update results smoothly without reloading the page.
Theme or CSS Layout Conflicts
If the filters appear broken or misplaced, your theme’s CSS might be conflicting with the filter plugin styles. Try switching temporarily to a default WooCommerce theme like Storefront to test. If that fixes it, adjust spacing, padding, or container settings in your custom theme’s CSS or filter plugin’s styling panel.
Filter Options Not Matching Product Attributes
Sometimes, filters don’t show the correct options because product attributes weren’t configured properly. Go to Dashboard → Products → Attributes, and ensure each attribute (color, size, etc.) has values assigned to the products. Without this connection, filters can’t display accurate or relevant options to shoppers.
Slow or Laggy Filter Performance
When filters take too long to load, the cause is usually heavy scripts, large product databases, or unoptimized caching. Use a caching plugin, optimize images, and disable unnecessary plugins. Lightweight themes and properly configured AJAX product filters for WooCommerce can greatly improve page speed and user experience.
Filters Not Working on Mobile Devices
Filters that malfunction on mobile devices often result from layout or responsive design issues. In your page builder or customizer, preview the shop page on smaller screens. Adjust filter placement or switch to collapsible menus for smoother browsing. Always re-test after making layout updates.
Plugin Activation or License Errors
If the plugin doesn’t activate or keeps asking for a license key, confirm you installed the correct version—free or pro. Re-enter the license key in Dashboard → Product Filters → License, and ensure your website URL matches the license details. Contact plugin support if reactivation doesn’t resolve it.
Filters Not Saving or Resetting Settings
Unsaved or resetting filter settings are commonly linked to browser cache or plugin permission issues. Log out and back in, then navigate to Dashboard → Product Filters → Form Manager to reapply your configurations. Click Save Changes and refresh the shop page to ensure all updates are active.
Advanced Filter Management Tips for Growing WooCommerce Stores
As your WooCommerce store grows, filter management becomes more about strategy than setup. The goal is to keep performance smooth, data structured, and navigation effortless for shoppers. Here are some smart ways to manage your product filters as your catalog expands and customer expectations rise.
Regularly Audit Product Attributes
Over time, new products, categories, and variations can clutter your filter options. Review your product attributes periodically to remove duplicates or outdated values. Keeping only relevant attributes ensures that your filters remain accurate, simple to use, and aligned with how customers actually browse your store.
Monitor Filter Analytics
Analytics reveal how shoppers interact with your filters. Identify which filters get the most clicks or drive conversions, and remove those that don’t add value. Understanding user behavior helps refine the order, type, and visibility of filters—making them more effective and user-focused.
Optimize Filter Logic and Hierarchies
Organizing filters in a logical sequence helps customers navigate faster. For example, start with broad categories, then narrow down to specifics like brand or price. A clean hierarchy avoids overwhelming users with too many options at once and creates a smoother, more intuitive browsing experience.
Use Conditional or Dynamic Filters
Conditional filters adapt to what customers are viewing, showing only the options that make sense. For instance, display “size” for apparel but “storage” for electronics. This keeps your filter panel relevant to each product type and reduces visual clutter for your visitors.
Update Filter Styles for Promotions
Refreshing your filter layout during sales or seasonal events adds visual appeal. Highlight special categories like “New Arrivals” or “On Sale” to guide attention. Subtle design changes can make your filters feel timely and encourage shoppers to explore trending or limited-time products.
Rebuild Cache and Optimize Performance
As your store traffic grows, caching and optimization become vital. Regularly clear the old cache and compress the database files to maintain speed. When combined with AJAX product filters for WooCommerce, this ensures your filters load instantly, even with thousands of products.
Test Filters After Major Updates
Plugin or theme updates can occasionally disrupt how filters behave. After every major update, run a quick test to make sure filters still appear correctly and update results instantly. Small checks like this prevent downtime and keep the shopping experience consistent.
Automate Backups and Configuration Exports
Backing up your filter settings regularly saves time during unexpected issues. Export your current filter configurations so you can restore them easily if changes cause problems later. It’s a simple precaution that protects your work and keeps your store running smoothly.
Concluding Lines
Product filters do more than just organize your store; they shape how people shop. A good filtering system turns endless scrolling into focused discovery, helping customers reach what they want faster and with less effort.
Learning how to set up WooCommerce product filters for your online store is one of the most impactful steps you can take toward improving user experience. Once filters are in place, they make navigation smoother, reduce frustration, and subtly guide customers toward checkout.
Whether your store sells fashion, electronics, or handmade goods, maintaining fast, accurate, and intuitive filters will always pay off. Keep refining them as your catalog grows because every click that saves a customer’s time increases the chance they’ll come back for more.