How to Use a Heat Press for Custom T-Shirt Printing
Custom t-shirt printing has become a popular way to express creativity, promote brands, and celebrate special occasions. Among the various methods available, using a heat press stands out for its efficiency, professional results, and versatility. Whether you’re a hobbyist or running a small business, mastering the heat press technique can open up endless possibilities for garment decoration. In this guide, we’ll walk you through the essential steps, share tips for success, and briefly discuss how the dtf printer fits into the modern t-shirt printing workflow.
What Is a Heat Press?
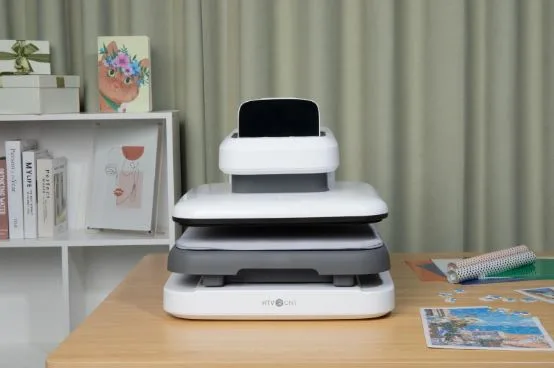
A heat press is a machine designed to transfer designs, graphics, or text onto t-shirts and other fabrics using heat and pressure. Unlike traditional ironing, a heat press ensures even temperature and pressure, resulting in durable and vibrant prints. The process works with various transfer materials, such as vinyl, sublimation paper, and transfer films.
Essential Equipment and Materials
Before starting, gather the following:
- Heat press machine
- Blank t-shirts (preferably 100% cotton or polyester blends)
- Transfer material (e.g., heat transfer vinyl, sublimation paper, or DTF transfers)
- Weeding tools (for vinyl)
- Protective sheets (such as Teflon or parchment paper)
- Scissors or cutting machine (for shaping designs)
If you’re using designs printed with a dtf printer, you’ll also need DTF transfer films and adhesive powder. The dtf printer allows you to print full-color images onto a special film, which is then transferred to the t-shirt using the heat press.
Step-by-Step Guide to Using a Heat Press
1. Prepare Your Design
Start by creating or selecting your design. You can use graphic design software to craft custom artwork or download ready-made designs. If you’re working with heat transfer vinyl, cut your design using a cutting machine and weed out excess material. For DTF transfers, print your design onto the DTF film using a dtf printer and apply adhesive powder before curing.
2. Set Up the Heat Press
Plug in your heat press and allow it to preheat. The temperature and time settings depend on the type of transfer material you’re using:
- Heat transfer vinyl: 150–160°C (302–320°F) for 10–15 seconds
- Sublimation: 190–200°C (374–392°F) for 40–60 seconds
- DTF transfers: 160–170°C (320–338°F) for 15–20 seconds
Always refer to the manufacturer’s instructions for precise settings.
3. Position the T-Shirt
Lay your t-shirt flat on the lower platen of the heat press. Smooth out any wrinkles to ensure even transfer. Use a lint roller if necessary to remove dust and debris.
4. Place the Transfer
Carefully position your transfer material (vinyl, sublimation paper, or DTF film) on the t-shirt. Make sure the design is centered and aligned. Cover the transfer with a protective sheet to prevent sticking and ensure even heat distribution.
5. Apply Heat and Pressure
Lower the upper platen and lock it in place. The heat press will apply the set temperature and pressure for the specified time. Once the timer goes off, lift the platen and remove the protective sheet.
6. Peel and Finish
Depending on the transfer type, you may need to peel the backing while hot or wait until it cools. Follow the instructions for your specific material. Once peeled, inspect the print for any imperfections. If necessary, repress for a few seconds to improve adhesion.
Tips for Successful Heat Press Printing
- Test before mass production: Always run a test print to check settings and quality.
- Use quality blanks: The fabric quality affects the final result. Choose t-shirts designed for printing.
- Maintain your heat press: Regularly clean the platens and check for consistent temperature.
- Handle DTF transfers carefully: If using a dtf printer for your designs, ensure the adhesive powder is evenly applied and the film is properly cured before pressing.
Common Mistakes to Avoid
- Incorrect temperature or time: Can result in poor adhesion or faded prints.
- Uneven pressure: May cause incomplete transfers or patchy designs.
- Skipping pre-pressing: Not pre-pressing the garment to remove moisture can affect the transfer quality.
The Role of DTF Printer in T-Shirt Printing
While the heat press is the essential tool for transferring designs onto garments, the dtf printer has revolutionized how designs are created. DTF (Direct-to-Film) printing allows for vibrant, full-color images to be printed onto a film, which can then be transferred to almost any fabric using a heat press. This method is especially popular for complex or multi-color designs that are difficult to achieve with vinyl or traditional screen printing.
By combining a dtf printer with a heat press, you can offer customers a wider range of customization options, from simple logos to intricate artwork. The workflow is straightforward: print your design with the dtf printer, prepare the transfer, and finish the process with the heat press for a professional look.
Conclusion
Learning how to use a heat press for custom t-shirt printing opens up a world of creative and business opportunities. With the right equipment, attention to detail, and a bit of practice, you can produce high-quality, durable prints that stand out. As technology evolves, integrating new tools like the dtf printer can further enhance your capabilities and help you meet diverse customer needs. Whether you’re printing for fun or profit, mastering the heat press is a valuable skill in the world of custom apparel.


