How to Use Sound Dampening Panels to Elevate Your Home Design
If your home looks beautiful but sounds chaotic—echoey hallways, clattering kitchens, or a living room that turns movie night into a muddle—you’re not alone. Modern, open layouts and hard finishes amplify noise. The fix isn’t to hide under heavy drapes or carpet every square inch. A smarter, design-forward solution is sound dampening panels. Today’s panels don’t just hush a space; they can double as wall art, headboards, room dividers, and architectural accents. Here’s how to use sound dampening panels to improve your acoustics and your aesthetic at the same time.
What Are Sound Dampening Panels?
Sound dampening panels—often called acoustic or sound-absorbing panels—are materials designed to reduce reverberation (echo) by absorbing sound waves. Think of them as “soft surfaces with purpose.” They don’t block sound entirely like heavy insulation or specialized doors, but they dramatically improve clarity inside a room. Panels can be mounted on walls or ceilings, freestanding as screens, or integrated into furniture. Core materials vary (more on that below), but the goal is consistent: tame reflections so voices, music, and everyday sounds feel clear and comfortable.
How Panels Elevate Your Design (Not Just Your Acoustics)
Great acoustics change how a room feels. Design-wise, panels offer benefits beyond hush:
- Visual rhythm: Arrange panels in grids, chevrons, or staggered patterns to add structure and balance to large walls.
- Color blocking: Use contrasting colors to define zones in open plans—think dining vs. lounge—without adding walls.
- Texture and depth: Felt, wood slats, and fabric-wrapped options add dimension, making minimalist rooms feel richer.
- Statement pieces: Oversized panels or sculptural baffles can be the focal point you’ve been missing.
Types & Materials: Pick the Right Look and Performance
Choosing the right sound dampening panels starts with matching material to style and function.
1) Fabric-wrapped fiberglass or foam
- Look: Clean, tailored, available in hundreds of colors.
- Best for: Media rooms, offices, bedrooms.
- Pros: Excellent performance; easy to create gallery-wall arrangements.
- Style tip: Use two or three complementary fabric tones to echo your rug, sofa, or artwork.
2) Felt (wool or PET)
- Look: Soft, matte texture; available as tiles, hexagons, and sculpted forms.
- Best for: Open-plan living, playrooms, hallways.
- Pros: Durable, tactile, and often made from recycled materials; great for pinning notes in offices.
- Style tip: Mix thicknesses or relief patterns to create subtle shadows and a custom feel.
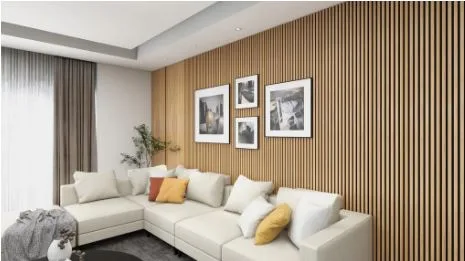
3) Wood slat (acoustic slat panels)
- Look: Modern, warm, and architectural—black felt backing with vertical or horizontal wood slats.
- Best for: Living rooms, dining rooms, entryways.
- Pros: Combines texture, warmth, and sound absorption; easy to run floor-to-ceiling.
- Style tip: Run slats vertically to “lift” low ceilings, or horizontally to elongate a wall.
4) Perforated wood/MDF with acoustic backing
- Look: Sleek, built-in millwork aesthetic.
- Best for: Statement walls and built-in cabinetry.
- Pros: High-end appearance; can hide wiring for sconces or LED strips.
- Style tip: Paint to match wall color for a quiet, integrated look.
5) Ceiling baffles and clouds
- Look: Floating forms that bring sculpture to your ceiling.
- Best for: Loft living rooms, kitchens with lots of hard surfaces.
- Pros: Attacks echo at the source (ceiling reflections); frees up wall space.
- Style tip: Align baffles with your island or dining table for a custom, intentional layout.
Where to Place Panels for Maximum Impact
You don’t need to cover every surface. Place panels where they’ll make the biggest difference.
Start with first reflection points. Sit where you normally talk or watch TV. The walls and ceiling you can see in a handheld mirror from that seat are key reflection points. Place panels there to reduce echo and improve clarity.
Treat parallel surfaces. Long hallways, narrow rooms, and rooms with big, opposing hard walls create flutter echo. A few panels on one side (or staggered along both) will break that ping-pong effect.
Don’t forget the ceiling. Even a couple of ceiling clouds over a dining table or sofa can transform conversation and reduce clatter.
Balance the room. If you add panels only behind the sofa, the room can feel lopsided. Distribute absorption across different surfaces to keep the sound—and the look—balanced.
Aim for coverage, not blanket coverage. As a rule of thumb, treating 15–30% of a typical living room’s hard surface area can yield a noticeable improvement without over-deadening the space.
Style & Customization Tips
- Match your palette: Pick two anchor colors (walls/furniture) and one accent color for your panels. This keeps the composition cohesive.
- Vary size and spacing: Combine large rectangles with smaller squares for a curated gallery-wall vibe. Maintain consistent gaps (e.g., 1–2 inches) for a professional finish.
- Frame it out: Add thin wood trim or create a “panel field” inside a painted rectangle to make budget panels look bespoke.
- Blend or contrast: For a minimalist look, match wall color. For drama, contrast with bold tones or a different material (e.g., walnut slats on white walls).
- Light it well: Wash panels with soft wall sconces or LED grazers to emphasize texture and patterns without glare.
Room-by-Room Ideas
Living Room
- Problem: TV dialogue is muddy; open-plan echo from kitchen.
- Fix: Two to four fabric panels at first reflection points, plus a wood-slat feature behind the TV. If ceilings are high, add two small clouds over the seating area.
- Design lift: Choose slats that echo your coffee table wood tone and fabric panels that pick up accent colors from cushions.
Dining Room
- Problem: Loud dinners, clinking plates.
- Fix: A ceiling cloud centered over the table and a felt tile composition on the longest wall.
- Design lift: Repeat tile shapes (hexagons, diamonds) to mirror your pendant geometry.
Bedroom
- Problem: Street noise reflections and early-morning echo.
- Fix: A fabric-upholstered headboard wall (or a panel “headboard” spanning the width of the bed) plus two panels on the ceiling above the foot of the bed to quiet reflections.
- Design lift: Choose a tone-on-tone palette for a calming, boutique-hotel feel.
Home Office
- Problem: Zoom call echo; fatiguing sound.
- Fix: Panels behind and to the side of your chair, plus a felt pinboard above the desk.
- Design lift: Color-block panels to frame your camera background—professional and intentional.
Kids’ Playroom
- Problem: High-energy noise.
- Fix: Durable felt tiles installed low on the wall and a few ceiling baffles.
- Design lift: Mix playful colors but keep a consistent pattern so it reads as design, not just noise control.
Hallways & Entry
- Problem: Footstep echo, “boomy” feel.
- Fix: Narrow slat panels or staggered felt pieces along one side.
- Design lift: Use panels to visually lead guests toward focal points (art, mirrors, or the living area).
DIY vs. Professional Installation
DIY works well for peel-and-stick felt tiles, small fabric panels, and modular slat panels with mounting cleats. Measure carefully, use a level, and plan your grid before sticking anything to the wall. For ceilings, ensure anchors match ceiling material and weight ratings.
Professional installation is worth it for:
- Large, heavy panels or ceiling clouds
- Custom millwork (perforated wood, built-ins)
- Complex layouts requiring precise alignment or integrated lighting
If you’re unsure, start with a small area you can DIY, then scale up with pro help if needed.
Common Mistakes to Avoid
- All absorption, no balance: Over-treating can make rooms feel flat. Mix in rugs, bookshelves, and even a few diffusers (sculptural surfaces that scatter sound).
- Ignoring the ceiling: It’s often the biggest reflective surface. One or two ceiling elements can do more than six wall panels.
- Random placement: A handful of panels in random spots won’t help much. Target reflection zones and parallel surfaces.
- Tiny panels on huge walls: Scale matters. Larger rooms need larger panels or grouped arrays.
Budget & Maintenance Tips
- Start small: Address the worst reflection points first, listen for improvement, then add more as needed.
- Mix materials: Use budget felt tiles in secondary areas and splurge on a statement slat wall where it counts.
- Buy modular: Panels you can add to over time protect your budget and let you tweak the design as your space evolves.
- Care: Vacuum felt and fabric on low suction; wipe wood slats with a soft, dry cloth. Rotate or rearrange panels occasionally to minimize sun fade.
Quick FAQs
Do sound dampening panels block noise from neighbors?
Not fully. Panels absorb reflections inside your room. To block outside noise, you’d need soundproofing measures like mass-loaded barriers, sealed doors, or double-stud walls. Panels still help by making the noise you do hear less echoey and easier to ignore.
How many panels do I need?
It depends on room size and surfaces. Start with roughly 15–20% of the wall/ceiling area in highly reflective rooms (lots of glass, tile, and drywall), then add more if voices still sound “live.”
Will they ruin my aesthetic?
Not if you choose wisely. Today’s sound dampening panels come in refined fabrics, rich wood slats, and sculptural felt forms that act like art or architecture.
Can I move them later?
Yes. Look for panels mounted on cleats or with removable adhesive. Heavier panels should be screwed into studs or proper anchors for safety.
Bringing It All Together
Design isn’t just what you see—it’s what you hear. By placing sound dampening panels thoughtfully at reflection points, scaling them to your room, and selecting materials that suit your style, you’ll improve clarity, reduce fatigue, and add visual richness. Start with a simple plan—two or three key surfaces, a coherent color story, and consistent spacing—and expand as you listen. Your home will look better, sound better, and feel better.