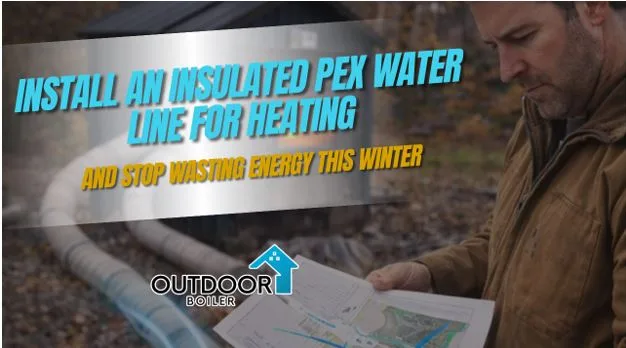
Install an Insulated PEX Water Line for Heating and Stop Wasting Energy This Winter
There’s something satisfying about walking barefoot on a warm floor in January while snow piles up outside. If you’re connecting an outdoor wood boiler to your home or setting up a radiant heating system, installing an insulated PEX water line correctly means keeping that heat where it belongs instead of warming up the ground between your boiler and house. We’re walking through the planning, trenching, and connections that make the difference between an efficient system and one that bleeds BTUs into the dirt.
Planning Your Route and Choosing the Right Pipe
Start by mapping the shortest reasonable path from your heat source to the building. Each added foot of pipe is another chance to lose heat, even with the best insulation. Never make sharp turns, which could cause stress to the line and possible future failure points.
For heating applications like outdoor boilers or hydronic systems, oxygen barrier PEX is not negotiable. Regular PEX allows oxygen to pass through the pipe walls, and once it does that, you’re looking at corroding pumps, heat exchangers, and any other metal parts of your system. 1″ PEX is still sufficient for most residential runs up to 150 or 200 feet with acceptable flow rates and friction loss.
Trenching Deep Enough to Avoid Frost and Damage
Dig your trench 18 to 24 inches deep as a baseline. This holds the line below the frost line in the majority of area which, excluding already-frozen grounds and pile control to prevent land surface activities, such as landscaping or light vehicle traffic. If you must go underneath a driveway, make sure to take the pipe down at least 4 feet under the frost line, or run it through a PVC sleeve to protect against weight.
Ferret out a nice, flat bed at the bottom of your trench. Throw away any rocks or other junk that might poke through the insulation jacket, causing a pressure point on the pipe. A blanket of sand offers superior cushioning, and it will help you collapse the well somehow during backfill.
Need specifics on burial depth for your area? Read our detailed guide on how deep to bury insulated PEX.
Installing Pre-Insulated PEX the Right Way
Pre-insulated PEX with a waterproof outer casing and radiant barrier keeps heat loss under 1 degree per 100 feet. That performance is impossible to match by wrapping bare pipe with foam sleeves after the fact. The factory-applied insulation is consistent, sealed, and built to last underground for decades.
Unroll the line slowly into the trench. PEX has memory and will try to return to its coiled shape if you let it. Forcing tight bends or kinking the pipe compromises both the tubing and the insulation layer. Take your time and let the pipe relax into position naturally.
Making Connections That Don’t Leak
Use a proper PEX pipe cutter for clean, square cuts. Jagged or non-square cuts cause fittings not to seat properly and eventually leak; often this can take several hours under full pressure/temperature use for the leaks to appear. Brass or good-quality plastic fittings with copper crimp rings or steel cinch clamps are ideal for making strong connections.
On crimps, check each connection with a go/no-go gauge. This basic instrument assures the crimp is tight enough to seal, but not so tight that it crushes the pipe. Failure to complete this step and just hoping for the best is how you find yourself digging up a trench six months later , trying to locate the leak.
Running Lines Through Foundations and Walls
The insulation needs to extend all the way through footings and into the building. You’d better believe that any opening with bare pipe is nothing but a cold spot for moisture to condense on and heat to be lost. For seal penetrations with expanding foam and/or proper caulking to reduce air penetration and more energy loss.
Inside the building, transition carefully to your distribution system. Whether you’re feeding baseboard loops, a radiant manifold, or a heat exchanger, maintain the oxygen barrier specification on all tubing. Switching to standard PEX inside defeats the corrosion protection you paid for outside.
Pressure Testing Before You Bury Anything
Pressurize the entire system before backfilling the trench. Run your boiler pumps at full operating pressure and walk the entire line looking for leaks at fittings, joints, and anywhere the pipe was cut or stressed during installation. Finding a leak now takes five minutes to fix. Finding it after backfilling takes a full day and a lot of unnecessary digging.
Let the system hold pressure for at least an hour. Small leaks sometimes take time to show themselves, especially at fittings that look fine but weren’t crimped quite right. If pressure drops, you’ve got a leak somewhere. Find it and fix it before moving dirt.
Backfilling Without Damaging Your Work
Start with another layer of sand or screened soil directly over the pipe. This protects the insulation from any rocks that may trickle down as the soil settles. Hand tamp or lightly pack with a tamper the first 6 inches of fill.
Fill the remainder of the trench in lifts, compacting every 8 to 12 inches. Dumping all the soil back into place at once and driving on top of it with heavy equipment compact the pipe and can crack the insulation jacket. Take the extra hour to do it correctly or you will have problems later.
Why OutdoorBoiler.com Stocks the Right Components
Pre-insulated PEX isn’t all created equal. The cheap stuff uses thin insulation that compresses easily and outer jackets that split when you look at them wrong. OutdoorBoiler.com carries lines built for high temperature hydronic applications, not residential cold water plumbing.
Their fittings, crimping tools, and pressure testing equipment match the quality of the pipe. You’re not mixing and matching components from three different suppliers and hoping they play nice together. Everything is spec’d for wood boiler temperatures and pressures from day one.
Frequently Asked Questions
What size PEX do I need for my heating system?
One inch PEX handles most residential runs up to 200 feet efficiently.
How deep should I bury insulated PEX?
Eighteen to 24 inches deep for standard installations, 4 feet under driveways.
Do I need oxygen barrier PEX for heating?
Yes, it prevents corrosion of metal components in your system.
Can I use regular PEX with foam insulation instead?
You can, but heat loss will be significantly higher than factory insulated lines.
How do I test for leaks before backfilling?
Pressurize the system to operating pressure and inspect all connections for an hour.
Get Your Heating Lines Installed Right
The difference between a heating system that works great and one that disappoints comes down to installation quality. Proper planning, the right materials, and careful execution mean decades of reliable service with minimal heat loss. Head over to OutdoorBoiler.com to source pre-insulated PEX, quality fittings, and the tools you need to do the job once and do it right.