Low Volume PCB Assembly: How Startups Should Move from Prototype to Production
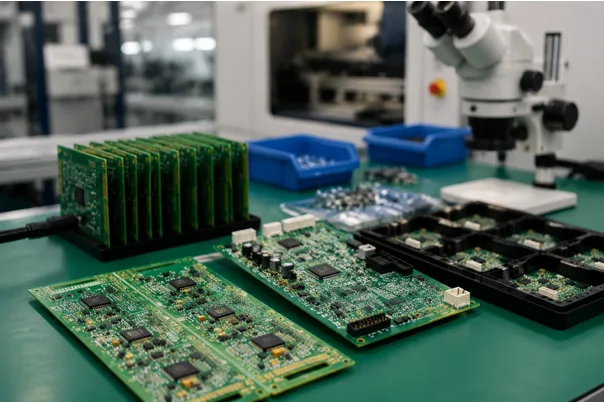
If you’ve ever celebrated a working prototype only to realize your PCB assembly manufacturer can’t scale past 50 units without doubling the per-board price, you’re not alone. The gap between a hand-built prototype and a repeatable production process is where most hardware startups lose time, money, and momentum.
Prototype assembly is forgiving. A prototype shop can hand-place components, tweak solder profiles, and work with partial stencils. But when you need 200 or 500 boards that all work the same way, the rules change. The assembly process must be standardized, the BOM must be locked, and the testing strategy must be automated.
This guide walks through exactly how to transition from prototype to low volume PCB assembly.
What Is Low Volume PCB Assembly?
Low volume PCB assembly typically refers to production runs between 50 and 1,000 units. It’s the stage between prototype validation and full-scale manufacturing—often called New Product Introduction (NPI).
At this volume, the assembly process shifts from flexible, manually-assisted prototyping to
automated, repeatable production. The same SMT pick-and-place machines that run
million-unit orders also run low volume batches, but the setup cost per board is higher because the NRE (non-recurring engineering) costs are spread over fewer units.
| Volume Tier | Typical Quantity | Primary Goal | Assembly Approach |
| Prototype | 1–50 | Design validation | Manual /
semi-automated |
| Low Volume | 50–1,000 | Market seeding, beta testing | Fully automated SMT |
| Mid Volume | 1,000–10,000 | Production ramp | Automated + panelization |
| High Volume | 10,000+ | Mass production | Fully optimized lines |
Prototype Assembly vs. Low Volume Assembly: What Changes
Moving from prototype to low volume production isn’t just about ordering more boards. The entire manufacturing approach changes.
Process Differences
| Factor | Prototype Assembly | Low Volume Assembly |
| Stencil | Prototype stencil (laser-cut) | Production stencil (laser-cut, framed) |
| Solder Paste | Manual or semi-auto printing | Automated stencil printer with 3D SPI |
| Component Placement | Partial manual + P&P for fine-pitch | Full automated P&P with vision alignment |
| Reflow | Batch oven or manual hot plate | Forced-convection reflow oven with profiling |
| Inspection | Visual inspection only | AOI + X-ray (for BGA/QFN) |
| Testing | Bench testing, no fixtures | ICT or functional test with fixtures |
| Documentation | Minimal (Gerbers + BOM) | Full fab drawing, assembly drawing, test spec |
| Lead Time | 2–5 days | 5–15 days |
When Are You Ready for Low Volume Production?
Moving too early wastes money on boards that still need design changes. Moving too late delays customer delivery and market feedback. Here are the signals that indicate you’re ready.
Readiness Checklist
| Signal | Why It Matters |
| Design validated through 3+ prototype iterations | Confirms the circuit works and no major schematic changes remain |
| BOM locked with full MPNs | No “TBD” or “alternative acceptable” lines |
| All components tested for availability | Lead times confirmed, no end-of-life parts on the BOM |
| DFM feedback incorporated | Pad geometry, solder mask, and clearance issues addressed |
| Thermal profile validated | Board doesn’t overheat at expected operating conditions |
| Beta customers or pre-orders confirmed | Real demand exists beyond your own testing |
| Certifications in progress (FCC, CE, UL) | Compliance requirements identified and budgeted |
If you can check at least 6 of these 7 signals, you’re ready to move from prototype to low volume.
The Cost Structure of Low Volume PCB Assembly
Understanding the cost drivers at low volume is critical for budgeting and pricing your product correctly.
NRE Costs (One-Time, Per Order)
| Cost Item | Typical Range | Notes |
| Stencil | $30–$80 | Laser-cut stainless steel, framed |
| P&P Programming | $50–$150 | Machine file generation from centroid data |
| AOI Program | $30–$80 | Inspection program based on CAD data |
| Cost Item | Typical Range | Notes |
| First Article Inspection (FAI) | $50–$200 | Full measurement and inspection of first unit |
| ICT Fixture (if needed) | $200–$800 | Custom fixture for in-circuit testing |
| Functional Test Fixture (if needed) | $300–$1,500 | Custom fixture for functional validation |
Per-Unit Costs
The per-unit price at low volume is driven by three factors: component cost, assembly labor, and NRE amortization.
| Volume | Component Cost Impact | Assembly Cost per Board | NRE per Board | Total Estimated Range (2-layer, ~50 components) |
| 10 units | No discount, may pay premium | $15–$40 | $15–$50 | $30–$90 |
| 100 units | Minimal bulk discount | $8–$20 | $10–$25 | |
| $1.50–$5.00 | ||||
| 500 units | Moderate bulk discount | $4–$10 | $0.30–$1. 00 | $5–$11 |
| 1,000
units |
Good bulk discount | $3–$7 | $0.15–$0. 50 | $4–$8 |
The key insight: at 100 units, NRE costs can account for 15–30% of the total price. At 500 units, that drops below 10%. Your pricing to customers should be based on your actual cost at your target volume, not a markup on prototype pricing.
Panelization: The Cheapest Way to Reduce Cost
One of the most effective cost-saving strategies for low volume assembly is panelization—grouping multiple copies of your board into a single panel that goes through the assembly line together.
Why Panelization Saves Money
A pick-and-place machine places components at a fixed rate, typically 15,000 to 30,000 components per hour. The time it takes to load a panel, register it, and place components is
roughly the same whether the panel contains 1 board or 10 boards.
| Scenario | Boards per Panel | Panels to Run | Total Machine Time | Assembly Cost Estimate |
| Single board | 1 | 500 | ~3 hours | ~$1,000 |
| Panelized (5-up) | 5 | 100 | ~40 minutes | ~$400 |
| Panelized (10-up) | 10 | 50 | ~25 minutes | ~$300 |
Panelization Guidelines
- Keep panel size under 250 mm × 300 mm (standard SMT line limit)
- Add tooling holes at 3 mm diameter on opposite corners
- Use V-scoring or tab-routing for depanelization
- Include fiducials on both the panel and individual boards
- Maintain 5 mm clear space around each board for routing
Turnkey vs. Consignment: Which Model Fits Startups?
At low volume, the choice between turnkey and consignment assembly has a significant impact on your workload, cash flow, and risk.
| Factor | Turnkey | Consignment |
| Who sources components | Manufacturer | You |
| Component cost | Manufacturer’s negotiated pricing | Your pricing (unless you have a distributor account) |
| Risk of missing parts | Manufacturer manages | You manage lead times and shortages |
| Shipping logistics | Single shipment for everything | You ship parts to assembler separately |
| Best for | Most startups | Established companies with existing supplier relationships |
| Lead time impact | Faster (manufacturer coordinates) | Slower (you coordinate multiple suppliers) |
For most hardware startups, turnkey assembly is the better choice. A good turnkey manufacturer uses authorized distributor relationships to source components at competitive prices and manages the supply chain coordination that would otherwise distract you from
product development.
Common Mistakes Startups Make
Mistake 1: Designing for Prototype, Not Production
Prototype PCBs often skip features that make assembly reliable at volume: solder mask dams between fine-pitch pads, thermal relief on ground-connected pads, and fiducial marks for machine vision alignment. These omissions don’t matter for hand-soldered prototypes but cause defects in automated assembly.
Fix: Run a DFM review specifically for production volume before ordering your low volume run.
Mistake 2: Keeping the Same BOM from Prototype
The components you used for ten prototype boards may not be practical for 500 boards. Perhaps a resistor had a 20-week lead time, or a connector was only available in minimum packs of 100. BOM optimization for availability should happen before, not during, production.
Fix: Review every component for lead time, MOQ, and lifecycle status before committing to production BOM.
Mistake 3: Skipping Panelization
Paying for 500 individual board placements when you could run 50 panels of 10 boards means paying 10× the machine time. This is the single easiest cost reduction most startups miss.
Fix: Work with your manufacturer to panelize your design. Most provide free panelization assistance during the DFM review.
Mistake 4: Underestimating Lead Times
If you send your Gerber files on Monday expecting boards by Friday at low volume, you’ll be disappointed. The added steps—stencil ordering, programming, FAI, automated inspection—push lead times to 10–20 days for most low volume runs.
Fix: Plan for 3-week lead times on your first production run. As you and your manufacturer establish process familiarity, this will compress.
Mistake 5: Not Qualifying Your Manufacturer
Not every PCB assembly manufacturer is set up for low volume production. Some only take orders above 1,000 units. Others are optimized for fast-turn prototypes and lack the quality systems for repeatable production.
Fix: Ask potential manufacturers about their low volume experience, their testing capabilities, and their process for handling BOM changes between runs. For a more comprehensive evaluation of the framework for assembly partners, please refer to the guide on how to select
the right PCB assembly manufacturer.
FAQ
What’s the minimum quantity for low volume PCB assembly?
Most manufacturers accept orders as low as 10–50 units for low volume runs, though some specialize in prototype quantities (1–10 units) separately. The key distinction is whether the assembler uses the same automated SMT process for your small run as they do for larger production. If they do, you benefit from the same quality standards even at low quantities. Many manufacturers offer no-minimum order policies for low volume assembly, making it accessible for startups.
How much does low volume PCB assembly cost per board?
For a typical 2-layer board with 50–100 components, expect 8–20 per board at 100 units and 4–10 per board at 500 units. This includes SMT assembly, basic testing, and component costs. NRE fees (stencil, programming, FAI) add 150–500 per order regardless of quantity. The per-unit price drops significantly as volume increases because fixed costs are spread over more boards.
What’s the typical lead time for low volume PCB assembly?
Standard lead times for low volume PCB assembly range from 10–20 business days. This includes 2–3 days for DFM review and quoting, 5–7 days for component procurement (if using turnkey), 2–3 days for stencil fabrication and SMT programming, and 2–4 days for assembly and testing. Quick-turn services can compress this to 5–7 days for a premium. Plan your first production run with at least 3 weeks of lead time.
Should I use turnkey or consignment assembly for low volume?
Turnkey assembly is strongly recommended for startups at low volume. The manufacturer manages component sourcing, handles supplier relationships, and coordinates logistics—reducing your workload and risk. Consignment makes sense only if you already have established distributor relationships or if you’re using specialized components that are difficult for the manufacturer to source. Most startups find that turnkey reduces their total cost when factoring in procurement labor and shipping fees.
How do I prepare my design for low volume production?
Run a Design for Manufacturing (DFM) review specifically targeting production considerations: add fiducial marks for automated optical alignment, ensure solder mask dams exist between fine-pitch pads, incorporate thermal relief on large copper pours, and verify that component clearances meet your assembler’s specifications. If you haven’t already, panelize your design to reduce per-unit assembly cost. Work with your manufacturer’s engineering team to catch issues before the production run.
What testing should I expect for low volume PCB assembly?
At minimum, low volume runs should include AOI (automated optical inspection) and functional testing. X-ray inspection is recommended if your design includes BGA or QFN components with hidden solder joints. In-circuit testing (ICT) is valuable if your board has accessible test points and you plan to scale to higher volumes. Some manufacturers include basic testing in their standard pricing, while others charge per test method.
How do I handle component shortages at low volume?
Component shortages are common at low volume because distributors prioritize large customers. Mitigation strategies include working with a turnkey manufacturer that has existing distributor relationships, identifying drop-in alternative components before production, ordering buffer stock (10–20% over BOM quantity) for critical components, and using an assembler’s in-stock component library to substitute standard parts. The earlier you lock your BOM and confirm availability, the fewer surprises you’ll face.
What certifications should a low volume PCB assembly manufacturer have?
ISO 9001:2015 is the minimum quality certification for any production-ready assembly manufacturer. For medical devices, ISO 13485 is required. For automotive, IATF 16949. For aerospace and defense, AS9100D. IPC-A-610 Class 2 or Class 3 compliance demonstrates that the manufacturer meets industry-accepted quality standards for electronic assemblies. These certifications ensure that the manufacturer follows documented processes and maintains quality records—essential for repeatable production.
Conclusion
In conclusion, whether you’re looking to test your first PCB design or refine an existing one, a Low Volume Assembly service like PCBAndAssembly is the perfect solution. By providing fast turnarounds, top-quality services, and expert guidance, PCBAndAssembly ensures that your designs are assembled correctly and efficiently. If you need to bring your PCB design to life, PCBAndAssembly should be at the top of your list. Start your project today with PCBAndAssembly to experience the speed, quality, and expertise that will help you succeed.