Moving Into a New Home? Plumbing Inspection Checklist
Moving into a new home is exciting. Fresh walls, new spaces, and a sense of beginning again.
But before furniture arrives, before paint touch-ups, and before you settle into daily life, there is one hidden system that determines whether your first few months are peaceful or filled with surprise repairs:
The plumbing system.
Most homeowners check flooring, paint, doors, windows, cabinets, and appliances. Very few perform a structured plumbing inspection. That’s exactly why leaks, slow drains, sewer smells, poor water pressure, and aging pipes often reveal themselves after move-in — when repairs are inconvenient and expensive.
This detailed plumbing inspection checklist walks you through every part of the house, step by step, so you can identify problems before they become damage.
Why Plumbing Inspection Before Move-In Is Critical
Plumbing problems are some of the most expensive issues in a home because they:
- Hide inside walls, floors, and ceilings
- Cause structural damage before becoming visible
- Lead to mold growth
- Increase water bills silently
- Damage cabinets, flooring, and drywall
- Turn into emergencies without warning
A slow drip today can become a ceiling collapse in a few weeks.
A proper inspection gives you control, clarity, and peace of mind.
Step 1: Start Outside the House
Before entering, the exterior already tells a story.
Locate the Main Water Shut-Off Valve
Find where the water line enters the house or the curb valve near the street.
Check that:
- The valve turns smoothly
- There is no heavy rust or corrosion
- It can fully shut off water
If this fails during an emergency, you cannot stop flooding.
Inspect Outdoor Hose Bibs (Spigots)
Turn them on and off.
Look for:
- Dripping after closing
- Rust around threads
- Weak water flow
This often signals pipe wear inside the wall.
Look for Constantly Wet Soil
If one patch of lawn is always damp or greener than the rest, it may indicate an underground supply line leak.
Examine the Foundation
White powder stains (efflorescence), damp marks, or discoloration can indicate hidden plumbing leaks inside.
Step 2: Perform the Water Meter Leak Test
This is one of the most powerful tests you can do.
- Turn off all faucets and water-using appliances.
- Locate the water meter.
- Watch the small leak indicator dial.
If it moves, water is escaping somewhere in the house.
This test requires no tools and reveals hidden leaks instantly.
Step 3: Inspect the Kitchen Plumbing
The kitchen uses more water than any room.
Under the Sink
Open the cabinet and use a flashlight.
Look for:
- Swollen wood from past leaks
- Moldy smell
- Active drips at the P-trap
- Corrosion on pipe joints
Check the Faucet
Turn hot and cold water on fully.
Watch for:
- Leaks at the base
- Low pressure
- Delayed hot water
Garbage Disposal
Run it with water flowing.
Listen for:
- Grinding sounds
- Rattling
- Leaks underneath
Dishwasher Line
Check the water supply hose and drain line under the sink for moisture and loose connections.
Step 4: Bathroom Plumbing Inspection (Do This in Every Bathroom)
Bathrooms expose plumbing issues quickly.
Toilet Base
Check around the bottom for stains or softness in the floor. This indicates wax ring failure.
Flush multiple times. The tank should stop running quickly.
Sink Drain Test
Fill the sink and release it.
If draining is slow, there is buildup in the pipe.
Shower and Tub
Run hot water for several minutes.
Check for:
- Pressure consistency
- Temperature stability
- Leaks from the shower arm
- Drips from the tub spout
Overflow Plate Test
Fill the tub halfway and watch the wall behind (if accessible). This is where hidden leaks often occur.
Step 5: Check Water Pressure Across the Home
Open multiple faucets at once.
Healthy plumbing maintains steady pressure.
If pressure drops significantly, there may be:
- Pipe scaling
- Partial blockages
- Undersized pipes
- Aging galvanized lines
Step 6: Inspect the Water Heater
The water heater is the core of the hot water system.
Check:
- Manufacturing date (older than 8–10 years is a warning sign)
- Rust around the bottom seam
- Dripping from the temperature pressure relief pipe
- Proper venting (for gas heaters)
- Presence of an expansion tank
A failing heater often leaks suddenly.
Step 7: Laundry Area Inspection
Look behind the washing machine.
Check:
- Hot and cold valves for drips
- Drain pipe for secure fit
- Signs of water behind or under the machine
Run a short rinse cycle to ensure proper draining.
Step 8: Basement, Crawlspace, or Mechanical Area
This is where many problems are visible.
Inspect exposed pipes for:
- Green corrosion on copper
- White crust from slow leaks
- Loose pipe supports
Floor Drain Test
Pour water into it.
If you smell sewer gas, the trap may be dry or cracked.
Sump Pump Test (if present)
Lift the float to make sure it activates.
Step 9: Test All Drains for Speed and Sound
Gurgling means venting issues.
Slow draining means partial blockages.
Test:
- All sinks
- Bathtubs
- Showers
- Utility sink
Drainage should be smooth and quiet.
Step 10: Look for Hidden Wall and Ceiling Signs
Examine ceilings and walls carefully.
Look for:
- Bubbling paint
- Stains
- Soft drywall
- Musty smell
These indicate long-term hidden leaks.
Step 11: Identify the Type of Pipes in the Home
This tells you the lifespan of the system.
| Pipe Type | Lifespan | Risk |
| Copper | 50+ years | Low |
| PEX | 40+ years | Low |
| CPVC | 25–40 years | Medium |
| Galvanized Steel | 20–40 years | High |
| Polybutylene | Failure history | Very High |
If you see galvanized or polybutylene pipes, replacement should be planned.
Step 12: Watch for Sewer Line Warning Signs
Sewer repairs are among the most expensive.
Watch for:
- Multiple drains backing up
- Toilet bubbling when sink drains
- Sewage smell in yard
- Slow drains throughout the house
A sewer camera inspection is worth considering before closing.
Step 13: Test All Shut-Off Valves
Every sink and toilet should have a working shut-off valve.
Turn them gently to ensure they move.
Frozen valves create disaster during leaks.
Step 14: Check Hot Water Consistency
Hot water should arrive in reasonable time and stay steady.
Fluctuations indicate:
- Sediment buildup
- Pressure balance issues
- Heater problems
Step 15: Listen to the House
After testing everything, turn off all water and walk through the house quietly.
You should not hear:
- Dripping
- Running water
- Hissing in walls
Silence is a good sign.
When to Call a Professional Before Moving In
If you notice:
- Low pressure everywhere
- Corroded pipes
- Sewer smells
- Water heater rust
- Persistent slow drains
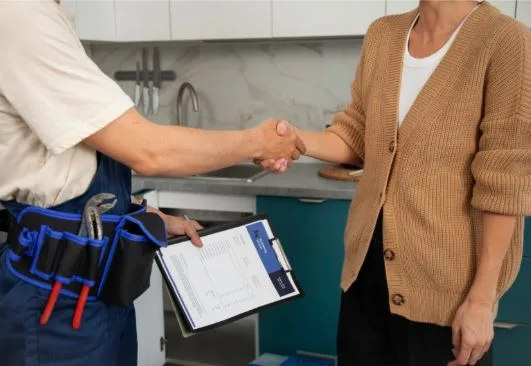
This is the time to call professionals like 24 hour plumbers before move-in, not after damage occurs.
Quick Plumbing Inspection Summary
Outside
- Main shutoff works
- No wet soil
- Hose bibs don’t leak
Kitchen
- No cabinet swelling
- Faucet and disposal working
Bathrooms
- Toilets firm
- Drains fast
- Shower pressure steady
Water Heater
- Under 10 years
- No rust
- No dripping
Basement/Crawlspace
- Pipes clean
- Floor drain odor-free
- Sump pump works
Whole House
- Strong pressure
- Quiet drains
- No wall or ceiling stains
Final Thoughts
A plumbing inspection is not about finding faults.
It’s about understanding the condition of the most important system in the home before you rely on it daily.
Thirty minutes of careful checking can save thousands of dollars, prevent mold, avoid structural damage, and give you complete peace of mind when you step into your new home for the first time.
Before the couch goes in.
Before the boxes arrive.
Before the first night’s sleep.
Run this checklist.
Your future self will thank you.