Pumpkin Carving Night Before Christmas: A Practical Guide to Crafting Festive Pumpkin Lanterns
A pumpkin carving night before christmas is a creative way to extend pumpkin carving beyond Halloween and adapt it for the holiday season. Instead of focusing on novelty or decoration alone, this guide is designed to help customers understand how to carve pumpkin lanterns safely, efficiently, and with clean results using the right carving tools. Whether you are working alone or with family, the goal is to create stable, well-lit pumpkin lanterns that fit naturally into Christmas décor.
This article focuses on practical carving techniques, tool selection, and small design adjustments that make pumpkin lanterns suitable for winter displays.
Choosing the Right Pumpkin for Carving
Successful carving starts with the right pumpkin. For lanterns, choose pumpkins with thick walls and a flat base so they sit securely on tables or floors. Medium-sized pumpkins are easier to control than very large ones, especially for beginners.
Inspect the surface before starting. Avoid pumpkins with deep ridges or soft spots, as uneven surfaces make controlled carving more difficult. Clean the exterior with a dry cloth to remove dirt, which helps tools move more smoothly during carving.
Essential Carving Tools and Workspace Setup
Using appropriate carving tools improves both safety and results. Basic pumpkin carving tools include a sturdy carving knife, a small scoop, fine-point carving blades, and a marker for outlining designs. For customers who want cleaner lines or repeated patterns, electric or air-powered tools can be helpful when used correctly.
Set up your workspace with good lighting and a stable surface. Place a non-slip mat or damp cloth under the pumpkin to prevent movement. Always carve away from your hands and take breaks to avoid fatigue, especially during longer carving sessions.
Preparing the Pumpkin for a Lantern Design
Begin by cutting an opening at the top or bottom of the pumpkin. Remove all seeds and loose pulp, then scrape the inner walls until they are evenly thinned. A wall thickness of about 1.5 to 2 centimeters allows light to pass through while keeping the structure strong.
Use a washable marker or paper stencil to outline your design. For Christmas-themed lanterns, simple shapes such as stars, snowflakes, or geometric cutouts are easier to execute and hold their shape longer than highly detailed images.
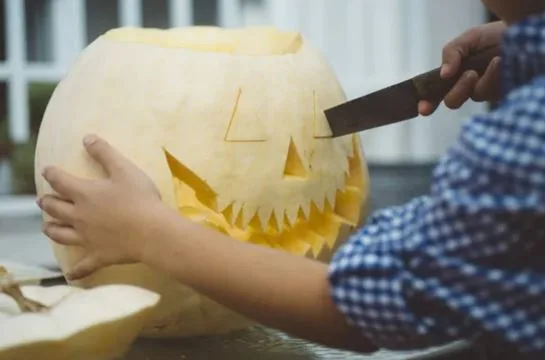
Carving Clean Lines and Controlled Openings
When carving, patience is more important than speed. Make shallow guide cuts first, then deepen them gradually. This reduces cracking and allows more control over the final shape. Rotate the pumpkin instead of your wrist to maintain steady pressure and consistent angles.
For customers familiar with detailed carving work, a pneumatic engraving machine can be used for precise cutouts or surface detailing. When working with pumpkins, use low air pressure and minimal depth to avoid tearing the flesh. This type of tool is best suited for simple patterns rather than complex relief carving.
Adding Simple Metal Accents for Holiday Displays
For customers who want to extend their pumpkin lanterns into Christmas décor, small metal accessories can be added carefully. Thin metal shapes such as stars or tags can be engraved using a pneumatic engraver on low settings. The goal is not deep engraving, but clean surface marks that reflect light.
Once completed, these metal pieces can be attached with thin wire or string and hung near pumpkin openings or placed nearby on a Christmas tree. When combined with internal LED lights, the engraved metal catches and reflects light, adding additional points of brightness without interfering with the pumpkin structure. This method allows carved pumpkins to visually connect with other holiday decorations.
Lighting the Pumpkin Lantern Safely
Lighting is a critical part of pumpkin lantern carving. Battery-powered LED candles or string lights are recommended, especially for indoor use. They produce consistent light, do not generate heat, and last longer than traditional candles.
Place the light source so it illuminates the carved areas evenly. If using string lights, secure the battery pack outside the pumpkin to avoid moisture buildup. Test the lighting before final placement to ensure visibility and balance.
Maintaining Pumpkin Lanterns During the Season
Pumpkins carved in December are exposed to colder temperatures, which can help preserve them. However, indoor heating can dry them out quickly. Lightly mist the interior with water every few days and store unused lanterns in a cool place overnight when possible.
Avoid stacking pumpkins or placing weight on carved areas. Structural integrity is important for both safety and appearance.
A Practical Seasonal Craft
A pumpkin carving night before christmas does not require advanced artistic skills or excessive materials. With proper preparation, the right carving tools, and careful lighting choices, customers can create functional pumpkin lanterns that fit naturally into holiday settings.
By focusing on clean carving techniques and controlled decoration, pumpkin lanterns become more than temporary displays. They become reliable seasonal crafts that combine practical skill with festive purpose.