Ultimate Guide to Vlogging Light Kits
Creating compelling vlogs requires more than just a great camera and interesting content. Proper lighting can transform amateur footage into professional-quality videos that captivate your audience. Whether you’re filming in your bedroom, a studio, or on location, the right vlogging light kit makes all the difference in how your content is perceived. Poor lighting can make even the most engaging personality appear washed out or shadowy, while good lighting enhances skin tones, creates depth, and ensures viewers focus on your message rather than technical distractions.
This comprehensive guide walks you through everything you need to know about vlogging light kits. From understanding why lighting matters to selecting equipment that fits your budget and style, you’ll discover practical solutions for elevating your video quality. We’ll explore different lighting types, setup techniques, and maintenance tips that help you achieve consistent, professional results. By the end, you’ll have the knowledge to make informed decisions about your lighting setup and create videos that stand out in today’s competitive content landscape.
Understanding the Importance of Lighting in Vlogging
Why Lighting Matters
Lighting serves as the foundation of visual storytelling in vlogging. It determines how viewers perceive you and your content, influencing whether they stay engaged or click away. Good lighting establishes mood, directs attention to your face and expressions, and conveys professionalism that builds trust with your audience. When you invest time in proper lighting, you’re essentially controlling how your story is told visually. It separates casual smartphone videos from content that commands respect and grows followings. Without adequate lighting, even the most expensive cameras struggle to deliver clear, vibrant footage that keeps viewers watching.
Impact on Video Quality
The technical impact of lighting extends beyond aesthetics into measurable quality improvements. Proper illumination reduces digital noise and grain that plague poorly lit videos, allowing your camera to capture sharper details and richer colors. It eliminates harsh shadows that distort facial features and creates the flattering, dimensional look that professional content creators achieve. Well-lit footage also performs better during editing, giving you greater flexibility with color grading and corrections. Your camera’s autofocus works more reliably in good lighting conditions, ensuring you stay sharp throughout your recording. These technical advantages compound to create videos that appear polished and intentional rather than hastily produced.
Types of Lighting for Vlogging
Natural vs. Artificial Lighting
Natural light from windows offers a free, flattering option that many vloggers leverage successfully. It provides soft, diffused illumination that’s gentle on skin tones and creates an authentic atmosphere. However, natural light changes throughout the day and varies with weather conditions, making consistency challenging. Artificial lighting gives you complete control over your environment regardless of time or location. You can film at midnight with the same quality as noon, maintain identical setups across multiple sessions, and adjust intensity to match your creative vision. Most successful vloggers combine both approaches, using window light as a base and supplementing with artificial sources to fill shadows and maintain consistency.
Specialized Lighting for Vlogging
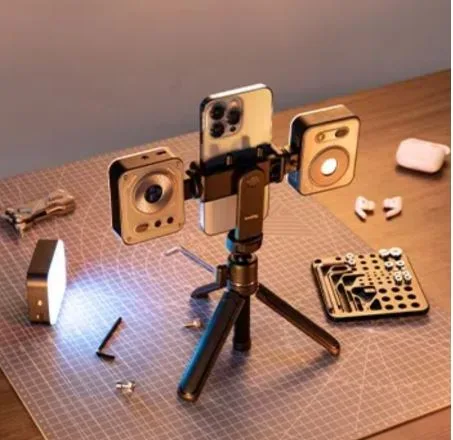
Ring lights have become synonymous with vlogging, creating the distinctive circular catchlight in eyes while providing even, shadowless illumination perfect for close-up talking-head shots. Panel lights offer broader coverage with adjustable color temperature, making them versatile for various shooting scenarios and larger spaces. Softbox lights diffuse harsh illumination through fabric panels, producing the flattering, professional look seen in high-end productions. LED stick lights provide portable, flexible options that mount on cameras or hide in tight spaces. Each specialized light serves different purposes, and understanding their strengths helps you build a kit that adapts to your specific content style and filming environments.
Choosing the Right Light Kit
Factors to Consider
Your filming environment dictates much of your lighting needs. Small spaces require compact setups with lower wattage to avoid overexposure, while larger rooms demand more powerful lights with wider coverage. Consider your content style—beauty and makeup vloggers benefit from ring lights that eliminate shadows, whereas interview-style content works better with three-point lighting setups. Portability matters if you film in multiple locations; lightweight LED panels and battery-powered options provide flexibility without sacrificing quality. Color temperature adjustability lets you match ambient lighting or create specific moods, making it essential for versatile creators. Finally, assess your power requirements and available outlets, as some professional setups demand significant electrical capacity that home circuits may struggle to provide.
Budget-Friendly Options
Entry-level vloggers can achieve professional results without breaking the bank by prioritizing smart purchases. Start with a single adjustable LED panel that offers dimming and color temperature control, providing maximum versatility for your investment. Clamp lights with daylight bulbs from hardware stores create effective DIY solutions when paired with white bedsheets as diffusers. USB-powered ring lights offer affordable, portable options perfect for desk setups and travel vlogging. Instead of expensive light stands, repurpose photography tripods or build simple PVC pipe stands for a fraction of the cost. Focus on one quality key light first, then gradually expand your kit as your channel grows and specific needs emerge through experience.
Setting Up Your Light Kit
Basic Setup
Position your key light at a 45-degree angle from your face, slightly above eye level, to create natural-looking dimension and minimize unflattering shadows. Place it about three to five feet away, adjusting distance to control intensity without changing your camera settings. Add a fill light on the opposite side at lower intensity to soften shadows created by the key light, maintaining a ratio where the key light remains noticeably brighter. Position yourself at least three feet from your background to prevent harsh shadows from appearing behind you. Test your setup by recording a short clip and checking for hotspots on your forehead or nose, adjusting light angles and distances until you achieve even, flattering coverage across your face.
Advanced Techniques
Implement three-point lighting by adding a backlight positioned behind you, aimed at your shoulders and hair to create separation from the background and add professional depth. Experiment with color temperature mixing, using warmer tones for your key light and cooler tones for fill to create visual interest and dimension. Employ negative fill by placing black fabric or foam boards opposite your key light to deepen shadows intentionally for dramatic effect. Create practical lighting by incorporating visible lamps or string lights in your frame that serve both as set decoration and supplementary illumination. Adjust your light heights throughout recordings to account for standing versus sitting positions, maintaining consistent angles relative to your face rather than fixed positions in the room. Mounting accessories from manufacturers like SmallRig can help you position lights more precisely and create stable configurations that remain consistent across multiple recording sessions.
Maintenance and Troubleshooting
Keeping Your Lights Clean
Dust accumulation on light surfaces reduces output intensity and creates uneven illumination patterns that degrade your video quality over time. Power off and unplug lights completely before cleaning, allowing bulbs and panels to cool for at least fifteen minutes to prevent burns or damage. Use a soft microfiber cloth to gently wipe LED panels and bulb surfaces, avoiding harsh chemicals that can damage protective coatings or diffusion materials. Clean softbox fabric by removing it from frames and hand-washing with mild detergent, ensuring it’s completely dry before reassembly to prevent mold growth. Inspect electrical connections and cables monthly for fraying or loose contacts that could cause flickering or safety hazards, replacing damaged components immediately to maintain reliable performance.
Common Issues and Solutions
Flickering lights typically indicate incompatible dimmer switches, loose power connections, or interference from other electronics—try plugging into different outlets or using power conditioners to stabilize voltage. Color temperature inconsistencies between lights create unnatural skin tones; verify all lights match the same Kelvin rating or use your camera’s custom white balance to compensate for mixed lighting. Overheating causes automatic shutdowns in LED panels; ensure adequate ventilation around lights and reduce intensity during long recording sessions to prevent thermal protection activation. Uneven lighting across your face suggests incorrect positioning or insufficient diffusion; move lights farther away and add diffusion materials like white shower curtains to soften harsh shadows. If lights fail to power on, check fuses in the units themselves before assuming complete failure, as replaceable fuses often blow before internal components sustain damage.
Elevate Your Vlogging with Professional Lighting
Mastering vlogging lighting transforms your content from amateur recordings into professional productions that attract and retain viewers. The investment in a proper light kit pays dividends through improved video quality, consistent results, and the creative control needed to express your unique vision. Whether you start with budget-friendly options or invest in comprehensive setups, understanding photography lighting principles ensures you maximize every piece of equipment you acquire. Remember that lighting is a skill developed through experimentation—test different positions, intensities, and combinations until you discover what works best for your face, space, and content style.
As you implement the techniques covered in this guide, your confidence will grow alongside your technical capabilities. Regular maintenance keeps your equipment performing optimally, while troubleshooting knowledge prevents technical issues from disrupting your creative flow. The lighting setup that works today will evolve as your channel grows and your needs change, so remain open to adjustments and upgrades that serve your expanding vision. With proper lighting as your foundation, you’re equipped to create vlogs that stand out in crowded platforms and build the engaged audience your content deserves.