Veo 3.1 AI Video Generator: A Practical Guide to Turning Ideas into Video
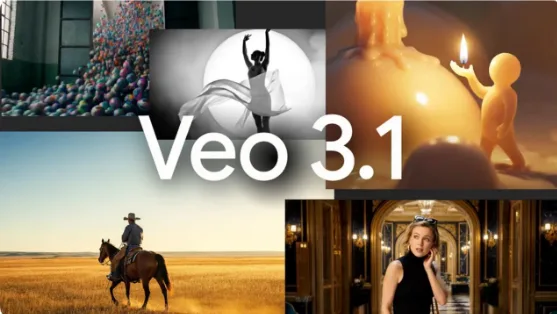
Creating a useful video used to mean coordinating cameras, locations, actors, editing software, and several rounds of post-production. Even a short product shot or social media clip could consume hours before the first usable version appeared. AI video generation changes that workflow by letting creators begin with a written scene, an existing image, or a pair of keyframes.
A Veo 3.1 AI video generator provides a browser-based way to test those ideas without installing production software. Voe Ai focuses its Veo 3.1 workflow on a small set of practical controls: choose how the scene begins, describe what should happen, select the output shape, and decide whether speed or fidelity matters more.
The interface does not overwhelm users with speculative or unnecessary parameters. Its current Veo 3.1 panel exposes the settings that are actually connected to the generation workflow, making it useful for marketers, independent creators, educators, and teams that need to produce and compare video concepts quickly.
Why the Input Method Matters
A prompt is only one way to direct an AI video model. Depending on the project, a creator may need to preserve an existing composition, animate a product photograph, or control both the opening and closing images of a shot.
Voe Ai therefore supports three Veo 3.1 tasks:
- Text-to-video: Start with a written prompt. No image is required.
- Image-to-video: Upload a reference image and describe how the still image should move.
- Frames-to-video: Provide opening and closing keyframes so the model can generate the motion between them.
This distinction is important. Text-to-video gives the model more visual freedom, while image-to-video anchors the result to a specific subject or composition. Frames-to-video is more appropriate when the destination of the shot matters—for example, a package opening, a day-to-night transition, or a camera move that must end on a logo.
Veo 3.1 Fast and Quality: The Actual Model Options
The tool currently offers two Veo 3.1 model choices.
Veo 3.1 Fast costs 3 credits per generation. It is the practical choice for prompt testing, composition experiments, and early creative variations.
Veo 3.1 Quality costs 24 credits per generation and is described in the interface as the highest-fidelity option for cinematic output. Because it costs eight times as many credits as Fast, a sensible workflow is to develop the idea with Fast and reserve Quality for the strongest version.
There is also an input-related difference. In the image-to-video workflow, Quality supports a single reference image. If more than one reference image is selected, the interface disables Quality and falls back to Veo 3.1 Fast. This behavior prevents users from submitting a reference configuration that the Quality path does not support.
For Veo 3.1, the visible model parameter is aspect ratio. The available values are Auto, 16:9, and 9:16, with 16:9 used as the default. The current panel does not present duration, resolution, audio, seed, style, or motion strength as user-selectable Veo 3.1 settings, so these should not be treated as adjustable controls in this workflow.
How to Use the Veo 3.1 AI Video Generator
Step 1: Start with the Intended Destination
Choose the format before writing the prompt. A 16:9 landscape video is generally better suited to websites, presentations, and conventional video players. A 9:16 vertical video fits mobile-first placements such as Shorts, Reels, and TikTok-style feeds. Auto is available when you do not want to impose one of the two fixed orientations.
Making this decision first helps you compose the scene correctly. A wide product tableau and a vertical close-up require different subject placement even when the underlying idea is identical.
Step 2: Choose the Right Generation Task
Use text-to-video when you are exploring a scene from scratch. Select image-to-video when an existing photograph, illustration, or product image must remain the visual foundation. Choose frames-to-video when you need to define both the starting state and the ending state.
The upload control accepts PNG, JPEG, JPG, and WebP images. In the frames workflow, place the intended opening image first and the intended closing image second. The two frames should share enough visual structure for a believable transition: a similar camera angle, recognizable subject, or clear transformation path usually gives the model better direction.
Step 3: Write a Prompt That Describes Change
A video prompt should explain what changes over time. A weak prompt such as “a premium coffee maker” describes an object but gives little direction about motion. A stronger version would be:
“Close-up product shot of a black espresso machine on a stone counter. The camera slowly moves from left to right as warm morning light crosses the metal surface. Steam rises from a finished cup while the background remains softly out of focus.”
This prompt identifies the subject, setting, camera movement, lighting, action, and depth treatment. Those details give the model a sequence to construct rather than a static visual theme.
The generation request also enables prompt translation at the provider level. Nevertheless, short and clearly structured instructions remain easier to iterate than long paragraphs filled with conflicting actions.
Step 4: Use Reference Images Deliberately
For image-to-video, upload an image with a clear subject and sufficient space for the requested movement. If a person or product already touches every edge of the frame, a large orbiting camera movement may be difficult to reconcile with the available visual information.
For frames-to-video, describe the connection between the two frames. Do not merely restate what each image contains. Explain how the first state becomes the second: the camera pushes forward, the package rotates, the lights fade, or the environment changes from afternoon to evening.
When using multiple references in an image-to-video experiment, remember that the tool routes that configuration through Fast rather than Quality.
Step 5: Compare in Fast, Finish in Quality
Generate several focused Fast variations instead of placing every creative idea into one prompt. Test camera movement, subject action, and lighting separately. When a Fast result establishes the right direction, keep the successful wording and run the refined prompt with Quality.
This approach controls credit use and makes comparison easier. If five variables change at once, it is difficult to know which instruction improved or damaged the result.
Step 6: Submit, Review, and Download
The homepage composer carries the selected prompt, task, model, and parameter choices into the workspace. An account is required before the generation request is submitted. Once submitted, the workspace tracks the task until it succeeds or reports a failure.
Completed videos appear in the generation interface with playback controls and a download action. The downloaded video is presented as an MP4, making it straightforward to move the result into a social scheduler, presentation, website workflow, or conventional editing timeline.
Practical Prompting Tips
- Describe one primary shot: A single coherent camera setup is easier to interpret than several unrelated cuts in one request.
- Use physical motion words: Terms such as “dolly forward,” “slow pan,” “fabric moves in the wind,” or “steam rises” explain how the frame should evolve.
- Separate subject and camera movement: State what the subject does and what the camera does as two distinct instructions.
- Match the reference to the requested result: A clean product photograph is more useful for a product animation than a crowded mood board.
- Preserve successful prompt language: Change one element at a time when testing variations.
- Use credits strategically: Fast is configured at 3 credits and Quality at 24, so iteration and final rendering should serve different purposes.
Where This Workflow Is Most Useful
Marketing teams can animate product photographs for concept ads before committing to a full campaign. Social creators can build vertical visual hooks from text or reference images. Filmmakers can test shot transitions with opening and closing frames. Educators can turn a clearly described process into a visual draft, while designers can evaluate how an existing composition behaves once motion is introduced.
The value of a Veo 3.1 AI video generator is not simply that it produces video. Its practical advantage is faster creative decision-making. By selecting the right input mode, writing prompts around motion, choosing the correct aspect ratio, and separating low-cost experimentation from high-fidelity rendering, creators can move from an abstract idea to a downloadable video draft through one focused workflow.