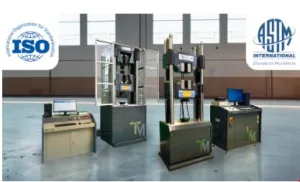
What Accreditation Means for Your Tensile Testing Equipment

If you believe that purchasing a tensile testing machine will be enough to satisfy industry standards, you are mistaken. Proper equipment accreditation is essential to ensure reliable, certifiable results, no matter how advanced or well-built the testing system may be. In industries that are subject to regulation, such as aerospace, automotive, and defense, without proper certification, failing an audit becomes a real risk. In the alternative, it could produce data that is unreliable.
Accreditation guarantees that your tensile testing equipment complies with established standards for calibration, alignment, and traceability. It demonstrates that your measurements are fully compliant with ISO 17025, ASTM E4, NADCAP, and other critical benchmarks, as well as accurate and repeatable. It is not limited to new systems; existing machines, extensometers, and force measurement tools must also undergo regular certification to guarantee that they are legally defensible and audit-ready.
To understand why this matters, let’s look more closely at what accreditation actually involves — and why it’s more than just a box to check.
Understanding Accreditation and Why It Matters
Accreditation isn’t just a certificate on the wall. It is a formal acknowledgement that the results of your tensile testing equipment are in accordance with the highest global standards of reliability and accuracy. ISO/IEC 17025 is the most widely accepted benchmark, delineating the prerequisites for the proficiency of testing and calibration laboratories. By having your equipment calibrated by an ISO 17025-accredited provider, you can be assured that each measurement is consistent, traceable, and accompanied by appropriate documentation.
This level of accreditation is particularly critical in sectors where even minor errors can have substantial repercussions. Even a minor miscalibration could result in invalid test results, non-compliance with client requirements, or failure to pass a regulatory audit if your force measurement system or extensometer has not been properly certified. Accreditation guarantees that your laboratory generates data that is credible to international partners, auditors, and customers.
Tensile testing equipment commonly needs to comply to additional specific standards in addition to ISO 17025. ISO 7500-1 specifies the requirements for tension and compression testing machines, while ASTM E4 governs force verification for load frames. Extensometers are subject to standards such as ASTM E83 and ISO 9513, while ASTM E1012 concentrates on frame alignment. Together, these elements establish a framework that guarantees the accountability, precision, and repeatability of your entire testing process.
Accreditation in Action: Calibrating Tensile Testing Machines
During the accreditation process, force calibration is a step that guarantees that the load applied by your tensile testing machine is within acceptable tolerances. Standards such as ASTM E4 and ISO 7500-1 establish the procedures for this calibration, which often require that machines comply with a Class 1 or Class 0.5 working range for high-precision applications.
But force alone isn’t enough. To prevent stress concentrations or measurement distortion caused by misaligned test frames, you need proper alignment calibration, as outlined in ASTM E1012. Especially when testing sensitive or high-strength materials, even minor misalignments can result in inconsistent results. For this reason, accredited service packages often include alignment verification tools, feeler gauges, and frame calibration systems.
Stringent standards must also be met by extensometers, which are used to measure strain during testing. ASTM E83 and ISO 9513 establish the regulations for guaranteeing the reliability of their readings and the verification of their performance. Calibrating these devices allows you to collect accurate strain data with assurance, which is a critical factor in the evaluation of elongation, yield, and break point.
Together, these calibration processes establish the basis of a tensile testing setup that is truly accredited. Whether your system is new or already in use, collaborating with an ISO 17025-accredited partner guarantees that each component of your machine—from the load cell to the extensometer—is functioning as intended. It’s the difference between running a test and producing results you can actually rely on.
NADCAP’s Role and Industry Applications
Many labs can’t operate without NADCAP accreditation. It is a globally recognized program that establishes rigorous quality and process control standards for critical operations, such as materials testing, and is overseen by the Performance Review Institute (PRI). In contrast with general certifications, NADCAP highlights technical precision, audit readiness, and process consistency.
NADCAP focuses on accurate calibration, alignment, and documentation during tensile testing. In this context, it is common to use standards such as ASTM E1012 and NASM 1312B to confirm that tensile testing machines and alignment fixtures meet the precision required for aerospace-grade testing. A supplier’s status with major OEMs may be at risk due to non-compliance, which can be caused by misalignment, unstable loading, or uncertified force measurement systems.
NADCAP’s standardized auditing process is one of its advantages, as it can replace many individual customer audits. This not only improves trust throughout the supply chain but also saves time and money. Accredited laboratories and manufacturers appear as trustworthy partners who are capable of producing consistent and traceable results that satisfy the most stringent industry standards.
To support this, companies like TensileMill CNC provide NADCAP-ready solutions — including precision-aligned testing frames, extensometer calibration tools, and full traceability packages. These systems have been created to assist laboratories in satisfying NADCAP audit requirements, mitigate the likelihood of findings, and guarantee ongoing compliance year after year.
Accreditation as the Foundation of Trusted Tensile Testing
Tensile testing equipment’s accuracy, traceability, defensibility, and auditability are all based on accreditation. Certified calibration and alignment are needed for the preservation of operational confidence and testing integrity, regardless of whether you are striving to adhere to ISO 17025, ASTM E4, or NADCAP.
Inconsistent data, audit failures, or lost business opportunities may result from even the most advanced tensile testing systems failing to meet the necessary standards without appropriate accreditation. However, with the appropriate calibration services and certified equipment, your laboratory or production environment can satisfy global standards and establish enduring trust with clients and regulatory bodies.
