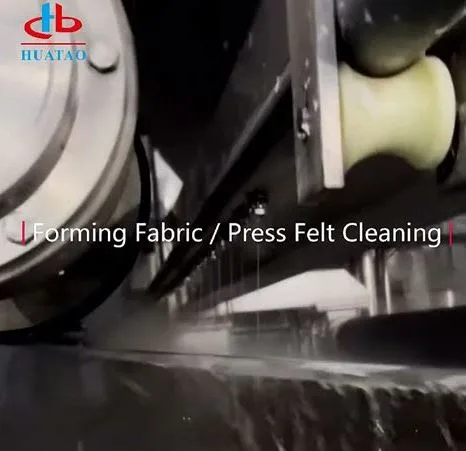
Forming Fabric for paper machine — 7 Quick Wins
You don’t need to be a “paper-machine person” to understand why a forming fabric matters. You only need to picture this: you’re trying to drain a big pot of pasta with the wrong strainer. Too coarse? Pasta slips through. Too fine? Water won’t drain and everything turns into a soggy mess. A paper machine’s forming fabric is that strainer—except it’s moving fast, it’s huge, and it decides whether the sheet starts its life smooth and strong… or shaky and troublesome.
Key takeaway: When your forming fabric for paper machine is chosen well and cared for consistently, you usually see cleaner running, fewer sheet defects, and less “mystery downtime” that steals your day.
So what is a forming fabric for paper machine, in plain words?
A forming fabric is the moving, endless “mesh belt” that receives the watery fiber mix and helps water drain away so a wet paper web can form. On many machines, your stock at the headbox is very dilute—Wikipedia describes headbox consistency typically under 0.4% for most grades, which is a reminder that you’re mostly moving water at this stage. :contentReference[oaicite:0]{index=0}
If you like a simpler picture: imagine you’re spreading a very thin smoothie across a moving screen so liquid can fall through while the solids stay on top. In one industry description, the forming section starts with a mix that’s roughly 99% water and 1% cellulose fiber and fillers when it hits the forming fabric. :contentReference[oaicite:1]{index=1}
The forming fabric’s two “jobs,” said without heavy jargon, are:
- Let water go (drainage through the structure).
- Hold fiber and fine particles (retention on the surface) so your sheet isn’t weak or uneven.
Those two basics (drainage and retention) are also called out as key requirements for forming fabrics in a technical TAPPI conference paper. :contentReference[oaicite:2]{index=2}
Why you should care: the forming fabric quietly controls your “good day vs bad day”
When people talk about a paper machine, they often talk about big visible things—speed, steam, breaks, quality complaints. But the forming fabric is often where those big problems begin. It’s the first surface the sheet “learns” to be a sheet on. And small issues here can snowball fast.
Key takeaway: If the forming fabric for paper machine doesn’t drain and support the sheet evenly, you can end up paying for it later with more breaks, more defects, and extra energy use downstream.
Here’s the cause-and-effect chain in everyday terms:
- Uneven sheet support → fiber clumps (flocs) and thin spots → weak areas → breaks and holes.
- Poor drainage balance → too much water rides forward → messy return run and deposits → more marks and cleaning effort.
- Bad retention → fines and fillers wash out → weak sheet, rough feel, more variability → unhappy converting/printing later.
Even if you don’t measure every variable, you’ll feel it: the machine seems “touchy,” the wet end looks dirtier than it should, and you’re always reacting instead of running calmly.
The “3 easy methods” that make forming fabric results noticeably better (without turning your life into a lab)
You don’t need 20 new tools to make progress. You need three habits that are easy to repeat and hard to forget. Do these consistently, and you’ll often prevent problems before they become a long meeting with too many people.
Method 1 (Daily, 6–12 minutes): The “walk-and-listen” forming fabric check
This is the most convenient method because you can do it while you’re already on the floor. You’re not trying to be perfect—you’re trying to catch early warning signs.
What you do:
- Look for shiny полосы/stripes, edge fuzz, or a repeating mark pattern that matches a roll rotation.
- Listen for a new hiss, squeal, or slapping sound (often a tension, seam, or shower issue).
- Feel the “story” (safely): if your mill allows, carefully check that showers are hitting where you expect, and that misting isn’t turning into a soaking mess.
Success signs: fewer sudden wet-end “mood swings,” steadier drainage, and less random dirt buildup on the return run.
A quick tip that saves time: keep a tiny checklist on your phone notes: “Edges, seam, shower angle, odd noise, new mark.” The goal is consistency, not genius.
Method 2 (Weekly, 20–35 minutes): A simple drainage and cleanliness snapshot
This method is about stopping “I think” and replacing it with “I saw.” You’re taking one small snapshot a week so you can spot drift before it becomes downtime.
What you do:
- Pick one reference time (example: Tuesday after grade stabilization) so your snapshot is comparable week to week.
- Record three things in plain words: (1) visible deposits (none/light/heavy), (2) any repeating marks, (3) whether your normal vacuum/shower settings seem “enough.”
- Take one photo from the same spot each week (same angle). This is surprisingly powerful for catching gradual changes.
Success signs: your notes show fewer “heavy deposit” weeks, and adjustments become smaller and more predictable.
How to get what you need: you don’t need a fancy system. A phone camera + a shared folder + a simple naming rule (“2025-12-Week3-OuterWire-ReturnRun”) already puts you ahead of most chaos.
Method 3 (When ordering or troubleshooting, 30–60 minutes): The “match the fabric to the pain” conversation
This is where many people lose time: they order a forming fabric based on habit, not based on what’s actually hurting them. A better approach is to match the fabric choice to your specific pain points.
What you do: ask yourself these three questions before you talk to a supplier or internal expert:
- What’s the #1 pain? Is it breaks, marks, poor formation, low retention, dirty running, or edge wear?
- What changed recently? More recycled fiber? New filler? Higher speed? Different shower chemistry? (Tiny changes can matter.)
- What does “good” look like? Example: “We want couch solids up by 1 point,” or “We want the repeating mark gone,” or “We want fewer wet-end defects.”
Success signs: your fabric trial has a clear target and a clear “yes/no” outcome, instead of endless debate.
Key takeaway: Method 3 saves time because it prevents you from spending weeks “tuning around” the wrong fabric design.
Quick comparison: which method is easiest and fastest for you?
| Three easy methods for better forming fabric for paper machine results (time and effort in everyday terms) | |||
| Method | When you do it | Typical time (minutes) | Best payoff |
| Method 1: Walk-and-listen check | Daily | 6–12 | Catches early issues before they turn into breaks/marks |
| Method 2: Weekly snapshot | Weekly | 20–35 | Spots drift (cleanliness/drainage) while it’s still easy to fix |
| Method 3: Match fabric to pain | Ordering & troubleshooting | 30–60 | Prevents wrong choices and makes trials measurable |
What “better fabric design” really means (without the headache)
You’ll hear terms like “double layer,” “triple layer,” or “SSB,” and it can sound like a different language. Here’s the everyday translation: these designs are different ways of building a surface that supports fiber evenly while letting water escape efficiently.
A TAPPI paper describes two practical design directions that aim to improve performance:
- Higher sheet support: Increasing the ratio of paper-side to wear-side CD yarns in an SSB triple layer structure from 2:1 to 3:1 achieved a step change in sheet support and fiber support index (FSI) of 15–35%. :contentReference[oaicite:3]{index=3}
- Surface enhancement / compaction: A heated compaction process can flatten surface knuckles and reduce fabric caliper and internal void volume by roughly 5–15%, improving vacuum dewatering efficiency and helping cleanliness. :contentReference[oaicite:4]{index=4}
If you want a mental picture: a higher-support surface is like replacing a bumpy mattress with a smoother one so the sheet forms more evenly. Surface enhancement is like gently pressing that mattress so it becomes thinner and more stable, making water removal feel more “direct” rather than trapped in hidden pockets.
A small set of real numbers that help you explain “why it works”
Numbers don’t have to be scary. They just help you avoid arguing based on vibes.
In one dataset in the TAPPI paper, fabrics with a 3:1 CD ratio show higher support points and higher FSI compared with similar 2:1 structures, while air permeability can stay in a similar band (meaning you can shift support without automatically “choking” drainage). :contentReference[oaicite:5]{index=5}
And in a machine trial example in that same paper, lost production due to sheet breaks (reported as sheet breaks %) dropped from 9.0% to 4.5% when a higher-support fabric was used in the evaluated position. :contentReference[oaicite:6]{index=6}
| Example performance shift tied to forming fabric changes (illustrative summary using TAPPI-reported trial data) | |||
| Metric | Before (example) | After (example) | What you feel on the floor |
| Lost production due to sheet breaks | 9.0% | 4.5% | Fewer sudden stops, fewer restarts, less frustration :contentReference[oaicite:7]{index=7} |
| FSI (fiber support index) change from design shift | Baseline | +15% to +35% | More even support can help formation/retention :contentReference[oaicite:8]{index=8} |
| Fabric caliper / void volume change (surface enhancement) | Baseline | -5% to -15% | Cleaner running, better vacuum efficiency :contentReference[oaicite:9]{index=9} |
Formula #1: Turn “couch solids” into a simple water-removed number you can use
People say “we need higher couch solids,” but then the discussion stops. Here’s a practical way to translate that into water you’re not dragging forward.
Formula:
Extra Water Removed (kg/h) = Dry Sheet Rate (kg/h) × (1/Sold − 1/Snew)
What each part means (plain language):
- Dry Sheet Rate: how much dry paper you make per hour (not wet weight).
- Sold, Snew: old and new solids as decimals (18% = 0.18, 20% = 0.20).
Everyday example: Suppose you make 10,000 kg/h of dry paper. Your couch solids improve from 18% (0.18) to 20% (0.20). Then:
Extra Water Removed = 10,000 × (1/0.18 − 1/0.20) = 10,000 × (5.556 − 5.000) ≈ 5,560 kg/h
That’s about 5.6 metric tons of water per hour you’re not carrying forward. Even if your real numbers differ, this kind of calculation makes the benefit feel real and easy to explain.
Key takeaway: When the forming fabric for paper machine drains more effectively (and stays cleaner), you’re often reducing hidden water carryover that can quietly push costs up.
Formula #2: A simple payback check that keeps fabric decisions grounded
Forming fabrics cost money, and you deserve a decision that feels fair, not fuzzy. Here’s a quick payback estimate you can do with a calculator.
Formula:
Payback (days) = Fabric Cost ÷ Daily Savings
Daily Savings can include two easy-to-count pieces:
- Downtime savings from fewer breaks
- Energy/steam savings from less water carried forward (even a rough estimate helps)
Everyday example (using TAPPI-style break reduction as a reference point): If lost production due to breaks drops from 9.0% to 4.5%, that’s a 4.5% gain in available time. Over a 7-day week (168 hours), that’s 7.56 hours/week regained, or about 1.08 hours/day on average. :contentReference[oaicite:10]{index=10}
If you value an hour of production (net value) at $1,200/hour (your mill may be higher or lower), that’s about $1,296/day. If the fabric costs $35,000:
Payback ≈ 35,000 ÷ 1,296 ≈ 27 days
Even if your real gain is half of that, you can still see whether you’re talking weeks, months, or “maybe not worth it.” That’s a convenient way to keep discussions calm.
| What break reduction could mean in a normal week (example built from TAPPI-reported lost production change) | |||
| Scenario | Scheduled time (hours/week) | Lost production change | Time regained (hours/week) |
| Continuous operation (24/7) | 168 | 9.0% → 4.5% :contentReference[oaicite:11]{index=11} | 7.56 |
| 6-day schedule | 144 | 9.0% → 4.5% :contentReference[oaicite:12]{index=12} | 6.48 |
| 5-day schedule | 120 | 9.0% → 4.5% :contentReference[oaicite:13]{index=13} | 5.40 |
Three common confusions that waste your time (and how to stop them)
These mix-ups are extremely common. If you clear them up once, you’ll save yourself many awkward conversations later.
Confusion 1: “Permeability” vs “drainage”
Permeability is like “how easy air could pass through” in a test. Drainage is what your sheet actually experiences with fiber, fines, vacuum, and real water. They’re related, but not identical. A fabric can look fine on a spec sheet but still drain poorly if it plugs quickly or if the surface geometry drives uneven flow.
Confusion 2: “Retention” vs “formation”
Retention is about keeping valuable small stuff (fines, fillers) in the sheet. Formation is about how evenly fibers distribute. Too much “sieving” at the wrong moment can trap fiber clumps; too little support can let fines wash away. The goal is balance, not “maximum of one number.” The TAPPI paper frames forming fabric requirements around both drainage through the structure and retention on the surface, which is exactly this balancing act. :contentReference[oaicite:14]{index=14}
Confusion 3: Forming fabric vs press fabric vs dryer fabric
- Forming fabric: helps create the sheet and remove the first big wave of water.
- Press fabric: helps squeeze water out under pressure (different job, different stresses).
- Dryer fabric: holds the sheet against hot cylinders and stabilizes drying (very different environment).
Key takeaway: If someone blames “the fabric” without naming which one, you can end up fixing the wrong problem for weeks.
Three mistake stories you can relate to (and how to avoid repeating them)
These are the kinds of mistakes that happen because you’re busy, not because you’re careless.
Mistake story 1: The “too aggressive cleaning” trap
You see dirt, you want it gone, you crank up the shower pressure or move a nozzle too close. For a short moment it looks cleaner, and then… you start seeing wear patterns and the fabric life shortens. Why it fails: mechanical damage builds slowly, and you only notice after you’ve paid for it. What to do instead: adjust in small steps and document the change; aim for “clean enough” plus stability, not “perfect for 10 minutes.”
Mistake story 2: Chasing vacuum when the fabric is the real issue
You increase vacuum to improve drainage, but the sheet starts acting weird—marks, pinholes, or instability. Why it fails: you’re forcing water through a surface that may be uneven, plugged, or carrying water forward. What to do instead: use Method 2’s weekly snapshot and look for plugging/cleanliness drift first; vacuum is a tool, not a cure-all.
Mistake story 3: Ordering “what you always order” after a furnish change
Your furnish changes (more recycled fiber, different filler level), but you reorder the same forming fabric. Suddenly retention and cleanliness are worse, and everyone says the machine is “touchy.” Why it fails: new furnish can change abrasion, plugging tendency, and drainage behavior. What to do instead: use Method 3 and write down the one biggest pain plus what changed; then order with a purpose.
A practical checklist for talking to a supplier (or your internal expert) without going in circles
This is the kind of simple, useful list that makes a forming fabric discussion faster and less emotional.
| What to share so your forming fabric for paper machine recommendation is specific (not generic) | |||
| What you share | Where you get it | Why it matters | Quick tip |
| Top 2 defects (marks, holes, streaks) | Quality logs + photos | Connects fabric surface/support to sheet symptoms | Take photos weekly from same spot |
| Furnish & filler notes (what changed) | Wet-end records | Impacts retention, plugging, abrasion | Write “changed” in plain words, not chemistry terms |
| Break frequency and where it starts | Operator notes + DCS events | Helps target stability vs drainage vs cleanliness | Mark the position (outer/inner, edge/center) |
| Cleaning/shower settings history | Maintenance + operator routine | Shows whether “cleanliness drift” is likely | Track changes as “small/medium/large” if numbers aren’t handy |
What’s happening right now in the industry (and why it changes what you should prioritize)
It’s easier to justify forming-fabric improvements when you understand what grades are growing and what pressures are rising. Recent U.S. industry snapshots from the American Forest & Paper Association show packaging papers behaving differently than printing-writing papers. For example, AF&PA’s October 2025 reports note packaging papers and specialty packaging shipments increased 9% versus October 2024, while printing-writing paper shipments decreased 14% versus October 2024. :contentReference[oaicite:15]{index=15}
Why should you care? Because packaging grades often push you toward higher recycled content and higher productivity demands. That can mean more abrasion, more plugging risk, and a stronger need for fabrics that stay clean and stable.
Key takeaway: As grade mix shifts, “same fabric as always” can become quietly expensive.