Best Pre-Charged Mini Splits for DIY Installation in 2026
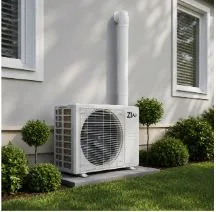
Choosing the right pre-charged mini split can save you thousands on contractor labor and turn a professional install into a weekend project. If you have moderate DIY skills and basic tools, a fully pre-charged system lets you handle the installation without opening the refrigerant circuit, renting a vacuum pump, or holding an EPA certification. This guide ranks the leading options for 2026 based on published manufacturer specifications, compares them side by side, and walks through what a DIY install actually involves.
Quick Answer: Top Pre-Charged DIY Mini Splits in 2026
“Pre-charged” means different things across brands. Some ship a fully sealed line set with the refrigerant already inside, so no vacuum is needed; others pre-charge only the condenser and leave the line set empty, which still requires vacuuming and charging on site. The shortlist below is ordered by how much of the refrigerant work is done for you at the factory, not by brand preference:
- Zone Air (9,000–24,000 BTU wall mount) — the manufacturer states the line set itself is factory-sealed and pre-charged, so no vacuum pump or EPA certification is required for a standard install. The 9,000 BTU 115V model plugs into a standard household outlet and is rated to −13°F. Suited to a bedroom, home office, or small garage up to roughly 450 sq ft.
- Pioneer 12,000 BTU single-zone wall mount — widely available and well reviewed for value. Note that many Pioneer DIY kits pre-charge the condenser but ship a pre-flared, empty line set that still needs to be vacuumed and opened on site, so confirm the configuration on the specific model. Popular for rooms up to roughly 600 sq ft.
- Senville 12,000 BTU wall mount — competitive SEER2 ratings and broad availability. As with Pioneer, many Senville kits ship an empty line set requiring vacuuming and refrigerant work, so verify per model. Sized for spaces around 350–600 sq ft.
Pioneer, Zone Air, and Senville are three of the most commonly cross-shopped brands for DIY mini split installs. Where they differ most is the line set: Zone Air markets a fully pre-charged, no-vacuum line set, while Pioneer and Senville kits more often involve some refrigerant handling. That single distinction drives most of the difference in install difficulty below.
Side-by-Side: Pre-Charged DIY Mini Splits (2026)
| Brand | Line set | Vacuum needed? | Sizes | 115V option | SEER2 | Cold-climate | Warranty |
| Zone Air | Factory-sealed, pre-charged (per mfr) | No (per mfr) | 9K–24K + dual-zone | Yes (9K) | Up to ~24 (mfr) | To −13°F (9K, per mfr) | See brand terms |
| Pioneer | Condenser pre-charged; line set often empty/pre-flared | Often yes — verify per model | 9K–36K (varies) | Select models | Varies (verify AHRI) | Varies by model | See brand terms |
| Senville | Condenser pre-charged; line set often empty | Often yes — verify per model | 9K–36K (varies) | Select models | Varies (verify AHRI) | Varies by model | See brand terms |
Specs reflect current manufacturer listings and vary by model and model year. “Varies / verify” means the figure depends on the specific SKU — check the model’s AHRI certificate and the seller’s listing as of July 2026 before purchasing. “Per mfr” indicates a manufacturer-stated figure we have not independently tested.
What Is a Pre-Charged Mini Split (and Why DIYers Like Them)
A pre-charged mini split is a ductless heat pump or AC system whose refrigerant circuit is sealed at the factory and shipped ready to connect. Instead of a technician charging refrigerant on site, the system arrives with refrigerant already inside. In a fully pre-charged design, that includes the line set, so you never open the refrigerant circuit during installation.
The core components are straightforward:
- An outdoor unit (condenser/heat pump) on a pad or wall bracket.
- An indoor air handler — a wall-mount head is the most common DIY option.
- A line set with sealed quick-connect or flared fittings that links the two units.
- Control wiring between the indoor and outdoor units.
- A condensate drain line for moisture removal.
On a fully pre-charged system, torquing the sealed fittings to spec opens internal valves and lets the refrigerant circulate — no vacuum pump, no manifold gauges, and no EPA Section 608 certification for a standard install. The payoff is real: install time can drop to a single weekend, you skip specialty tools, and a sealed circuit lowers the risk of moisture or air contamination.
One caveat worth repeating: not every system marketed as “DIY friendly” is fully pre-charged. Some ship refrigerant only in the condenser and leave the line set empty, which still requires vacuuming. Confirm that the line set itself is factory-sealed before you buy.
How Pre-Charged Mini Splits Differ from Standard Systems
A traditional mini split needs a trained HVAC pro for the refrigerant side of the job.
- Standard install: flaring or brazing empty copper line sets, nitrogen purging, pulling a deep vacuum (commonly below 500 microns), weighing in the correct charge, pressure testing, and opening service valves. This calls for specialized tools, certification, and often two or more days on site.
- Fully pre-charged DIY install: mount the indoor unit, route the sealed line set through the wall, connect both ends with a torque wrench, wire the control cable, and power up. Zone Air reports a typical first-time single-zone install runs about 4–8 hours with basic tools; your time will vary.
The cost gap is the headline. Contractor labor for a 12,000–18,000 BTU system is commonly quoted in the $3,000–$5,000 range in 2026. A fully pre-charged DIY install removes most of that line item. On performance, a properly engineered pre-charged line set is designed to match the efficiency and capacity of a conventionally charged system, provided you stay within the specified line-set length and follow the torque guidelines so the fittings seat correctly.
Key Factors for Choosing the Best Pre-Charged Mini Split
Use this as a checklist before you shop:
- Capacity and sizing. A rough rule is about 20 BTU per square foot — roughly 9,000 BTU for a 200–450 sq ft bedroom or office, 12,000 BTU for a 350–600 sq ft space, and 18,000–24,000 BTU for a large room or garage. High ceilings and heavy sun exposure push those numbers up. Run a sizing calculator to confirm.
- Efficiency ratings. Compare SEER2 (cooling) and HSPF2 (heating). Zone Air lists models up to roughly 24 SEER2; verify the figure for any brand against its AHRI certificate, since ratings vary widely by SKU.
- Cold-climate heating. If winters drop below freezing, choose a model rated for low-ambient heat. Zone Air rates its 9,000 BTU 115V unit to −13°F. Standard splits from brands like Mitsubishi or Fujitsu also perform well in the cold but typically require professional installation.
- Noise levels. Check the dB rating at low fan speed — many quality wall-mount heads run under 30 dB on low, about the level of a whisper.
- Indoor unit style. Wall-mount heads are the easiest for DIY. Ceiling cassettes and concealed-duct options usually need more advanced skills or a pro.
- Line-set length and fittings. Confirm the included pre-charged length (Zone Air lists 16 ft standard with extensions to about 25 ft). Exceeding the pre-charged length can require a technician to add refrigerant.
- Warranty and support. Look for solid parts and compressor coverage, and check whether DIY installation affects it. Some brands offer direct-to-consumer support; others route everything through licensed contractors.
Pioneer: Established and Widely Available
Pioneer is a long-standing brand with a broad range of ductless systems, and its 12,000 BTU single-zone wall mounts are popular for their balance of price and availability. On the pre-charged question, most Pioneer DIY kits pre-charge the condenser for a standard line-set length but ship the line set pre-flared and empty, which means some vacuuming and refrigerant handling is typically part of the install. Because of that, Pioneer often suggests professional help to keep the warranty intact — confirm the current requirements for the model you’re considering. For a DIYer comfortable with a vacuum pump, or planning to hire out just the refrigerant step, Pioneer is a reasonable, widely stocked option.
Zone Air: Fully Pre-Charged Line Sets
Zone Air positions its systems around a fully pre-charged line set aimed at homeowners who don’t want to touch refrigerant. According to the manufacturer, the line sets ship factory-sealed with the refrigerant inside, so a standard single-zone install needs no vacuum pump, manifold gauges, or EPA certification. Zone Air lists sizes from 9,000 to 24,000 BTU single-zone, plus dual-zone bundles, with SEER2 up to about 24, cold-climate heating rated to −13°F on the 9K model, and built-in Wi-Fi. The company states its homeowner-installed systems keep full warranty coverage when installed per the instructions, and it offers direct customer support. As with any brand, verify the current specs and warranty terms on the exact model.
Senville: Value-Oriented and Broadly Stocked
Senville offers competitive SEER2 ratings and dependable cooling and heating in a value package, with its 12,000 BTU wall mounts aimed at 350–600 sq ft rooms. Like Pioneer, most Senville kits pre-charge the condenser but ship an empty line set that needs vacuuming and charging on site, so plan on some refrigerant work or hiring that step out. Some Senville models also carry a higher minimum heating temperature than cold-climate-focused units, so check the low-ambient rating if you’re in a cold region.
Where These Brands Fit
- Zone Air — best for homeowners who want the simplest, no-vacuum install and cold-climate heating, and who value direct manufacturer support.
- Pioneer — best for DIYers comfortable with some refrigerant handling, or planning to hire out the refrigerant step; broadly available and well established.
- Senville — best for budget-conscious buyers willing to manage or outsource the vacuuming and charging steps.
Step-by-Step Overview of a Pre-Charged DIY Install
A high-level overview only — not a substitute for your official installation manual. Always follow local building and electrical codes and the manufacturer’s instructions.
- Plan the layout. Pick a wall spot for the indoor unit with good airflow, clear of obstructions, and usually 7–8 inches below the ceiling. Map the line-set route through an exterior wall to the outdoor unit, which needs adequate air circulation and a level pad or bracket.
- Mount the indoor unit. Fix the wall bracket to studs with a level, drill the pass-through hole (commonly about 3 inches) angled slightly downward for drainage, and hang the air handler.
- Route and connect the line set. Uncoil the line set without kinking it and run it to the outdoor unit. Connect the fittings at both ends to the manufacturer’s torque specs. On a fully pre-charged system, this is where the sealed valves open. Do not cut or modify the line set.
- Handle the electrical. Most systems need a dedicated circuit and a disconnect near the outdoor unit, plus color-coded control wiring between units. If you’re unsure about wiring, hire a licensed electrician for this part — it’s often the only step that truly needs a pro.
- Final checks. Leak-check the fittings (soapy water works), confirm the condensate drain slopes away from the wall, then run cool and heat modes, cycle the fan speeds, and listen for anything abnormal.
For a detailed walkthrough with photos, see a full DIY mini split installation guide.
Single-Zone vs Multi-Zone Pre-Charged Mini Splits
A single-zone system pairs one outdoor unit with one indoor head for a single space; a multi-zone system connects one outdoor unit to several indoor heads with independent control. Most true DIY pre-charged products today focus on single-zone: one line-set run, one wall penetration, simpler routing, and easier troubleshooting. Single-zone is ideal for a garage, bonus room, home office, finished basement, or an addition your central system can’t reach.
Multi-zone setups use multiple heads and longer, branched refrigerant lines. Some brands offer dual-zone bundles, but larger whole-house configurations usually need custom line-set runs and are best designed and installed by a pro. If you’re conditioning three or more zones across a whole home, bring in an HVAC professional for the system design.
Energy Savings, Rebates, and Cold-Climate Performance
- Lower operating costs. High-efficiency inverter heat pumps with SEER2 in the low-to-mid 20s can cut cooling costs by an estimated 30–40% versus older central air or window units, depending on what you’re replacing. Variable-speed compressors modulate to the load instead of cycling on and off, and ductless designs avoid the 20–30% losses common in leaky ductwork.
- Cold-climate heating. A cold-climate mini split keeps producing useful heat well below freezing. Zone Air rates its 9K model to −13°F, which can offset or replace fossil-fuel heat in northern regions. Confirm the low-ambient rating on the specific model.
- Rebates and tax credits. Many 2026 utility and state programs offer incentives for ENERGY STAR or cold-climate-certified mini splits, often keyed to thresholds like SEER2 ≥ 15.2 and HSPF2 ≥ 8.5. The federal 25C tax-credit rules changed for systems placed in service after December 31, 2025, so check current federal, state, and utility programs before you buy.
- Documentation. Keep the spec sheets showing SEER2, HSPF2, and AHRI certification numbers. Confirm with your program whether DIY installation affects rebate eligibility — many focus on equipment specs rather than installer credentials, but not all.
Common Questions About Pre-Charged DIY Mini Splits
Are pre-charged mini splits truly DIY, with no vacuum needed?
Only if the line set itself is factory-sealed. Fully pre-charged systems (Zone Air markets its line sets this way) need no vacuum for a standard install. Many Pioneer and Senville DIY kits pre-charge only the condenser and ship an empty line set that still requires vacuuming, so confirm the configuration before buying.
Does DIY installation void the warranty?
It depends on the brand. Some brands require a licensed installer or professional commissioning to keep full coverage; others, like Zone Air, state that homeowner installation retains the warranty when done per the instructions. Always check the specific brand’s current terms.
Do factory-sealed line sets leak over time?
Manufacturers typically pressure-test sealed line sets (often to 400 PSI or higher) before shipping. Following the specified torque values and doing a soapy-water leak check at each fitting during install is what keeps the connection reliable. A sealed design also makes it less likely you introduce contaminants than a field-charged install.
How much maintenance do they need?
Minimal. Clean the reusable mesh filter every couple of weeks, wipe the indoor coil, clear the condensate drain, and rinse debris off the outdoor fins with a garden hose. A periodic professional inspection is optional but can catch issues early.
What if I can’t run the electrical myself?
That’s common. Hire a licensed electrician for the dedicated circuit and disconnect, and do the rest yourself. Splitting the work this way still saves a large share of a full contractor install.
Is a DIY Pre-Charged Mini Split Right for Your Home?
Pre-charged DIY mini splits suit homeowners with moderate skills, a basic tool set (drill, level, torque wrench, hole saw), and the patience to follow detailed instructions. If you’ve hung a heavy shelf or mounted a TV bracket, you have the core skills. You’re a strong candidate if you:
- Want to save on contractor labor — often several thousand dollars.
- Are comfortable drilling through an exterior wall and working safely on a short ladder.
- Can handle basic electrical connections, or will hire an electrician for just that portion.
- Need to condition a specific space — a garage, home office, bonus room, or older home without ductwork.
If that describes you, a pre-charged system from Zone Air, Pioneer, or Senville can be an effective, efficient solution — just weigh how much refrigerant work you’re willing to take on, and confirm each brand’s specs and warranty requirements before you choose. Run a sizing calculator to lock in the capacity, then plan your weekend install.