Common Details Homeowners Forget During a Flooring Renovation
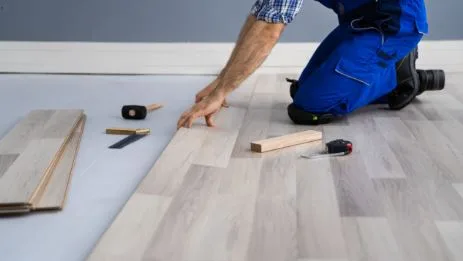
So, you have picked out the perfect new floor. You spent weeks looking at samples, comparing prices, and reading reviews. You finally pulled the trigger and scheduled the installation. You are dreaming about how amazing the room is going to look when it is done. I get it. A new floor is a huge deal.
But here is the thing I have learned after years of watching friends and family go through this process. The big stuff is easy. Picking the color? That is the fun part. Picking the material? That is a decision you can obsess over. The hard part, the part that trips people up, is the little stuff. The details that nobody writes on the inspiration board. Those are the things that turn a smooth renovation into a headache.
You see, a floor is not just the planks or the tiles. It is a system. It touches the walls, it touches the doors, and it touches the heating and cooling system. If you ignore those intersections, you are going to have problems. Maybe not immediately, but eventually. And those problems will be annoying to fix because you will have to tear up something or call a specialized contractor.
Let’s talk about the common details that homeowners forget. Some of these are minor, and some of them are major. But all of them are worth thinking about before you start swinging a hammer.
The Underlayment Question
This is the one that causes the most arguments between homeowners and installers. You have your subfloor, and you have your pretty new floor. What goes in between? That is the underlayment. It is not the most exciting thing to spend money on. It is hidden. You will never see it. But it makes a huge difference in how the floor feels and how long it lasts.
If you are putting down luxury vinyl, the underlayment provides cushioning and sound absorption. It can make a cheap vinyl feel a little more premium. If you skip it, the floor can feel hollow and echoey. If you are putting down hardwood, the underlayment acts as a moisture barrier. It prevents the wood from sucking up water vapor from the subfloor below. Without it, your wood can cup and warp.
The mistake people make is assuming that the underlayment is included in the price of the flooring. It usually is not. It is a separate line item. You need to budget for it. And you need to make sure you are using the right type. Not all underlayments work with all floors. Using the wrong one can actually void your flooring warranty. Ask your installer what they recommend, and do not cheap out here. It is the foundation of your new floor.
The Door Clearance Problem
This is a classic. You have a nice, thick carpet in the bedroom. You are replacing it with a thinner luxury vinyl or hardwood. Suddenly, the door is sitting way too high off the floor. There is a massive gap at the bottom, and you can see light coming through. Or worse, you are going the other direction. You had a thin sheet vinyl in the kitchen, and you are replacing it with a thick tile or engineered wood. Now the door is scraping against the floor every time you open it.
This happens all the time. Homeowners just assume the door will fit. They do not think about the height difference between the old floor and the new floor. The solution is to either shave the bottom of the door or install a transition strip. Shaving a door is not that hard if you have a planer and some patience. But if you do not catch it before the floor is installed, you are going to have a door that will not close, and you will be looking for a handyman in a panic.
Before the installer arrives, take a look at your doors. See how much clearance there is. If the new floor is going to be higher, plan to have the doors trimmed. If it is going to be lower, plan for a larger gap or a new threshold. A little bit of planning here saves a lot of frustration later.
The Baseboard and Trim Situation
Baseboards are the finishing touch. They hide the expansion gap between the floor and the wall. But when you change the floor, you might have to change the baseboards, or at least repaint them.
If your baseboards are already in place and you are floating a new floor, the floor will need a little room to expand and contract. That means there is usually a quarter inch gap between the floor and the baseboard. You cover that gap with shoe molding or quarter round. But if you do not plan for that, the floor will buckle or the edges will look raw.
The other issue is paint. When the old floor is pulled up, the installers will inevitably ding up the baseboards. If you were planning on repainting anyway, great. If not, you are going to be touching up a lot of scuffs. It is often easier to just remove the old baseboards before the floor goes in, then reinstall or replace them after. That way you get a clean line, and you do not have to worry about the expansion gap being visible. It is a bit more work, but it looks so much better.
The Transition Nightmare
If you are doing multiple rooms, you have to deal with transitions. Where does the new floor meet the old floor? Where does the kitchen tile meet the living room hardwood? These joints need something to cover them. They need a transition strip.
People forget about these because they are small and seem like an afterthought. But they are not. They are essential. Without them, the edges of your floor are exposed. They can chip, they can splinter, and they look unfinished. You also have to think about height differences. If the two floors are not the same thickness, you need a transition that can bridge the gap. There are transition strips for all sorts of situations: T moldings, reducers, end caps, and stair noses.
You would be surprised how many times I have seen someone finish a floor and then realize they have no idea what kind of transition strip they need. They end up with a jagged edge or a strip that sticks up too high and becomes a trip hazard. Make a note of every doorway and every room change before you start. Buy the transitions along with the flooring, not as an afterthought.
The Heavy Lifting of Furniture
This is less about the floor and more about your sanity. You have to move the furniture. If you are redoing the living room, you have a sofa, a coffee table, a bookcase, and maybe a piano. Where does it go? If you do not have a plan, it is going to sit in the kitchen or the garage for a week. That might be fine if you are single, but if you have a family, it is chaos.
Hire movers if you can afford it. If not, rent a storage pod and put it in the driveway. Do not try to move a heavy dresser by yourself. You will hurt your back, and you will probably scratch the new floor in the process. A lot of flooring companies will move furniture, but they charge extra for it. Weigh the cost of hiring movers against the cost of damaging a brand new floor because you were trying to save a few bucks.
The HVAC Factor: Vent Covers
Now we get to the detail that almost everyone forgets. It is so small that it is invisible. I am talking about your vents. Those little metal or plastic grates that sit in your floor or your ceiling. They are part of your heating and cooling system, and your new floor is going to affect them.
When you change the height of your floor, you change the height of everything that sits on it. If you have floor vents, which are common in older homes, the new floor might be thicker or thinner than the old one. If the new floor is thicker, the vent cover might not sit flush anymore. It might stick up, creating a tripping hazard. Or it might not fit into the opening at all. If the new floor is thinner, the vent cover might fall through the hole.
This is where people start scrambling. They try to force the old cover in, bending the metal and scratching the floor. They try to file down the edges. They try to stack washers underneath it. It is a mess. The simple solution is to replace the vents. When you are buying your new flooring, take a walk around your house and count how many Floor Vent Covers you actually have. Measure them. Then go to the hardware store and buy new ones that match the height of your new floor. They are not expensive, but they make a huge difference in the final look.
And it is not just the floor vents. What about the ceiling? A flooring renovation kicks up a ton of dust. Fine, powdery dust gets into the air. It gets sucked into the cold air returns. It coats the inside of your ducts. If you have never thought about your Ceiling Vent Covers, now is the time. You should either seal them off during the demolition and installation process, or you should take them down and clean them thoroughly before you call the project done. You do not want to be breathing in wood dust and old adhesive particles for the next six months. A fresh coat of paint on the walls is great, but if you leave the dusty vent covers up there, they will just blow that dust right back into the room.
The generic term for all of these is simply Vent Covers. They are the unsung heroes of a renovation. They are small, they are cheap, and they are always forgotten. Do not be that person. Add them to your checklist. Your lungs and your bare feet will thank you.
The Final Inspection
After the floor is down and the furniture is back in place, you need to do a final walkthrough. Look at the edges. Look at the transitions. Look at the door clearances. And yes, look at the vents. If something does not look right, do not be afraid to call the installer back. It is much easier to fix a problem now than it is to live with it for ten years.
A flooring renovation is a big investment. It changes the feel of your home. But the difference between a good job and a great job is the attention to detail. The big pieces of wood or tile are the stars of the show, but the supporting cast is what makes the production run smoothly. Pay attention to the underlayment, the doors, the baseboards, the transitions, and the vents. Do that, and you will end up with a floor that you love for a very long time.