Lemosho Route: Itinerary and Daily Elevation Profile
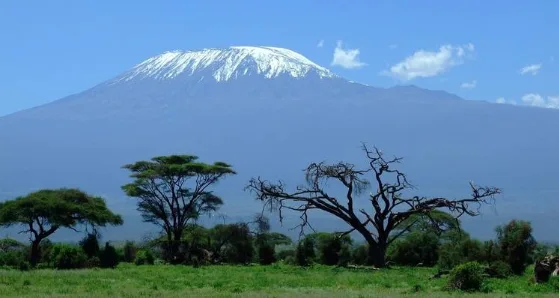
The 7 days Lemosho Route is one of the more gradual ways up Mount Kilimanjaro, and the elevation profile is the reason why. Rather than gaining height in a straight line, the route deliberately zigzags, climbing high during the day and dropping back down to sleep, so the body has more chances to adjust before the final push to the summit. Below is a day-by-day breakdown of the route’s distances, elevations, and terrain, based on the itinerary Almighty Kilimanjaro runs from Londorossi Gate to Mweka Gate.
Where the Route Starts and Why It Matters
Lemosho approaches Kilimanjaro from the west, starting near Londorossi Gate before the trailhead itself. This is a quieter, less-trafficked side of the mountain compared to routes like Marangu or Machame, and it’s part of why Lemosho is known for its scenery: the trail crosses the wide, open Shira Plateau, one of the remnants of Kilimanjaro’s older volcanic activity, before joining the mountain’s southern circuit for the approach to the summit.
Day-by-Day Itinerary and Elevation Profile
Day 1: Londorossi Gate to Mti Mkubwa Camp Elevation: 2,250m to 2,820m Distance: approximately 7km Trekking time: 3 to 4 hours Habitat: montane rainforest
The trek begins with registration at Londorossi Gate, followed by a drive to the Lemosho trailhead. From there, the trail climbs gradually through montane rainforest to Mti Mkubwa Camp, also known as Big Tree Camp. This zone gets significant rainfall and supports tall trees, ferns, and moss, along with blue monkeys and black-and-white colobus monkeys, though sightings aren’t guaranteed.
Day 2: Mti Mkubwa Camp to Shira 2 Camp Elevation: 2,820m to approximately 3,850m Distance: approximately 16.5km Trekking time: 9 to 11 hours Habitat: rainforest, heath, and moorland
This is the longest day of the itinerary, both in distance and elevation gain. The trail leaves the rainforest behind and climbs into heath and moorland, with the vegetation thinning as the route crosses the Shira Plateau. The pace stays deliberately slow here, since the elevation gain on this single day is substantial. Shira 2 Camp sits in an exposed location that can get considerably colder after sunset.
Day 3: Shira 2 Camp to Barranco Camp via Lava Tower Starting elevation: approximately 3,850m Lava Tower elevation: approximately 4,630m Sleeping elevation: approximately 3,950m Distance: approximately 10km Trekking time: 6 to 8 hours Habitat: moorland and alpine desert
This is the clearest example of the route’s “climb high, sleep low” acclimatization strategy. The trail climbs steadily to Lava Tower, a prominent volcanic rock formation at roughly 4,630m, then descends into the Barranco Valley to sleep at a lower elevation of about 3,950m. Reaching that higher point during the day, then dropping back down before nightfall, is what helps the body adjust ahead of the tougher days to come. Giant groundsels and other high-altitude plants become visible on the descent into the valley, and Barranco Camp itself sits directly beneath the Barranco Wall, with views of Kibo when the weather cooperates.
Day 4: Barranco Camp to Karanga Camp Elevation: 3,950m to approximately 3,995m Distance: approximately 5km Trekking time: 4 to 5 hours Habitat: alpine desert
The day opens with the Barranco Wall, the most recognizable single obstacle on this route. It looks steep from camp, but it’s a guided, non-technical scramble rather than a technical climb; climbers use their hands for balance in a few spots, with the crew assisting through the narrower sections. After the wall, the trail crosses a series of ridges and valleys along the southern circuit before descending into the Karanga Valley and climbing to Karanga Camp. It’s a comparatively short day, built in deliberately to leave time to rest before the push toward Barafu.
Day 5: Karanga Camp to Barafu Camp Elevation: 3,995m to approximately 4,673m Distance: approximately 4km Trekking time: 4 to 5 hours Habitat: alpine desert
The terrain becomes increasingly barren as the trail approaches Barafu Camp, whose name means “ice” in Swahili and reflects the cold, exposed conditions typical at this elevation. Barafu sits on a rocky ridge and serves as the staging point for the summit attempt. Most of the afternoon and evening here is spent resting, hydrating, organizing summit-night gear, and going through a final briefing on pacing, clothing layers, and the route ahead to Stella Point and Uhuru Peak, since the summit push usually begins around midnight.
Day 6: Barafu Camp to Uhuru Peak and Mweka Camp Starting elevation: 4,673m Summit elevation: 5,895m Sleeping elevation: approximately 3,100m Distance: approximately 5km ascending, 12km descending Trekking time: approximately 11 to 14 hours Habitat: Arctic zone, alpine desert, and moorland
This is summit day. Climbers wake around midnight, eat something light, and begin the ascent over loose volcanic scree above Barafu Camp. It’s the most demanding stretch of the trek, both physically and mentally, with temperatures often well below freezing and the thinner air at altitude making a slow, steady pace essential. Stella Point, on the crater rim at roughly 5,756m, comes first; from there the trail follows the rim past glaciers and exposed volcanic terrain to Uhuru Peak at 5,895m, the highest point on Kilimanjaro and in Africa. After summit photos, the descent retraces the route back to Barafu Camp for a short rest, then continues down to Mweka Camp at approximately 3,100m, a long day with a substantial net descent.
Day 7: Mweka Camp to Mweka Gate Elevation: 3,100m to approximately 1,640m Distance: approximately 10km Trekking time: 3 to 4 hours Habitat: montane rainforest
The final descent passes back through montane rainforest, which can be wet and slippery, especially after rain. At Mweka Gate, exit procedures are completed and climbers who reached Stella Point or Uhuru Peak receive their summit certificate before transferring back to the hotel.
Why the Extra Day Matters
The seven-day version of Lemosho differs from the shorter six-day option mainly in how day two is handled: splitting it into two more moderate days rather than one very long one, which gives the body more time to adjust to the jump in elevation before reaching Lava Tower and Barranco. Almighty Kilimanjaro reports a crater rim success rate of 96.5% and an Uhuru Peak summit rate of 94.9% for this itinerary, which the company lists as its highest across all its Kilimanjaro routes.
Terrain and Difficulty
None of the trekking on Lemosho requires technical climbing skill or equipment. The one section that surprises first-time climbers is the Barranco Wall, which looks intimidating from a distance but is walked, not climbed, under guide supervision. The bigger factor in difficulty is altitude and the accumulation of consecutive long trekking days, which is why fitness, pacing, and prior hiking experience all make a meaningful difference to how the week feels.
Planning a Lemosho Climb
The route runs January to early March and June to October, the two periods when Kilimanjaro’s weather tends to be driest and most stable, though conditions on the mountain can shift at any time of year regardless of season. Full details on the itinerary, accommodation, pricing, and what’s included are on a 7 day Lemosho Route page, and the wider range of Kilimanjaro routes and other Tanzania trips can be found on the Almighty Kilimanjaro homepage.