A Beginner’s Guide to Using Griddle and Flat Top Pans
Imagine standing in your kitchen, effortlessly flipping golden pancakes while crispy bacon sizzles alongside them, all on one perfectly heated surface. That dream of versatile, stress-free home cooking isn’t reserved for seasoned chefs or restaurant kitchens—it’s entirely within your reach. The secret? A griddle or flat top cooking pan, one of the most underrated yet powerful kitchen gadgets available to home cooks today. If you’ve ever felt intimidated by new cooking equipment or unsure where to start, you’re not alone. Many beginners hesitate to invest in unfamiliar tools, worried about steep learning curves or complicated maintenance routines. This guide exists to change that. We’ll walk you through everything from understanding what makes these pans special, to selecting your first one, seasoning it properly, cooking your first meal, and keeping it in great condition for years. By the end, you’ll have the knowledge and confidence to turn that flat cooking surface into your favorite spot in the kitchen.
What Are Griddle and Flat Top Pans, and Why Are They Perfect for Beginners?
A griddle or flat top cooking pan is exactly what it sounds like: a wide, flat cooking surface—sometimes with a very slight concave shape to contain liquids—designed to give you maximum contact between your food and the heat source. Unlike a traditional frying pan with its raised, curved sides that limit workspace and make flipping awkward, a griddle offers an open, expansive platform where spatulas glide freely and multiple ingredients cook side by side without competing for space.
For beginners, this design translates into immediate, tangible advantages. The large cooking area means you can prepare an entire breakfast—eggs, pancakes, and hash browns—simultaneously rather than juggling multiple pans. The flat surface promotes remarkably even heat distribution, which eliminates the frustrating hot spots that scorch food in the center while leaving edges undercooked. You’ll also find that griddles require minimal oil to prevent sticking, especially once properly seasoned, making your meals naturally lighter and healthier without extra effort.
Versatility is where these pans truly shine. From fluffy weekend pancakes and crispy grilled sandwiches to seared vegetables and restaurant-quality smash burgers, a single flat top surface handles tasks that would otherwise demand three or four different pieces of cookware. This makes the griddle one of the most practical easy cooking solutions available—it simplifies your kitchen while expanding what you can create. Rather than mastering a dozen specialized tools, you focus on building foundational skills like temperature control, timing, and food placement on one reliable surface. That focused repetition builds real cooking confidence faster than almost any other approach.
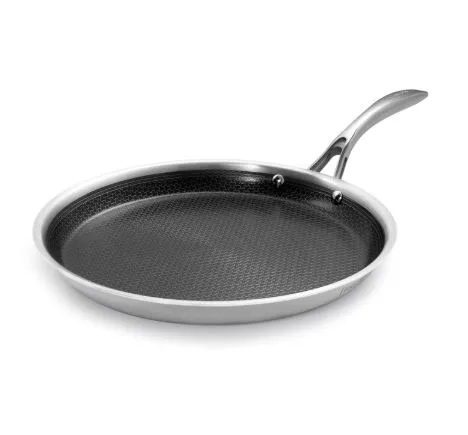
Choosing Your First Griddle: Essential Features and Materials
Walking into a cookware aisle or browsing online for your first griddle can feel overwhelming, but narrowing your focus to a few key decisions makes the process straightforward. The most important choice is material, and for most beginners, it comes down to two options: cast iron or non-stick coated aluminum.
Cast iron griddles are beloved for their exceptional heat retention—once hot, they stay hot, delivering consistent searing power that creates beautiful crusts on meats and golden-brown surfaces on pancakes. The trade-off is weight and a required seasoning routine to maintain their natural non-stick properties. Non-stick coated aluminum, on the other hand, is lightweight, heats up quickly, and requires virtually no break-in period. Cleanup is effortless since food slides off with minimal effort. However, these coatings wear over time and can’t handle the extreme temperatures that cast iron thrives under.
Size matters more than you might expect. A griddle that spans two burners gives you generous cooking space for family meals, but make sure it fits your stovetop configuration. If you cook for one or two people, a single-burner model offers plenty of room without the bulk. Check whether your cooktop is gas, electric, or induction—induction compatibility requires a magnetic base, which not all griddles offer.
Beyond material and size, look for practical features that make daily use more enjoyable. A grease channel or drainage lip along the edges catches rendered fat and prevents messy overflow. A helper handle opposite the main grip provides stability when lifting or repositioning a heavy pan. Brands like Deluxe Cookware incorporate these thoughtful details into their griddle designs, making them worth considering when you’re evaluating options. These details might seem minor when shopping, but they become the cooking accessories that separate a frustrating experience from a seamless one. Choose based on your actual cooking habits and kitchen setup rather than chasing the most expensive option—the best griddle is the one you’ll actually reach for every day.
Your First Steps: How to Use and Season Your Griddle Pan
You’ve unboxed your new griddle, and the temptation to start cooking immediately is real—but investing twenty minutes in proper preparation will dramatically improve every meal you make on it going forward. Start by washing your griddle with warm water, a small amount of mild dish soap, and a soft cloth. This removes any manufacturing residues, dust, or protective coatings applied during shipping. Dry it completely with a clean towel, then place it on your stovetop over low heat for a minute or two to evaporate any remaining moisture. This is the only time you’ll use soap on a cast iron griddle, so make it count.
If you’ve chosen cast iron, seasoning is the single most important step between you and a naturally non-stick cooking surface. Apply a very thin layer of a high-smoke-point oil—flaxseed, vegetable, or canola work well—across the entire cooking surface and sides using a paper towel. The key word here is thin; you want the surface to look almost dry rather than glossy. Place the griddle upside down in an oven preheated to 450°F with a sheet of foil on the rack below to catch drips. Bake it for one hour, then turn off the oven and let the griddle cool inside completely. Repeat this process two to three times before your first cook. Each layer polymerizes into a hard, slick coating that builds over time, growing more effective with every use.
For non-stick coated griddles, the process is far simpler. After that initial wash and dry, lightly rub the surface with a dab of cooking oil on a paper towel, then wipe it clean. This conditions the surface without building layers. Your non-stick pan is essentially ready to go.
Preheating correctly prevents the most common beginner mistake: cooking on a surface that isn’t uniformly hot. Place your griddle over medium heat and let it warm for at least five minutes. Cast iron, in particular, needs time to absorb and distribute heat evenly across its entire surface. Resist the urge to crank the burner to high—gradual, patient preheating eliminates cold spots and gives you the consistent temperature control that makes flat top cooking so forgiving. Sprinkle a few drops of water on the surface; when they dance and evaporate within two seconds, you’re at the ideal temperature to begin cooking.
Mastering the Flat Top: Simple Recipes and Cooking Techniques
Now that your griddle is seasoned and properly preheated, it’s time to actually cook—and this is where the fun begins. Before diving into recipes, internalize three fundamental techniques that will serve you across every dish. First, master temperature control using the sizzle test: flick a tiny drop of water onto the surface before adding food. A gentle sizzle means medium heat, perfect for eggs and pancakes. An aggressive, instant evaporation signals high heat, ideal for searing burgers. Second, understand when to use fat. Butter adds flavor but burns at high temperatures, making it best for moderate-heat items like grilled sandwiches. Neutral oils like avocado or vegetable oil handle higher heat without smoking. Third, resist the urge to overcrowd. Food releases moisture as it cooks, and packing items too tightly traps steam, preventing the golden-brown crust you’re after. Leave at least an inch between pieces, and your results will improve immediately.
For your first griddle breakfast, try perfect pancakes. Mix your batter and let it rest for five minutes while the griddle warms to medium heat. Add a thin film of butter, then pour quarter-cup portions, spacing them generously. Watch for bubbles forming across the surface and edges that look set—usually about two to three minutes—then flip once. The flat surface gives you uniform color every time because there are no curved edges creating thin, overcooked spots. Cook another minute on the second side, and you’ll have restaurant-worthy stacks without the restaurant bill.
Smash burgers are where your griddle truly earns its place. Roll ground beef into loose balls about two ounces each. Get the surface screaming hot—high heat, just below the smoke point of your oil. Place a ball on the griddle and immediately press it flat with a sturdy spatula, holding firm pressure for about ten seconds. That aggressive contact creates an incredible crust through the Maillard reaction. Season with salt and pepper, cook for two minutes, flip, add cheese if desired, and give it one more minute. The expansive flat surface means you can easily cook four or six patties simultaneously for a crowd.
Grilled cheese sandwiches become effortless on a griddle because the even heat toasts bread uniformly from edge to edge. Butter the outside of each bread slice, place them on a medium-heat surface, and let the cheese melt slowly without burning the exterior. The open layout also lets you press down gently with your spatula for extra crispiness. Try adding grilled vegetables alongside—sliced zucchini, bell peppers, or asparagus brushed with oil cook beautifully in just a few minutes on the same surface. The ability to prepare your main dish and sides simultaneously on one pan is what makes griddle cooking one of the most practical easy cooking solutions for weeknight dinners. Each recipe you try builds your instincts for heat, timing, and spatial awareness, creating a foundation that transfers to virtually any cuisine you want to explore next.
Care and Maintenance: Keeping Your Kitchen Gadget in Top Shape
The meal is done, your stomach is full, and now comes the part that determines whether your griddle performs beautifully for decades or deteriorates within months. For cast iron, timing matters—clean while the pan is still warm but not dangerously hot. Scrape off any food debris with a flat-edged spatula, then sprinkle coarse kosher salt across the surface and scrub with a folded paper towel or cloth. The salt acts as a gentle abrasive that lifts stuck particles without stripping your seasoning layer. Rinse briefly with hot water, dry immediately and thoroughly with a towel, then place on a warm burner for thirty seconds to ensure no moisture remains. Finish by rubbing a pea-sized amount of oil across the surface with a paper towel—this maintains the seasoning between uses and prevents oxidation.
Non-stick griddles require a different approach. Let the pan cool completely before cleaning, since thermal shock from cold water on a hot non-stick surface can warp the base and degrade the coating. Use a soft sponge with warm soapy water, rinse, and dry. Never use metal spatulas, steel wool, or abrasive cleaners on non-stick surfaces—these scratch through the coating permanently, creating spots where food will grab and stick.
When problems arise, solutions are usually simple. Food suddenly sticking to cast iron typically means the seasoning has worn thin in spots; apply one fresh oven-seasoning cycle to restore it. Small rust spots on cast iron aren’t fatal—scrub them away with steel wool, wash, dry completely, and re-season the affected area with two oil-and-bake cycles. If your non-stick pan starts losing its release properties despite gentle care, it’s likely reached the end of its coating’s lifespan and should be replaced. Consistent maintenance after every cook keeps these kitchen gadgets performing at their peak, ensuring that reaching for your griddle always feels like the easiest decision in your kitchen.
Start Cooking with Confidence on Your Griddle Today
A griddle or flat top pan isn’t just another piece of cookware collecting dust in your cabinet—it’s a genuinely transformative tool that simplifies cooking while expanding what you can accomplish in your kitchen. Throughout this guide, you’ve learned that these pans offer an unmatched combination of even heating, generous workspace, and versatility that makes them ideal for anyone just starting their cooking journey. You now know how to choose between cast iron and non-stick based on your lifestyle, how to properly season and prepare your pan for its best performance, and how fundamental techniques like temperature control and spatial awareness translate into delicious, consistent results across dozens of different dishes.
The maintenance routines we covered—whether it’s the salt-scrub-and-oil ritual for cast iron or the gentle cool-and-wash approach for non-stick—take only minutes but protect your investment for years of reliable use. Remember that every meal you cook builds on the last, strengthening your instincts and deepening your confidence at the stovetop. So don’t let your new griddle sit in its packaging or linger unused on a shelf. Heat it up tonight, start with something simple like pancakes or a grilled sandwich, and let each successful cook remind you that great food at home doesn’t require complexity—just the right surface, a little knowledge, and the willingness to begin.