Avoid Common RV Battery Mistakes on Your Boondocking Trips
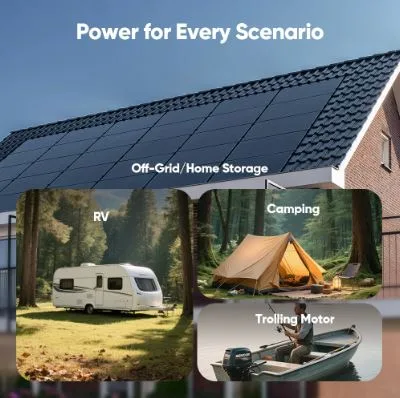
Picture this: you’ve driven three hours down a dusty forest road to reach your perfect remote campsite. The sun sets, you flip on the lights, pour a cold drink from the fridge, and settle in — only to wake up at 2 a.m. to dead silence and a completely dark rig. Your battery is gone, and the nearest hookup is a long, embarrassing drive away. It’s a scenario that plays out far too often for boondockers who underestimate what it takes to power life off the grid.
Your RV battery isn’t just another component — it’s the heart of your entire off-grid electrical system. Everything from your refrigerator and water pump to your phone charger and lighting depends on it. When it fails, your adventure fails with it.
The frustrating truth is that most battery failures are completely preventable. They stem from a handful of common, avoidable mistakes that even experienced campers make. This article is designed to help you identify those mistakes before they strand you somewhere remote, and to give you a practical roadmap for selecting, maintaining, and monitoring your RV battery system. Along the way, we’ll explore why modern LiFePO4 technology is changing the game for serious boondockers who demand reliable, long-lasting power wherever the road takes them.
Understanding Your RV Battery: The Foundation of Off-Grid Power
When you’re parked miles from the nearest power hookup, your RV battery isn’t just a convenience — it’s your lifeline. It powers everything in your rig: the lights that keep you from stubbing your toe at midnight, the water pump that fills your coffee pot, the refrigerator preserving your food, and the devices keeping you connected or entertained. Without a properly functioning, adequately sized battery, boondocking quickly stops being an adventure and starts being a survival situation.
For decades, lead-acid batteries dominated RV systems, and many rigs still use them today. AGM (Absorbent Glass Mat) and Gel variants improved on flooded lead-acid designs by reducing maintenance and spillage risk, but they share the same fundamental limitation: you can only safely use about 50% of their rated capacity before risking permanent damage. Drain an AGM battery below that threshold repeatedly, and its lifespan drops dramatically — often to just two or three seasons of regular use.
Lithium Iron Phosphate (LiFePO4) batteries represent a genuine leap forward for serious boondockers. The differences are stark and practical. LiFePO4 batteries deliver up to 80–100% usable depth of discharge, meaning a 100Ah LiFePO4 battery effectively gives you nearly twice the usable power of a 100Ah AGM. Their cycle life — often 2,000 to 5,000 full cycles — dwarfs lead-acid options. They charge significantly faster, accept higher charge currents, and lose almost no capacity during the charge process. They’re also substantially lighter, which matters when you’re already watching every pound on a long-haul trip.
The upfront cost of LiFePO4 is higher, no question. But when you factor in longevity, usable capacity, and reduced maintenance, the long-term value often makes lithium the smarter financial choice for anyone who boondocks regularly. For weekend warriors who rarely go off-grid, a quality AGM may suffice. For extended remote camping, LiFePO4 is increasingly the standard worth building around — and manufacturers like Vipboss have made purpose-built LiFePO4 options more accessible for RV applications specifically.
Top 5 Costly RV Battery Mistakes Boondockers Make
Mistake 1: Underestimating Your Power Needs
Most boondocking trips go sideways not because of equipment failure, but because of poor math. Campers routinely underestimate how much power their appliances actually draw over a full day. A 12V compressor fridge might pull 4–5 amps per hour, a ceiling fan another 2–3 amps, LED lighting around 1–2 amps, and phone and device charging adds more on top. Run those loads for 12–16 hours and you’re looking at 60–80 amp-hours of daily consumption — before accounting for a coffee maker, CPAP machine, or inverter losses. When your battery can’t meet that demand, you’re not just dimming the lights; you’re pushing it into deep discharge territory that causes lasting damage, especially with lead-acid chemistry.
Mistake 2: Neglecting Proper Battery Charging
Plugging any charger into any battery is a recipe for shortened lifespan. Lead-acid and LiFePO4 batteries require fundamentally different charge profiles, and using a conventional charger on a lithium battery — or vice versa — can cause undercharging, overcharging, or in serious cases, safety hazards. Undercharging leads to sulfation in lead-acid batteries and capacity loss over time. Overcharging generates excess heat and can permanently degrade cells. A quality multi-stage smart charger that matches your battery chemistry isn’t optional — it’s the single most important component protecting your investment. The same principle applies to solar charge controllers; always match the controller type and settings to your specific battery chemistry.
Mistake 3: Ignoring Battery Monitoring and Management
The stock voltage meter built into most RVs tells you almost nothing useful. Voltage readings are notoriously unreliable indicators of true State of Charge, particularly under load or immediately after charging. A battery that reads 12.4V might be at 70% capacity or 30%, depending on conditions. Without a dedicated shunt-based battery monitor, you’re essentially driving blind. For LiFePO4 systems, this problem compounds: lithium batteries have a flat discharge curve, making voltage-based estimation even less accurate. A proper Battery Management System (BMS) is non-negotiable for lithium setups — it protects against overcharge, over-discharge, short circuits, and thermal events that could otherwise destroy expensive battery banks.
Mistake 4: Poor Installation and Ventilation
Undersized cables are one of the most overlooked installation mistakes. When wire gauge is too small for the current it carries, resistance increases, voltage drops, and heat builds — all of which reduce efficiency and create fire risk. Batteries also need to be properly secured against road vibration; loose batteries shift, stress their terminals, and can short against metal surfaces. Flooded lead-acid batteries additionally require dedicated ventilation to safely exhaust hydrogen gas produced during charging. Even lithium batteries, which don’t off-gas, need temperature consideration — extreme cold reduces their output, and extreme heat accelerates degradation.
Mistake 5: Choosing the Wrong Battery Type for Your Use Case
Budget batteries and starter batteries are not deep-cycle batteries, and treating them as such destroys them within a season. More subtly, even choosing a legitimate deep-cycle AGM when you’re planning extended boondocking trips is a mismatch that will cost you more in replacements over time. Think ahead about your electrical future too — adding a second air conditioner, an induction cooktop, or an electric bike charger later will demand more capacity than you planned for. Sizing your battery bank for only today’s needs without headroom for tomorrow’s upgrades is a short-sighted choice that forces expensive system overhauls down the road.
Building a Reliable Off-Grid Power System: Solutions and Steps
Step 1: Auditing Your Energy Consumption
Before you buy a single battery, you need to know exactly what you’re powering and for how long. Start by listing every electrical device in your rig, its wattage or amp draw, and the average hours you run it daily. Divide watts by 12 to convert to amps, then multiply by hours to get amp-hours per device. A 60-watt compressor fridge running 8 hours draws 40Ah. A 30-watt fan running 6 hours draws 15Ah. Add everything up, then multiply by 1.2 to account for inverter inefficiency and parasitic loads. That final number is your daily amp-hour requirement — and it’s the non-negotiable starting point for every decision that follows.
Step 2: Selecting the Right RV Battery and Capacity
Once you know your daily consumption, match your battery choice to your actual use pattern. If you camp at hookups most of the time with occasional dry camping, a quality AGM bank can work fine — just size it so you never exceed 50% discharge. For anyone doing multi-day boondocking trips regularly, LiFePO4 is the straightforward answer. Its 80–100% usable depth of discharge means you need less total capacity to meet the same demand, and its cycle life means you won’t be replacing the bank every two years. To size your bank, multiply your daily amp-hour requirement by the number of days of autonomy you want without recharging, then divide by your battery’s usable discharge percentage. A boondocker needing 80Ah per day for three days with LiFePO4 needs roughly a 300Ah bank — the same autonomy with AGM would require nearly 500Ah of rated capacity.
Step 3: Implementing Essential Monitoring and Control
Ditch the stock voltage meter and install a shunt-based battery monitor. These devices measure actual current flowing in and out of your battery, giving you a true State of Charge reading regardless of load conditions or battery chemistry. Brands like Victron’s BMV series or Renogy’s shunt monitors are popular, reliable options that display real-time SOC, voltage, current, and consumed amp-hours on a clear display. For LiFePO4 systems, a built-in Battery Management System is equally critical — it acts as the battery’s internal guardian, cutting off charge or discharge automatically if voltage, temperature, or current exceed safe thresholds. Never run a lithium bank without one; the BMS is what separates a long-lasting investment from a potential hazard.
Step 4: Ensuring Proper Charging from Multiple Sources
A resilient off-grid system doesn’t rely on a single charging source. Solar panels paired with an MPPT charge controller form the backbone for most boondockers — MPPT controllers harvest significantly more energy than PWM alternatives, especially in partial shade or low-light conditions. Size your solar array to replenish your daily consumption with a comfortable margin; 200–400 watts of panels suits most moderate setups. Add a DC-to-DC charger (also called a battery-to-battery charger) to harvest power from your alternator while driving — this is far safer than a simple isolator for LiFePO4 chemistry, as it regulates the charge profile correctly. Finally, a shore power or generator connection through a compatible multi-stage converter/charger rounds out the system for travel days or extended cloudy stretches. Every component must be rated for your battery chemistry; mismatched equipment quietly destroys the bank it’s supposed to protect.
Maintaining Your System and Finding Technical Support
A reliable battery system doesn’t maintain itself. Every few months, inspect terminal connections for corrosion and clean them with a wire brush if needed — loose or corroded terminals cause resistance that quietly drains performance. Re-torque terminal bolts to manufacturer specs, since road vibration loosens them over time. Visually check battery cases for swelling, cracks, or leaking, and verify that mounting hardware keeps the bank firmly secured. For long-term storage, charge LiFePO4 batteries to around 50% SOC before leaving them idle; lead-acid batteries should be stored fully charged and connected to a maintenance trickle charger to prevent sulfation.
When problems exceed your troubleshooting ability, go straight to the source. Most reputable battery manufacturers offer direct technical support lines and detailed online documentation — use them before assuming a battery is defective. Vipboss, for instance, provides dedicated support resources for their RV battery lineup that can help users diagnose charging or capacity issues before assuming the worst. RV forums like iRV2 and Reddit’s r/vandwellers are active communities where experienced boondockers share real-world solutions. For wiring or installation concerns, a certified RV technician or 12V electrician is worth the cost. The RVIA technician locator and mobile RV repair networks can connect you with qualified help even in less-populated areas.
Power Your Adventures Right: Key Takeaways for Boondocking Success
Most boondocking battery failures share a common thread: they were preventable. The camper who wakes up to a dead rig at 2 a.m. usually made their critical mistake weeks earlier — when they skipped the energy audit, grabbed a cheap battery, or assumed the stock voltage meter was telling the whole story. The good news is that every mistake covered in this article has a straightforward fix, and none of them require an engineering degree to implement.
The path to reliable off-grid power comes down to four fundamentals: know exactly how much energy your rig consumes daily, invest in battery technology that matches your actual use — which for serious boondockers increasingly means LiFePO4 — install a shunt-based monitor so you’re never guessing about state of charge, and build a charging system with multiple sources and compatible components throughout. Routine maintenance keeps that investment performing for years rather than seasons.
When you get these pieces right, something shifts. The anxiety of watching a voltage needle creep downward gets replaced by genuine confidence. You stop rationing phone charges and start enjoying the campfire. Remote campsites stop feeling like gambles and start feeling like exactly what they’re supposed to be — freedom. Build your system on solid fundamentals, and the only thing left to worry about is which trail to explore next.