How to Increase Your US Visa Approval Chances: The Importance of a Perfect DS-160 Photo
Applying for a US visa is an important process that requires careful preparation. Whether you are planning to visit the United States for tourism, business, education, or family purposes, every part of your application deserves attention. From completing the DS-160 form correctly to preparing supporting documents, small details can make a difference in how smoothly your application proceeds.
One detail applicants sometimes overlook is their visa photograph. A photo that does not meet official requirements can cause upload problems, require resubmission, or delay application processing. Fortunately, preparing a correctly sized image is relatively simple with the right tools and a little attention to detail.
Let’s explore how to improve your visa application preparation and create a suitable US visa photo.
1. Understand the US Visa Application Requirements
The first step toward a successful visa application is understanding the requirements for your particular visa category. The DS-160 is the online nonimmigrant visa application form used for several purposes, including tourism, business, and temporary visits.
Before submitting your application, make sure that:
- All personal information is accurate and consistent with your passport.
- Your travel purpose is clearly explained.
- Your employment, education, and financial information is correct.
- Your supporting documents are organized.
- Your answers are honest and consistent.
- Your photograph meets the official US visa specifications.
Remember that no photograph, document, or online tool can guarantee visa approval. Consular officers make decisions based on the applicant’s individual circumstances and applicable immigration requirements. However, avoiding preventable application mistakes is an important part of preparation.
2. Why Your US Visa Photo Is Important
Your photograph is more than just an identification image. It helps establish your identity and must follow specific technical and visual standards.
An unsuitable photograph may fail the DS-160 upload process or be considered unacceptable during application review. Common problems include incorrect dimensions, excessive file size, poor lighting, an unsuitable background, and improper positioning.
A professional-looking photograph helps ensure that your application meets the required image standards from the beginning.
3. Official US Visa Photo Requirements
According to the US Department of State, digital photographs submitted through the DS-160 must satisfy specific requirements.
| Photo requirement | Specification |
| Image dimensions | 600 × 600 to 1200 × 1200 pixels |
| Shape | Square |
| File format | JPEG |
| Maximum file size | 240 KB |
| Color | 24-bit sRGB |
| Printed photograph | 2 × 2 inches |
| Background | White or off-white |
| Head height | 50%–69% of image height |
| Photo age | Taken within the last six months |
Your photograph should also show your full face directly facing the camera, with both eyes open and a neutral facial expression. Glasses are generally not permitted, except in rare medically necessary circumstances.
You should wear ordinary clothing, avoid distracting accessories, and ensure that your face is clearly visible. Religious head coverings are permitted when worn daily, provided they do not obscure your face or create shadows.
4. How to Use a US Visa DS-160 Photo Resizer
If your photograph has the wrong dimensions or exceeds the upload size limit, you do not necessarily need to take another picture. A photo resizing tool can help you prepare an existing suitable photograph.
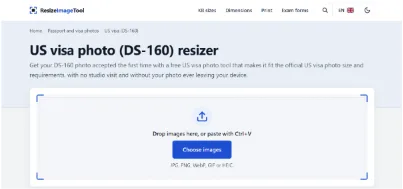
The us visa ds 160 photo resizer is a convenient option for applicants who want to resize and prepare their images without installing additional software. It is free and runs directly in your browser.
Here is how to use it:
Step 1: Select Your Photograph
Choose a clear, recent photograph from your computer or device. Make sure your face is visible, the lighting is balanced, and the background is plain.
Step 2: Upload Your Image
Open the photo resizer and select your photograph. The browser-based tool makes the process straightforward without requiring software installation.
Step 3: Adjust the Image Dimensions
Prepare a square photograph measuring between 600 × 600 and 1200 × 1200 pixels. Check that your face is centered and that your head occupies approximately 50%–69% of the image height.
Step 4: Check the File Size
Make sure the resulting JPEG file is no larger than 240 KB. If necessary, use image compression while maintaining acceptable image quality.
Step 5: Download Your Photograph
Save the prepared image to your device. Before uploading it to your DS-160 application, open the downloaded file and check its appearance, dimensions, and file size.
The tool helps with technical preparation, but you should still verify the photograph’s visual compliance with official requirements.
5. Common US Visa Photo Mistakes to Avoid
Even a high-resolution photograph can be unsuitable if it does not follow the required composition rules.
Here are some common mistakes applicants should avoid:
- Wearing glasses: Regular prescription glasses and sunglasses are generally prohibited.
- Using an incorrect background: Avoid colored, patterned, or distracting backgrounds.
- Taking selfies too closely: Close-up selfies can distort facial proportions.
- Using old photographs: Your photograph should reflect your current appearance and be taken within six months.
- Applying beauty filters: Do not digitally alter your facial appearance.
- Ignoring file size: A JPEG exceeding 240 KB may not meet the upload requirements.
- Incorrect head positioning: Your head should be centered and correctly proportioned.
6. Other Ways to Improve Your US Visa Application
While preparing your photograph is important, it is only one part of the application process. Consider these additional preparation tips:
Provide Accurate Information: Double-check every answer on your DS-160 form. Incorrect passport details, employment information, or travel dates can create unnecessary complications.
Explain Your Travel Purpose: Be prepared to explain why you want to visit the United States, how long you intend to stay, and what you plan to do.
Prepare Supporting Documents: Depending on your visa category and circumstances, relevant documents may include employment records, financial information, travel details, or educational documents.
Demonstrate Your Circumstances Clearly: For temporary visitor visas, be prepared to explain your circumstances and reasons for returning home. Your answers should be truthful and supported by your actual situation.
Prepare for the Interview: Review your DS-160 answers and practice answering common questions naturally. Avoid memorized or misleading responses.
7. Final Checklist Before Submitting Your DS-160
Before completing your application, take a few minutes to review everything.
- Passport information is correct.
- Personal details match your official documents.
- Travel purpose is accurately described.
- Supporting information is organized.
- Photograph has a square aspect ratio.
- Image dimensions are between 600 × 600 and 1200 × 1200 pixels.
- JPEG file size is 240 KB or less.
- Background and facial positioning meet the requirements.
- Photograph reflects your current appearance.
Conclusion
Preparing a US visa application requires attention to detail, and your photograph is an important part of that process. Although a perfect photo cannot guarantee approval, submitting an image that follows the official requirements helps prevent avoidable technical problems.
Using the us visa ds 160 photo resizer makes preparing your photograph easier. You can resize your image, meet the required dimensions, check the file size, and download a suitable JPEG directly through your browser.
Combine a properly prepared photograph with accurate application information, organized supporting documents, and honest interview answers. These practical steps can help you approach your US visa application with greater confidence.