How to Recover Deleted Files from an External Hard Drive on a Mac
I wanted to connect my external hard drive to my Mac laptop to surprise my friends with some old high school photos of us. However, to my disbelief, the files were simply not there. A few months earlier, I accidentally wiped a drive with my work PDFs on it during a cleanup I thought I’d done properly. If you’ve experienced this, don’t worry, we all have, and all is not lost. I have a solution for you.
The good news is that those files aren’t always erased forever. They could still be on the drive in recoverable condition, marked as “free space” unless new data overwrites them, so act fast.
I’ll take you through how to recover data from an external hard drive on a Mac, step by step.
Why Do Files Disappear from External Drives on Mac?
Files go missing from external drives on a Mac for many reasons:
- Deleted accidentally: You drag a folder to the Trash, and empty the bin.
- Quick formatting: A quick format erases the directory, but data stays until overwritten.
- Improper ejection: Pulling the drive without ejecting corrupts the file system.
- Corruption: Crashes, macOS updates, or cross-platform use can hide files.
- Encryption locks: FileVault or APFS-encrypted drives need password input for access.
Quick Checks Before Using Recovery Tools
Here’s how to try to save your files before advanced recovery:
- Check the Trash: Right-click > “Put Back” if they’re there.
- Reboot and replug: Restart your Mac. Eject, unplug, then try another port or cable.
- Run Disk Utility: Applications > Utilities > Disk Utility > First Aid > Run.
If this doesn’t recover your files, don’t worry – move on to recovery methods below.
Method 1: Restore with Time Machine or APFS Snapshots
If you’ve set up Time Machine on your Mac, this might be the easiest solution:
- Connect your Time Machine drive.
- OpenFinder and navigate to the folder.
- Click theTime Machine icon > Enter Time Machine.
- Scroll the timeline and click Restore.
Pro tip: If Time Machine is enabled, macOS may create local APFS snapshots on your internal drive – which don’t typically exist on external drives unless you explicitly enabled Time Machine for them there. Advanced users can open Terminal and run tmutil listlocalsnapshots / to see which snapshots exist. Then, open Finder > Enter Time Machine to browse and restore files from those local snapshots. This can be a lifesaver in pressing situations.
Method 2: Repair External Drive Errors on macOS
Sometimes, file system errors can make files inaccessible:
- OpenDisk Utility, choose your drive.
- ClickFirst Aid > Run to fix basic errors.
If that doesn’t work, advanced users can:
- Open Terminal, run diskutil list to find the drive’s identifier (e.g. /dev/disk2s1).
- Runsudo diskutil repairVolume <diskID> (replace with your actual ID e.g., /dev/disk2s1).
Important: Double check the disk ID from diskutil list before running risky repair commands.
Method 3: Use Mac Data Recovery Software
If repairs don’t work, you can use Mac data recovery software. Such tools can scan all your drives to recover deleted or hidden files (even if formatted or encrypted).
Important: Always recover files to a different drive to avoid overwriting what you’re trying to get back. Also, give the app Full Disk Access (System Settings > Privacy & Security) and allow Removable Volumes when prompted. If you use an SSD/NVMe, disconnect it immediately when you notice lost files. TRIM in macOS can permanently erase deleted data. Reconnect only when running the recovery scan.
What to look for:
- Supports APFS, HFS+, exFAT, NTFS
- Works with both Intel and Apple Silicon (M1/M2/M3)
- Handles encrypted drives (like FileVault-encrypted ones – these are locked)
- Free scan + preview before recovery
- Deep scan mode for formatted drives (will sometimes lose original filenames and folder structure)
| File System | macOS Native Access | Supported by Stellar Data Recovery for Mac |
| APFS (default for modern macOS) | ✅ Full Read/Write | ✅ Yes |
| HFS+ (older Mac) | ✅ Full Read/Write | ✅ Yes |
| exFAT (cross-platform) | ✅ Full Read/Write | ✅ Yes |
| NTFS (Windows) | ⚠️ Read-only (without extra drivers) | ✅ Yes |
APFS is standard on newer macOS systems. Older or cross-platform drives might use HFS+, exFAT, or NTFS.
Stellar Data Recovery for Mac is great for beginners, handles encryption, deep-scans formatted drives, and is Apple Silicon-ready.
Here’s a step-by-step guide to using Stellar Data Recovery for Mac effectively:
Step 1: Download and Install, Go to the official Stellar website.
Download Stellar Data Recovery for Mac.
Open the .dmg file and drag the app to your Applications folder.
Launch the software and connect the External drive the software will instantly show the drive.
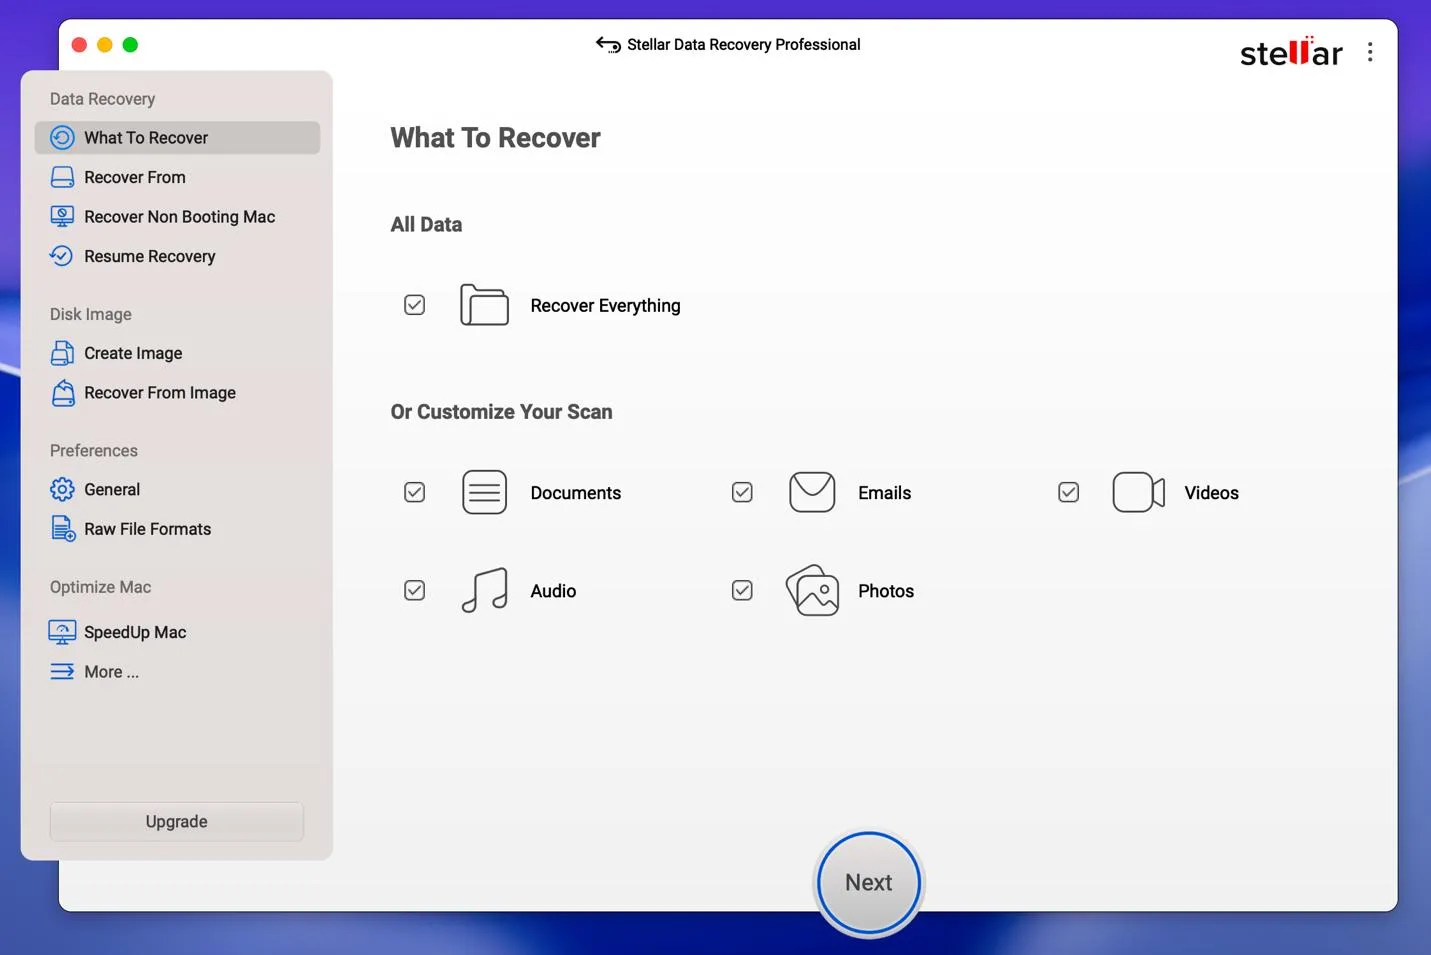
Step 2: Select What to Recover
On the main interface, choose the type of data you want to recover: Documents, Photos & Videos, Emails, Audio Or select Everything to recover all types of files.
Step 3: Choose the Location
Pick the location where the files were lost: Specific Drive or Partition (e.g., Mac hard drive, external drive, USB ) Entire Mac hard drive, External drives or USBs and then Click Scan.
Step 4: Scan for Lost Files, The software will perform a scan, quick scan first, then deep scan if needed. You can pause or stop the scan at any time. Once scanning is done, it will display all recoverable files in a structured preview.
Step 5: Preview Files: Use the preview option to check your files before recovery.This helps ensure you’re recovering the right files.
Step 6: Recover Files: Select the files you want to restore, preview the file to be sure and Click Recover. Choose a safe location (different from the source drive) to save the recovered files.
Step 7: Save Scan (Optional)
You can save the scan results for future recovery if you don’t want to rescan the drive. Use Load Scan next time to pick up where you left off.
Step 8: Done
Verify the recovered files. Backup important data to avoid future loss.
Method 4: Get Professional Help for Physically Damaged Drives
If your drive clicks, buzzes, or isn’t visible in Disk Utility, it’s physically damaged. In this case, stop using it.
Cleanroom services like Secure Data Recovery or Stellar Information Technology Pvt. Ltd. can open the drive in dust-free labs, replace parts, and pull data. It’s pricey, but often succeeds. Never open it yourself.
Method 5: Cloud Recovery (If Synced)
If you have iCloud Drive enabled, go to iCloud.com > Account Settings > Restore Files. Deleted files stay for 30 days.
Also check Google Drive, Dropbox, or other cloud storage trash folders. I once found a client project in Google Drive’s Trash.
Mistakes That Can Ruin Recovery
These mistakes ruin your recovery chances:
Writing anything new to the affected drive (including saving files, copying data, or installing software) can overwrite lost data and ruin recovery chances
- Using tools that don’t support APFS or Apple Silicon
- Malware or unstable systems interrupting scans
- Typos in Terminal causing new corruption
How to Prevent External Drive Data Loss on Mac
Once your files are back, stay safe:
Copy, don’t move: Copy first, delete originals later.
- Always back up: Follow the 3-2-1 rule – 3 copies, 2 different types of media, 1 offsite (like on the cloud).
- Eject properly: Always right-click > Eject before unplugging.
- Protect hardware: Surge protectors, quality cables, and safe handling prevent damage from drops or power spikes.
- Check regularly: Run Disk Utility monthly to catch issues early.
Final Thoughts
Losing files on your Mac’s external drive can be stressful, but there’s hope. Start with Trash, Time Machine, or Disk Utility. If they fail, use top recovery utilities to scan deep. For dead drives, pros are your best shot. Act quickly, avoid writing to the drive, it massively improves your chances of getting back your data.