Step-by-Step Through-Hole PCB Assembly for Beginners
Printed circuit boards are important components of many electronic devices. Electronic devices have become basic needs of many organizations and industries, as science and technology advance. To make the PCBs, there are many different ways. You can do it with the help of SMT technique, which is considered to be advanced technology. In addition, through-hole technology is another way to through-hole PCB assembly. One may have to face different challenges and difficulties in order to make a perfect PCB board. PCB assembly means, you have to attach the different components to the board, when you have made the board.
When you are using the through-hole technology you have to make the holes in the boards with the help of drilling machine to attach the components with the help of pins. You have to make sure that you drill the holes in such a way that every component fits directly in the hole. The holes could be 1-2 mm in diameter. These components allow the mechanical and electrical connections in the electronic device. THT technology came to limelight in 1950s when it has replaced other older technologies like point to point construction. Through-hole technology is more reliable, easier to use and more compatible than other technologies in PCB assembly.
Through-Hole PCB Assembly Steps
As we have discussed there are mainly two ways to assemble PCB board that are SMT and THT technologies. This article will mainly focus on through-hole PCB assembly. If you want to assemble the boards using THT, there are few things that you should keep in your mind. For beginners, there are several steps that must follow in through-hole PCB assembly.
Through-Hole Components Preparing
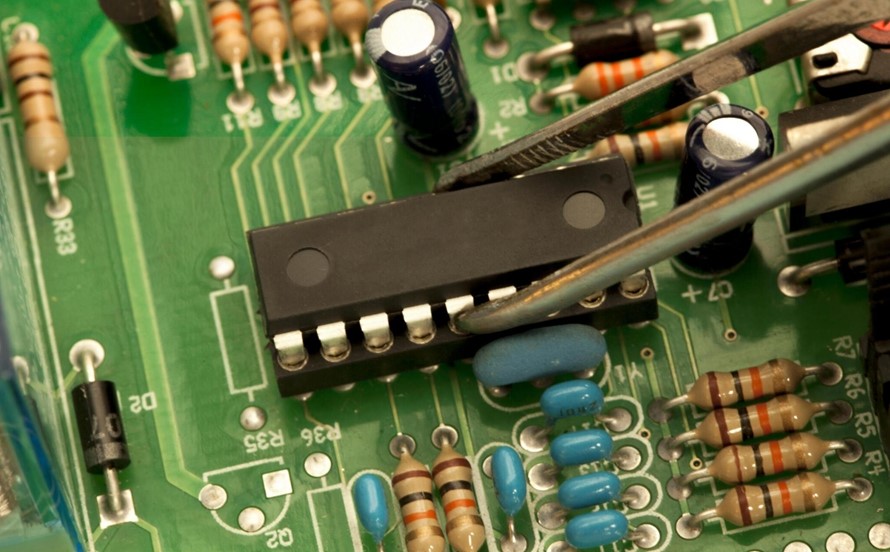
The first step is to choose components in through-hole PCB assembly. The components could be of many types like active and passive components. Passive components are further divided into axial and radial lead components. Axial lead components may include resistors, capacitors and diodes while the examples of the radial lead components are fuses, switches, and LEDs. Moreover, active components are used on the breadboards for improvement. The examples of active components are integrated circuits, packages like DIP and PDIP. With the help of soldering pads these components can be mounted in holes on the PCB boards.
Cleaning the PCB Boards and Components
The soldering process in through-hole technology takes time. You have to clear the area first to continue the soldering process. Use Isopropyl Alcohol to clean components and boards. Little time may be required to do this but it is an essential part that needs to be done before the soldering process begins.
Components Plug-In
There are two ways to plug in the components on the boards when using through hole PCB assembly. One is manual plug-in and the other one is automated plug-in. It is mostly used for small batches of PCB boards. If you want to check the feasibility of the prototypes that you have made and the performance of the design and need the fast production of the boards, you can go for the manual plug-in. It is less time consuming process. In this method, the alignment and attachment of the components are done manually. You should have to take care of the height, and position of the components while plugging it in a board.
On the other hand, there is automatic plug-in. In the method, a machine is used to solder the components on boards. This is particularly designed for the production of PCB board at large scale. In the first step you have to send the design or BOM file to the machine. Then the boards have to be placed in the working area. After that the components are supplied to the machine in reels or tape forms. The machine recognizes the components and places them on the boards according to the design and instructions given to the machine.
Soldering Through-Hole Components
Next comes the soldering of the components. It can also be done manually or through a machine. Manual soldering is typically for the low-volume PCB assembly. In the method, the components are soldered on the boards manually and you have to make sure that there is a distance between components of 50 to 100 mil pad to pad spacing. Flux-cored wire is used as a solder in manual soldering. You can solder the components with the help of solder iron. It has a metal tip, platted with tin and uses a current to heat up its tip. The tip needs to be properly tinned and should keep the temperature of iron higher than the soldering temperature.
Now if you want an automated soldering process, then you should go for the wave soldering. This is done with the help of wave soldering machine. Flux sprayer, pre-heating pad, the pump that makes the waves and pan solder are the components of the machine. A solder tank on a wave soldering machine is preheated to a precise temperature before the soldering operation begins and over the bottom of the board, there will typically be a solder wave within the tank. This indicates that at that moment, the board connects to the solder wave. Furthermore, caution must be used while adjusting the wave’s height. You would have to block the wave from crossing the board’s front by doing this. At this point, the solder reaches its proper location.
Washing PCBs
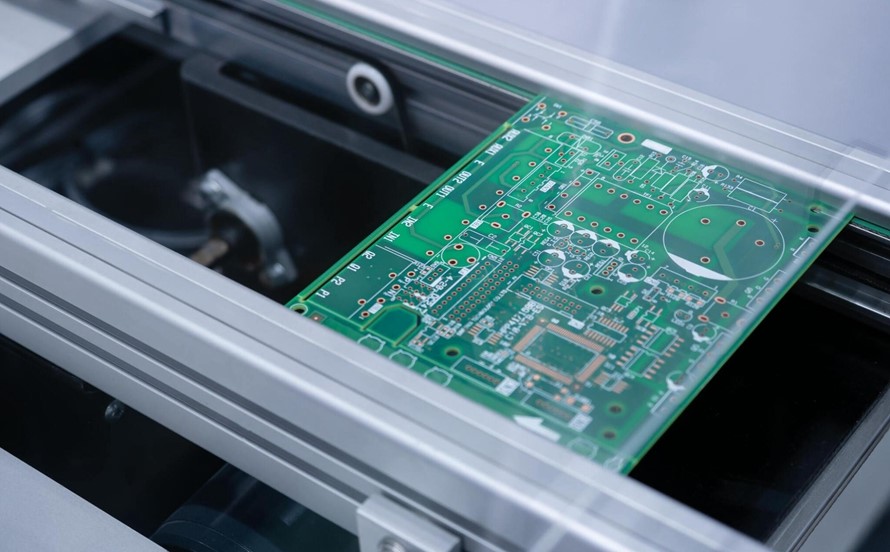
If you want to check the quality and strength of the PCBA that you have just made, you can check it by washing it. Usually in small shops, they don’t wash the PCB board which eventually lead to the errors in the electronic devices later. It is important to wash the PCBs because the boards may still have impurities and other substances on the boards from the soldering process. If stored in a humid environment, the board’s surface may become contaminated with ions, leading to malfunction. Common PCBA issues or even circuit board shorts will result from this. As a result, cleaning the PCB both before and after soldering is essential. Usually water-washing is used to remove the unwanted particles on the boards.
Inspection and Functionality Test
The last and most important point in the through-hole PCB assembly is the inspection and the quality check of the boards. It is crucial to find the quality of final product through inspection. The quality of the boards is determined by components you used in the soldering process during PCB assembly. There are many techniques to check different errors and defaults in the final PCB board. X-ray and automated optical inspection (AOI) are the most common techniques. During the X-ray inspection, with the help of different rays, high quality images are created and you can check the errors in the PCB board assembly. On the other hand, in the automated optical inspection, schematics and images are generated which helps to find errors. However, there is another method used to check defaults, manually you can also check errors in the boards. Usually technicians use magnifying glass or naked eye for this purpose. These tests make sure you have the best quality in the final product.
Conclusion
In the through-hole PCB assembly, you assemble the components on the board with the help of holes which you make with drilling machines and attach the components with the help of the pins. When you plate attach large or heavy components, through-hole PCB assembly is used. At this time, following manufacturing process and relevant requirements is of significant importance. And beginners have to learn and follow through-hole PCB assembly step by step.